afsh_ad
Published © GPL3+

Hand gesture control wheelchair for disabled people

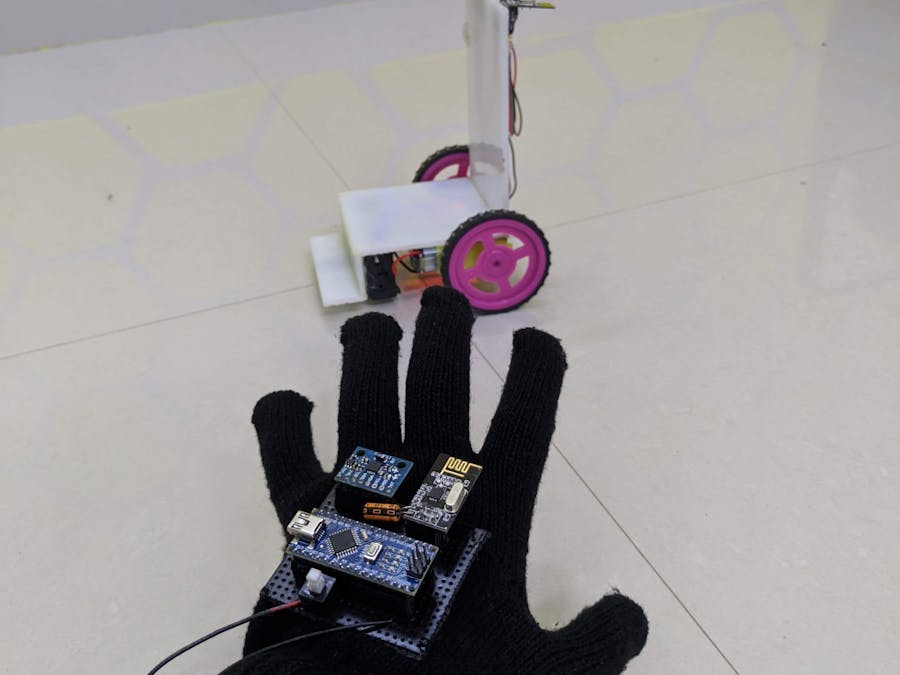
With the help of hand gesture corresponding to the Accelerometer sensor the wheel chair will move

IntermediateFull instructions provided30,020
Hand gesture control wheelchair for disabled people

Things used in this project

Hardware components

Arduino Nano R3
Arduino Nano R3
×2
nRF24 Module (Generic)
×2
Dual H-Bridge motor drivers L298
SparkFun Dual H-Bridge motor drivers L298
×1
Jumper wires (generic)
×1
DC Motor, 12 V
DC Motor, 12 V
×2

Software apps and online services

Arduino IDE
Arduino IDE

Hand tools and fabrication machines

Soldering iron (generic)
Hot glue gun (generic)

Story

Read more

Schematics

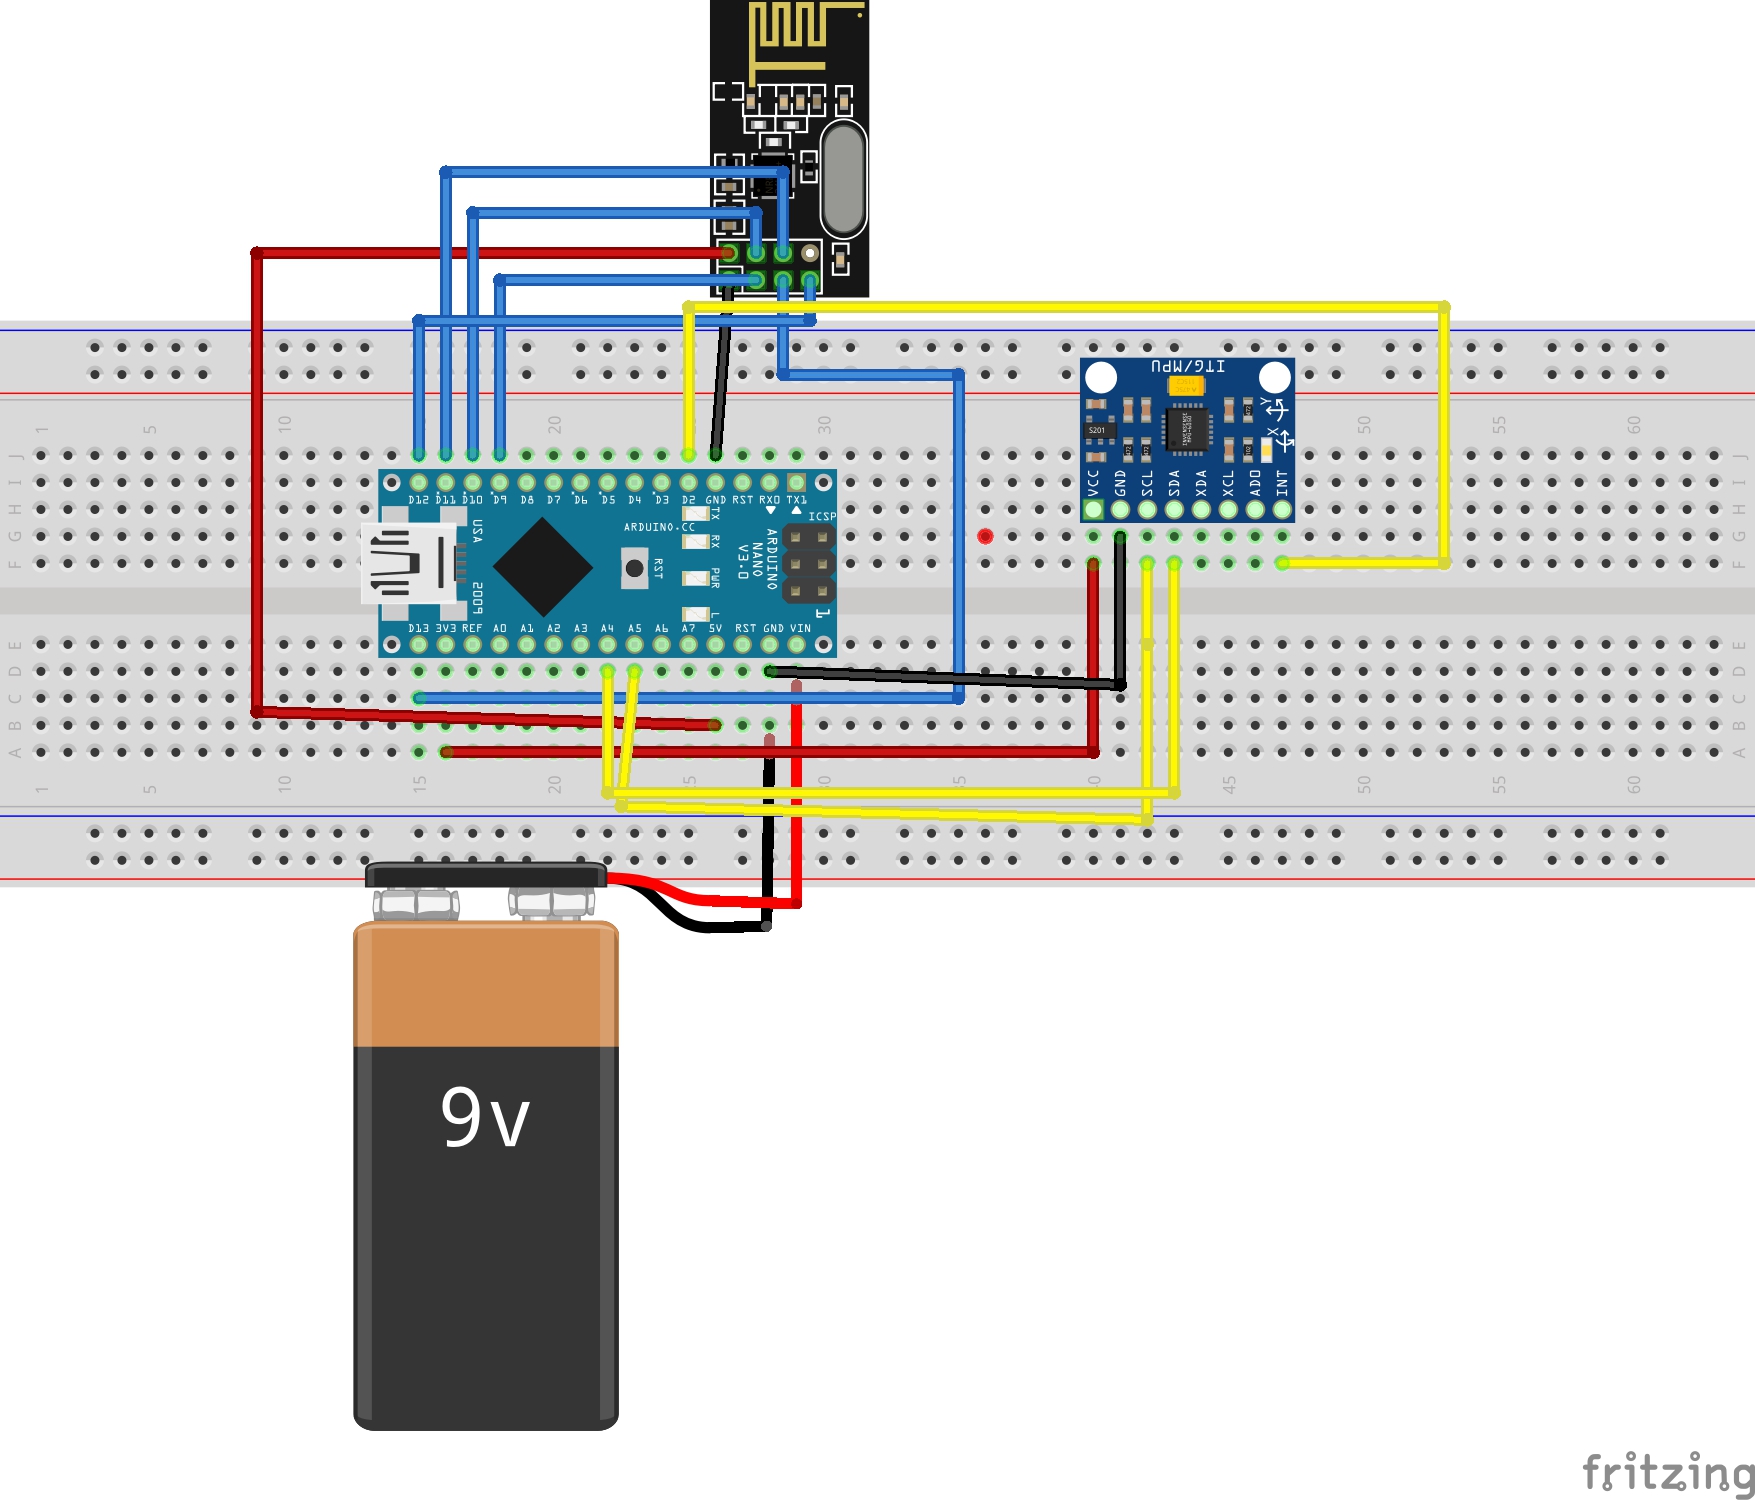
Circuit diagram of hand gesture TRANSMITTER

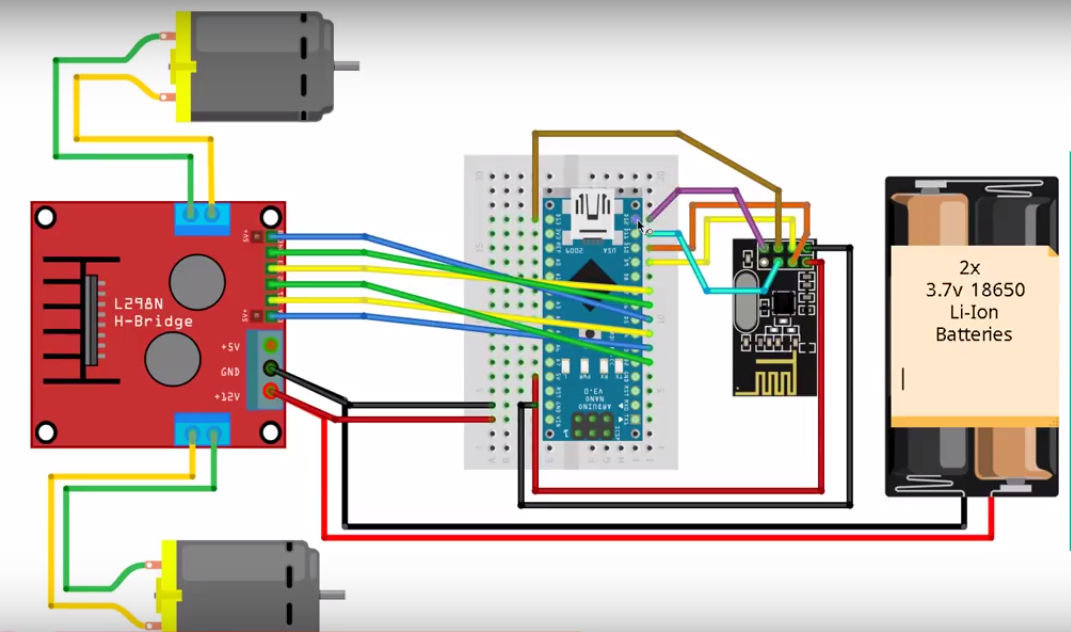
Circuit diagram of wheel chair RECEIVER

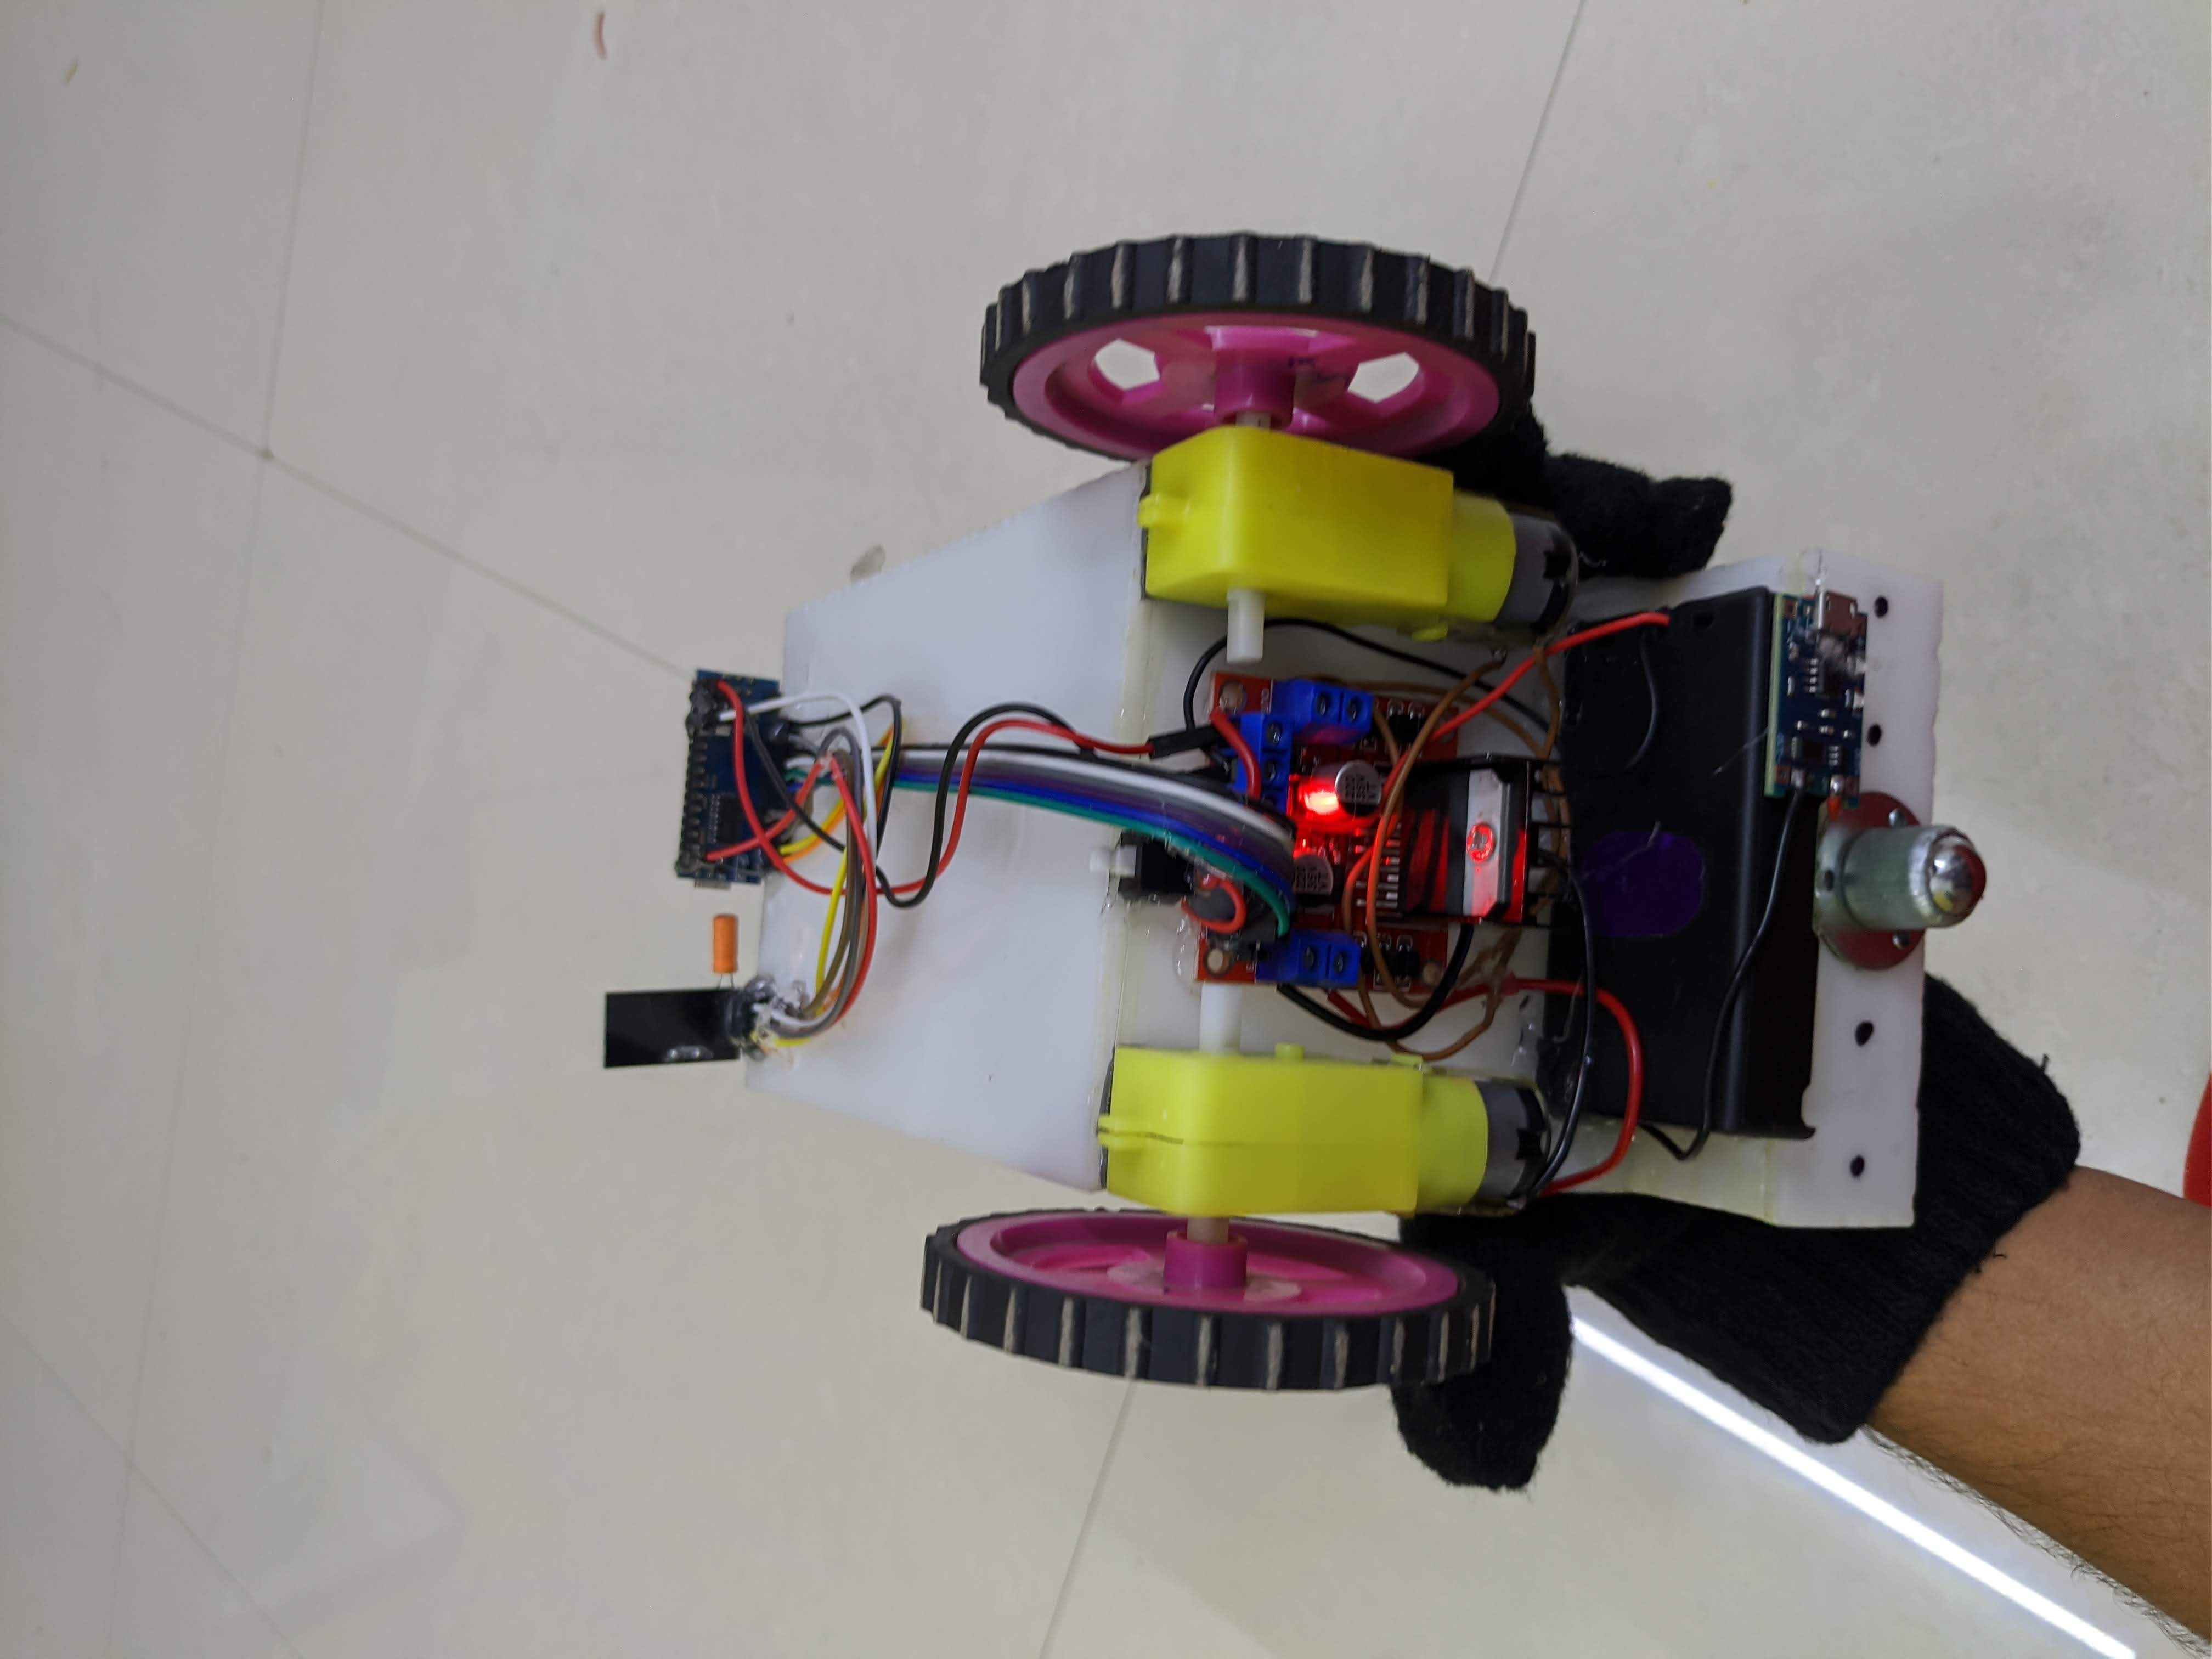
wheel chair

Code

Transmitter code

Arduino
#include <SPI.h>        //SPI library for communicate with the nRF24L01+
#include "RF24.h"       //The main library of the nRF24L01+
#include "Wire.h"       //For communicate
#include "I2Cdev.h"     //For communicate with MPU6050
#include "MPU6050.h"    //The main library of the MPU6050

MPU6050 mpu;
int16_t ax, ay, az;
int16_t gx, gy, gz;
int data[2];

RF24 radio(9,10);
                                    
const uint64_t pipe = 0xE8E8F0F0E1LL;

void setup(void){
  Serial.begin(9600);
  Wire.begin();
  mpu.initialize();              //Initialize the MPU object
  radio.begin();                 //Start the nRF24 communicate     
  radio.openWritingPipe(pipe);   //Sets the address of the receiver to which the program will send data.
}

void loop(void){
 
  mpu.getMotion6(&ax, &ay, &az, &gx, &gy, &gz);

 
  data[0] = map(ax, -17000, 17000, 300, 400 ); //Send X axis data
  data[1] = map(ay, -17000, 17000, 100, 200);  //Send Y axis data
  radio.write(data, sizeof(data));
}

Receiver Code

Arduino
#include <nRF24L01.h>
#include <printf.h>
#include <RF24.h>
#include <RF24_config.h>
#include <SPI.h>      //SPI library for communicate with the nRF24L01+
#include "RF24.h"     //The main library of the nRF24L01+


const int enbA = 3;
const int enbB = 5;

const int IN1 = 2;    //Right Motor (-)
const int IN2 = 4;    //Right Motor (+)
const int IN3 = 7;    //Left Motor (+)
const int IN4 = 6;    //Right Motor (-)

int RightSpd = 130;
int LeftSpd = 130;

int data[2];


RF24 radio(9,10);

const uint64_t pipe = 0xE8E8F0F0E1LL;

void setup(){
  //Define the motor pins as OUTPUT
  pinMode(enbA, OUTPUT);
  pinMode(enbB, OUTPUT);
  pinMode(IN1, OUTPUT);
  pinMode(IN2, OUTPUT);
  pinMode(IN3, OUTPUT);
  pinMode(IN4, OUTPUT);
  
  Serial.begin(9600);
  radio.begin();                               
  radio.openReadingPipe(1, pipe);
  radio.startListening();             
  }

void loop(){
  if (radio.available()){
    radio.read(data, sizeof(data));

    if(data[0] > 380){
      //forward            
      analogWrite(enbA, RightSpd);
      analogWrite(enbB, LeftSpd);
      digitalWrite(IN1, HIGH);
      digitalWrite(IN2, LOW);
      digitalWrite(IN3, HIGH);
      digitalWrite(IN4, LOW);
    }
    
    if(data[0] < 310){
      //backward              
      analogWrite(enbA, RightSpd);
      analogWrite(enbB, LeftSpd);
      digitalWrite(IN1, LOW);
      digitalWrite(IN2, HIGH);
      digitalWrite(IN3, LOW);
      digitalWrite(IN4, HIGH);
    }
     
    if(data[1] > 180){
      //left
      analogWrite(enbA, RightSpd);
      analogWrite(enbB, LeftSpd);
      digitalWrite(IN1, HIGH);
      digitalWrite(IN2, LOW);
      digitalWrite(IN3, LOW);
      digitalWrite(IN4, HIGH);
    }

    if(data[1] < 110){
      //right
      analogWrite(enbA, RightSpd);
      analogWrite(enbB, LeftSpd);
      digitalWrite(IN1, LOW);
      digitalWrite(IN2, HIGH);
      digitalWrite(IN3, HIGH);
      digitalWrite(IN4, LOW);
    }

    if(data[0] > 330 && data[0] < 360 && data[1] > 130 && data[1] < 160){
      //stop car
      analogWrite(enbA, 0);
      analogWrite(enbB, 0);
    }
  }
}

Credits

afsh_ad

afsh_ad

0 projects • 10 followers

Comments