


This build is an easy project that adds a little style to your watch collection. This is a simple 2-watch design using simple components and 3D printed parts.
What You Will NeedList of materials is available below or via this link:
Any and all PPE equipment.
*Links provided are affiliate links. If used to purchase something, it may provide Adylinn Studio a small commission.
3D Printed PartsPrint time is roughly 17 hours for all 3 pieces @ 60 mm/s. The difficulty I would classify as easy for both the printing and assembly.
Watch Case (decent surface quality to limit amount of sanding needed)
- Filament choice not really important
- 0.2mm layer height
- 25-30% infill (ideally you use multiple processes and use a high infill for at least the first 10mm if you can.
- Support is optional depending on overhang performance
- Brim optional
Cover and Cover Back Plate
- Filament choice not really important
- 0.2mm or higher layer height
- 15-20% infill
- Support recommended
- Brim optional
- Remove any support material.
- Sand pieces to the desired smoothness. Start with 220 or320 grit and move up until you have a nice smooth part without visible print lines.
- Wipe the sanded parts with a lightly damp cloth or paper towel.
- Apply even and a light coat of primer.
- Allow enough time for the primer to dry, then sand lightly.
- Wipe the sanded parts with a lightly damp cloth or paper towel.
- Once the parts are dry, evenly apply light coat(s) of base coat spray paint.
- At this point, you can either finish with a clear coat or you can hydro-drip your parts (you can see a full guide on how to do that here.)
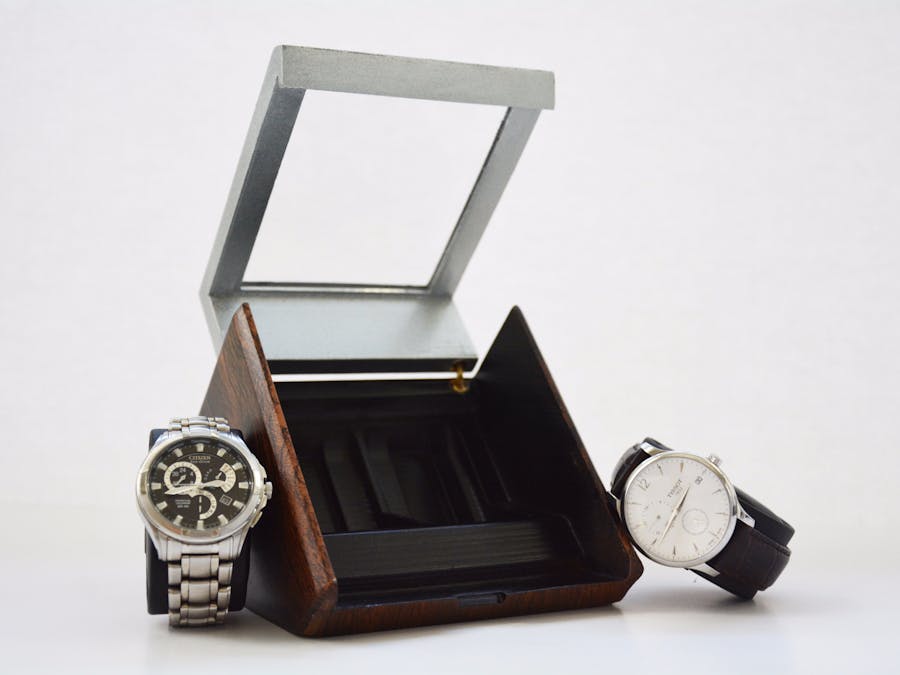
Now you are ready to wrap your watches around the watch pillows, insert into the case and close the lid. I hope you enjoy your 3D printed watch case!
- Prepare acrylic by cutting to a 3.6” x 4.3” rectangle. I used painters tape, marked the lines, and then cut using a jigsaw.
- Slide acrylic rectangle into the back of the cover.
- Slide (glue optional) back cover plate behind the acrylic sheet. (For a seamless look, slide acrylic into before finishing the cover and use Bondo Spot Putty to fill the seam and then finish.
- Review how hinges operate and ensure orientation is correct before inserting into all 4 mounting holes.
Thanks for taking the time to explore the project. I hope you try it, and if you do, I’d love to hear your feedback and see pictures of your build!
Check out www.myminifactory.com/users/adylinn for all my designs or consider subscribing to my email list here to stay updated with new builds, tutorials, and designs. http://eepurl.com/cD3W0L.

Comments