This project is all about making the user snug as a bug in a rug. Where else to start than cooling the work environment, optimized to the user's needs. The seed to this idea was planted in my mind when I thought of ways I could optimize my workflow efficiency. Since my desk is in the corner of my room there isn't much airflow with the ceiling fan on and turning the fan to a high speed creates a lot of noise which I personally loathe. So I got a desk fan to cool me at my desk. Then after getting the desk fan I realized that it was a chore to turn it off if I forget to do so after work since it is in the corner of my corner table. So by creating a system that does turning of lights and fans on for me reduces the number of tasks that I need to do to start/stop my work takes the edge off on laborious days. An added benefit would be that the entire system would be automated, which would lessen my involvement, allowing me to focus on the task at hand, and not necessarily on the minor aspects of my desk.
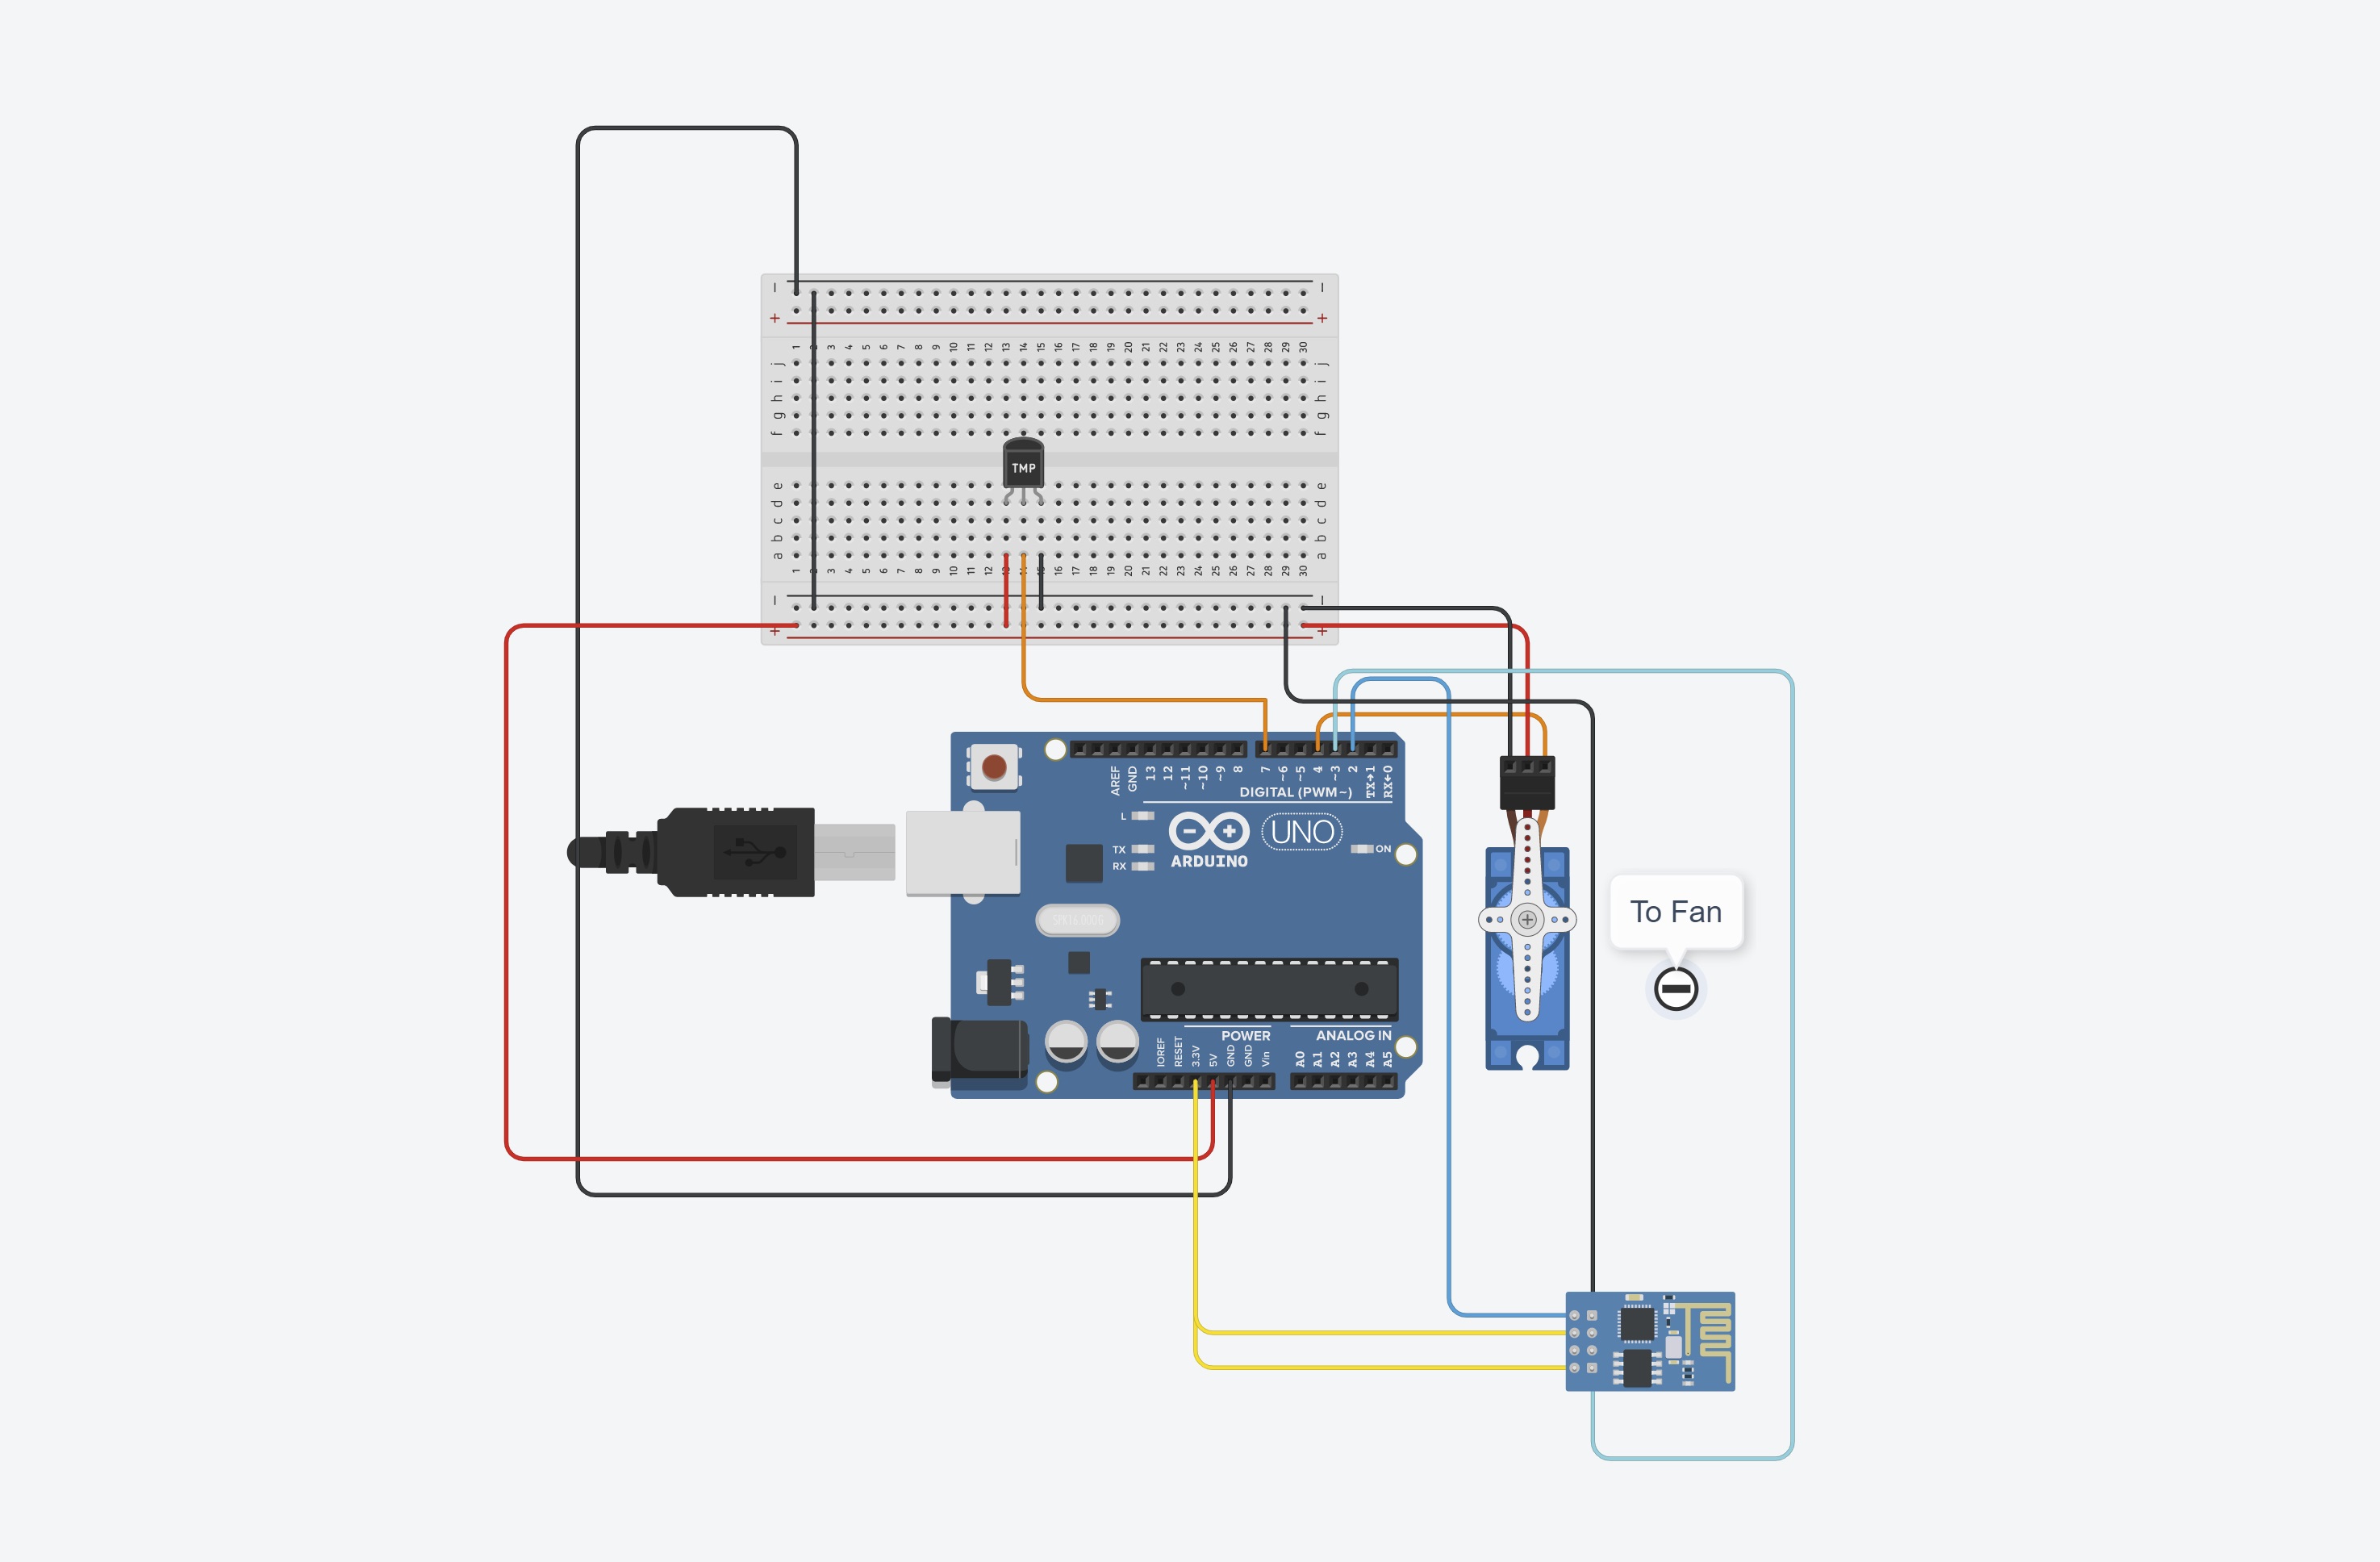
The project started with the fan which I already had in possession. It consisted of a push button to turn off and on, that was used sparingly, based on the need; which would arise primarily based on the prevailing temperature. Since the temperature can be measured using a temperature sensor, the end user can set the threshold temperature which would dictate the operation of the fan. A servo motor would act as the actuator in the system, and once the temperature criteria were met, would turn on, with an extended arm in place for the rotor to apply pressure to the fan's pre-built switch, thus turning it on. With the basic components in possession, they were interfaced with an Arduino Uno, implementing a conditional code-block which would allow the user free access to set their conditions as per their requirements. Below are screenshots of the Thingspeak Interface.
1 / 4 • Attached images are screenshots of the system communicating with the cloud.
Given below is how the system looks in person. I have separated the components for distinction. I look forward to making it more aesthetically pleasing. The images shown are for making it as easy as possible for the viewer to understand.
The sensor data can be accessed from the user's phone. The application is called Thingview, and it is in Google Playstore. This solution ensures remote access of the data.
1 / 2 • screenshot of the application #1
The project as a whole serves to show that such minor tasks can be fully automated, and a more objective approach can be taken, as opposed to just "feeling". The project can be scaled to higher levels, where intuition can be replaced with something more tangible. Automated cooling has already shown that it can greatly reduce both carbon footprint and direct user involvement. The project aims to show just how a system like that could work, proving how accessible it is.


_ztBMuBhMHo.jpg?auto=compress%2Cformat&w=48&h=48&fit=fill&bg=ffffff)


Comments