
Hardware components | ||||||
 |
| × | 1 | |||
Software apps and online services | ||||||
| ||||||
| ||||||
| ||||||
Well, see how our world is becoming better day by day due to the device which we carry right in our hand! In this beautiful device, we have an extraordinary service which is the Google Assistant. This thing is not only useful for calling people and knowing about weather....It has got a lot more in it; like turning on a light when we ask it to. Sounds great, right? Okay, then let's dive right in.
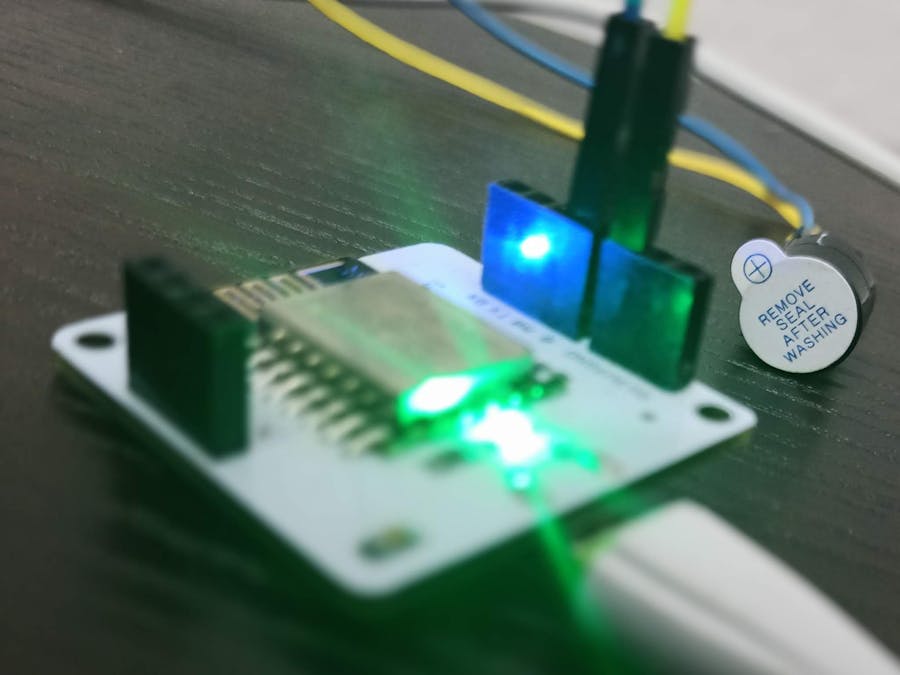
So, here I used an LED and a Buzzer to understand how this works.
Step 1:First things first... Make sure the internet connection is good and a good power supply is given to the Bolt WiFi module.
Create the accounts in the following areas:
- Bolt cloud
- IFTTT
- Google Assistant
- Webhooks
Sign in to your cloud account and you will find to the left column of you API key.
Now, you must save it somewhere safe.
And also for every Bolt module we will have a specific name. You must save it aside for later use.
For us to use the Google assistant effectively, we must sign in into the IFTTT (i.e. If This Than That), which helps us set a trigger so that the output is successful. For that, after signing in, we must go and click on "Create-(Make your own from scratch)".
Then click on "+This" in the below figure.
Later in the search box type "Google assistant" to set a trigger as shown below and follow the following pictures.
- Select : Say a simple phrase
- Enter the following details:
Now click on "+That" and go for "Webhooks" in the search bar. And click on "Make a web request".
Then you must need a URL so that the connection is made properly.
For this go to Bolt cloud and go to 'Docs'. Then go to 'API' section and go to 'GPIO commands' and since we must have an output we will choose ' Write Digital Output'.
Click on any of them and don't forget to change the API key and device name which you have kept safe in the beginning.
As you can see in the above pic, we are giving HIGH or LOW to the pin of the bolt module so that it can either Turn on or off.
The link will take us to something like this. And by this we can understand that our simple code can be put to implementation.
Now, we must copy this URL address:( https://cloud.boltiot.com/remote/44b2de6b-7e68-40e7-a27f-814b58afe008/digitalWrite?pin=0&state=HIGH&deviceName=BOLT13819450 ) and paste it in the before mentioned 'Webhooks' page. Since we used 'json', choose it in the content type... And the method is chosen as 'GET'.
Then click on 'Continue'....and later on 'Finish'...
And that's it your bolt module is connected and we can use it.
Step 4:Hardware connections :
So the components we use here are:
- LED (1)
- Buzzer (1)
- Jumper wires(2-3)
- Resistor 10kohms (1)
Follow the following steps for hardware connections:
Connections for LED
- · Take one end of a 10k resistor and swirl it to the positive (long) terminal of an LED.
- · Later, insert the negative end of LED to the GND pin of Bolt module and the other end of the resistor to the pin 0 of the module.
Connections for Buzzer :
- · We must take the help of the jumper wires here. Connect the positive end of buzzer to a wire and the other end of the wire to the pin0 of the WiFi module.
- · Now, the negative end (the shorter one) must be connected to other jumper wire and this end must be inserted into GND pin.
So that’s it.... We have successfully completed our project....

Comments