

Hardware components | ||||||
 |
| × | 1 | |||
 |
| × | 1 | |||
| × | 1 | ||||
| × | 1 | ||||
Software apps and online services | ||||||
 |
| |||||
Hand tools and fabrication machines | ||||||
 |
| |||||
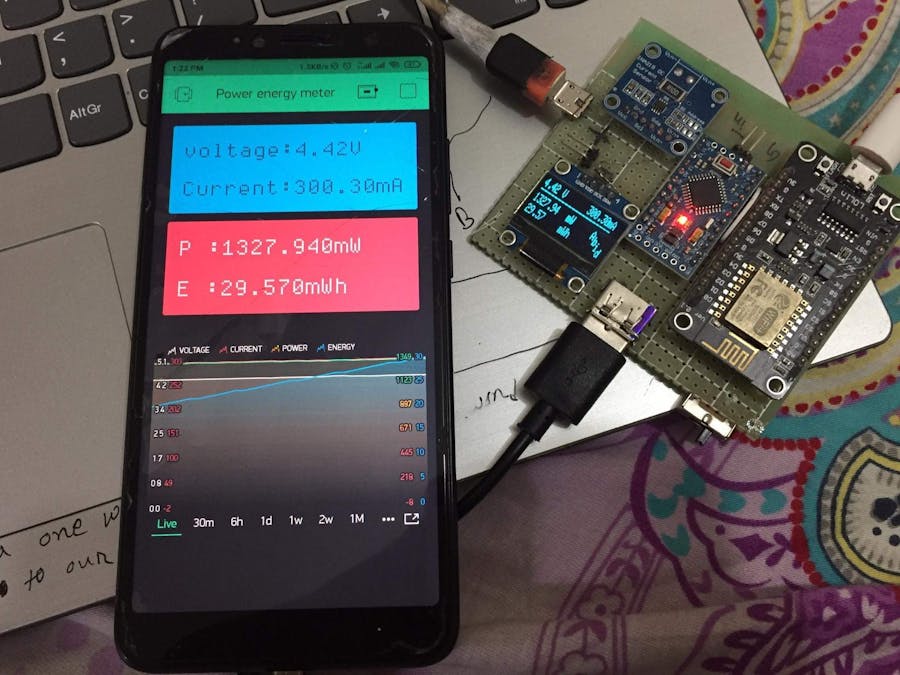
In this project I'll show you how to make a IOT based power and energy meter which can measure current, power, energy consumption using INA219 current sensor and shows it on OLED display and to blynk app through internet. In blynk app you can see the graphically representation of your voltage, current, power and energy data.
To make this project you will need some component
- Arduino Pro mini
- ESP12E Nodemcu
- INA219 current sensor
- 0.96" i2c OLED
- Veroboard
- 450mah lipo (capacity is optional) with charging circuit.
Connect:
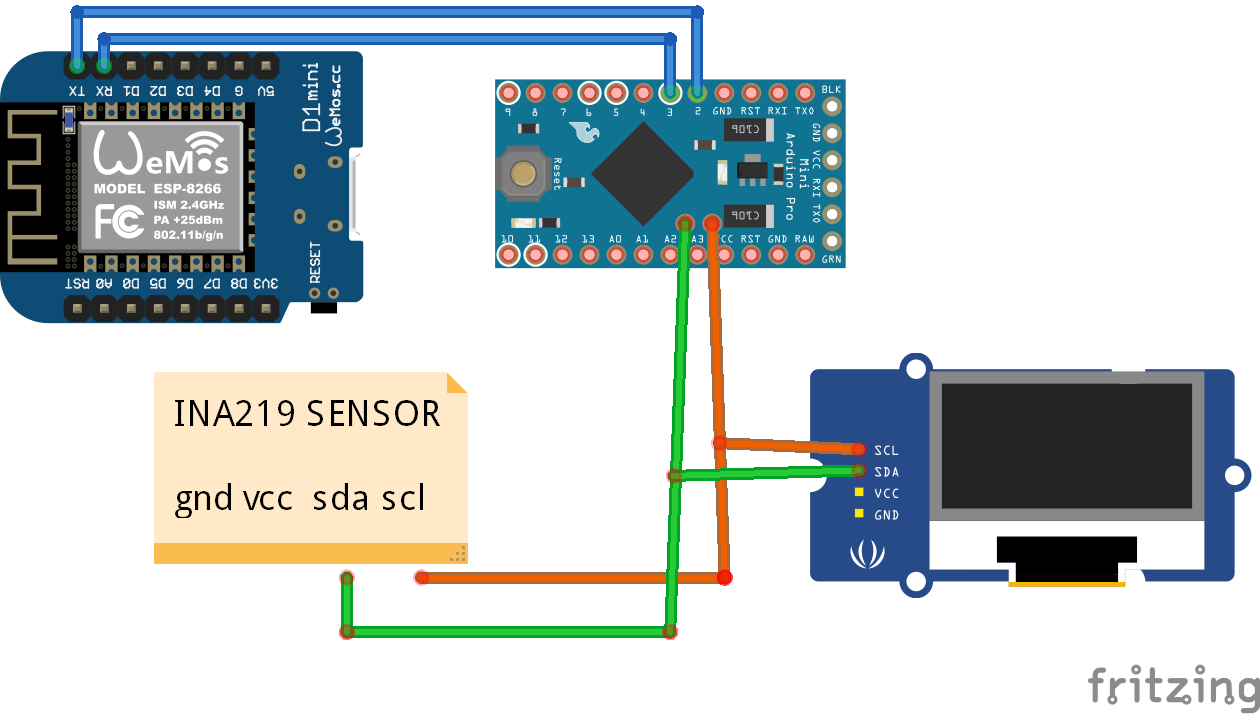
Arduino D2 to Nodemcu TX
Arduino D3 to Nodemcu RX
Arduino A5 to INA219 SCL
Arduino A4 to INA219 SDA
Arduino A5 to OLED SCL
Arduino A4 to OLED SDA
There are two code for this project. One is for Arduino and one for the nodemcu. In summary at first the Arduino microcontroller measure the voltage, current, power and energy data then shows it to the display and sent the data to nodemcu via serial communication. then the nodemcu receive the data and send it to blynk server with its unique authentication code and with blynk app we can see the data and graphically visualize them.
After creating a Blynk account you need to follow those steps-
Step 1
Step 2
Step3
Step4
now use the auth token in your nodemcu code and upload the codes to your arduino and nodemcu.


_3u05Tpwasz.png?auto=compress%2Cformat&w=40&h=40&fit=fillmax&bg=fff&dpr=2)
Comments