

Hardware components | ||||||
_ztBMuBhMHo.jpg?auto=compress%2Cformat&w=48&h=48&fit=fill&bg=ffffff) |
| × | 1 | |||
 |
| × | 1 | |||
You will only need to set this up once, assuming you have not done so already.
sudo raspi-config
- Select option 5: Interfacing Options
- Enable P5 I2C
- Remove all wires from Arduino
- Connect the Arduino to the computer using USB
- Upload the Arduino sketch code into the Arduino
- Download the python code onto your Pi as i2c.py
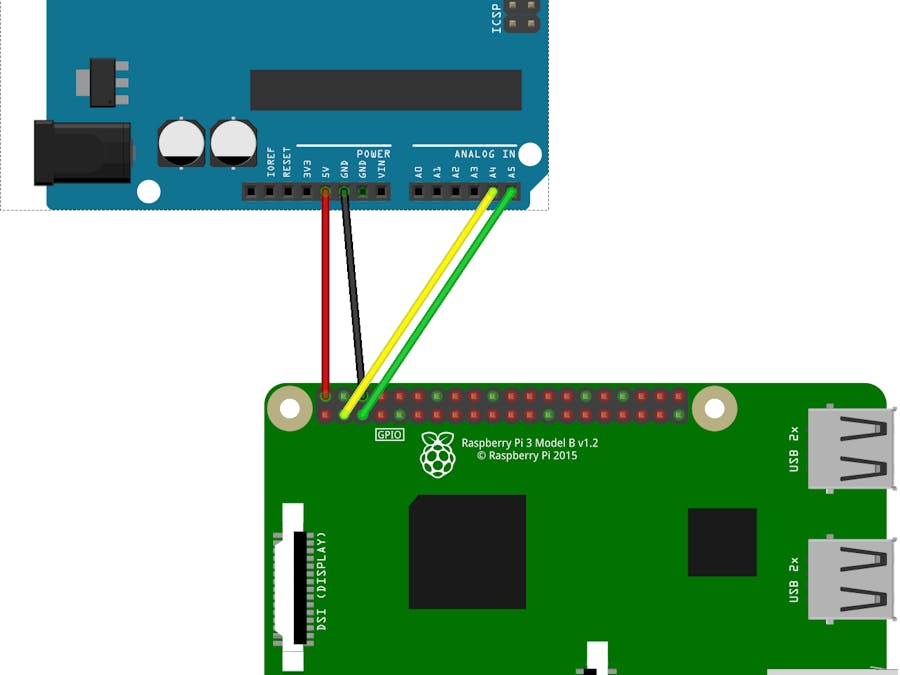
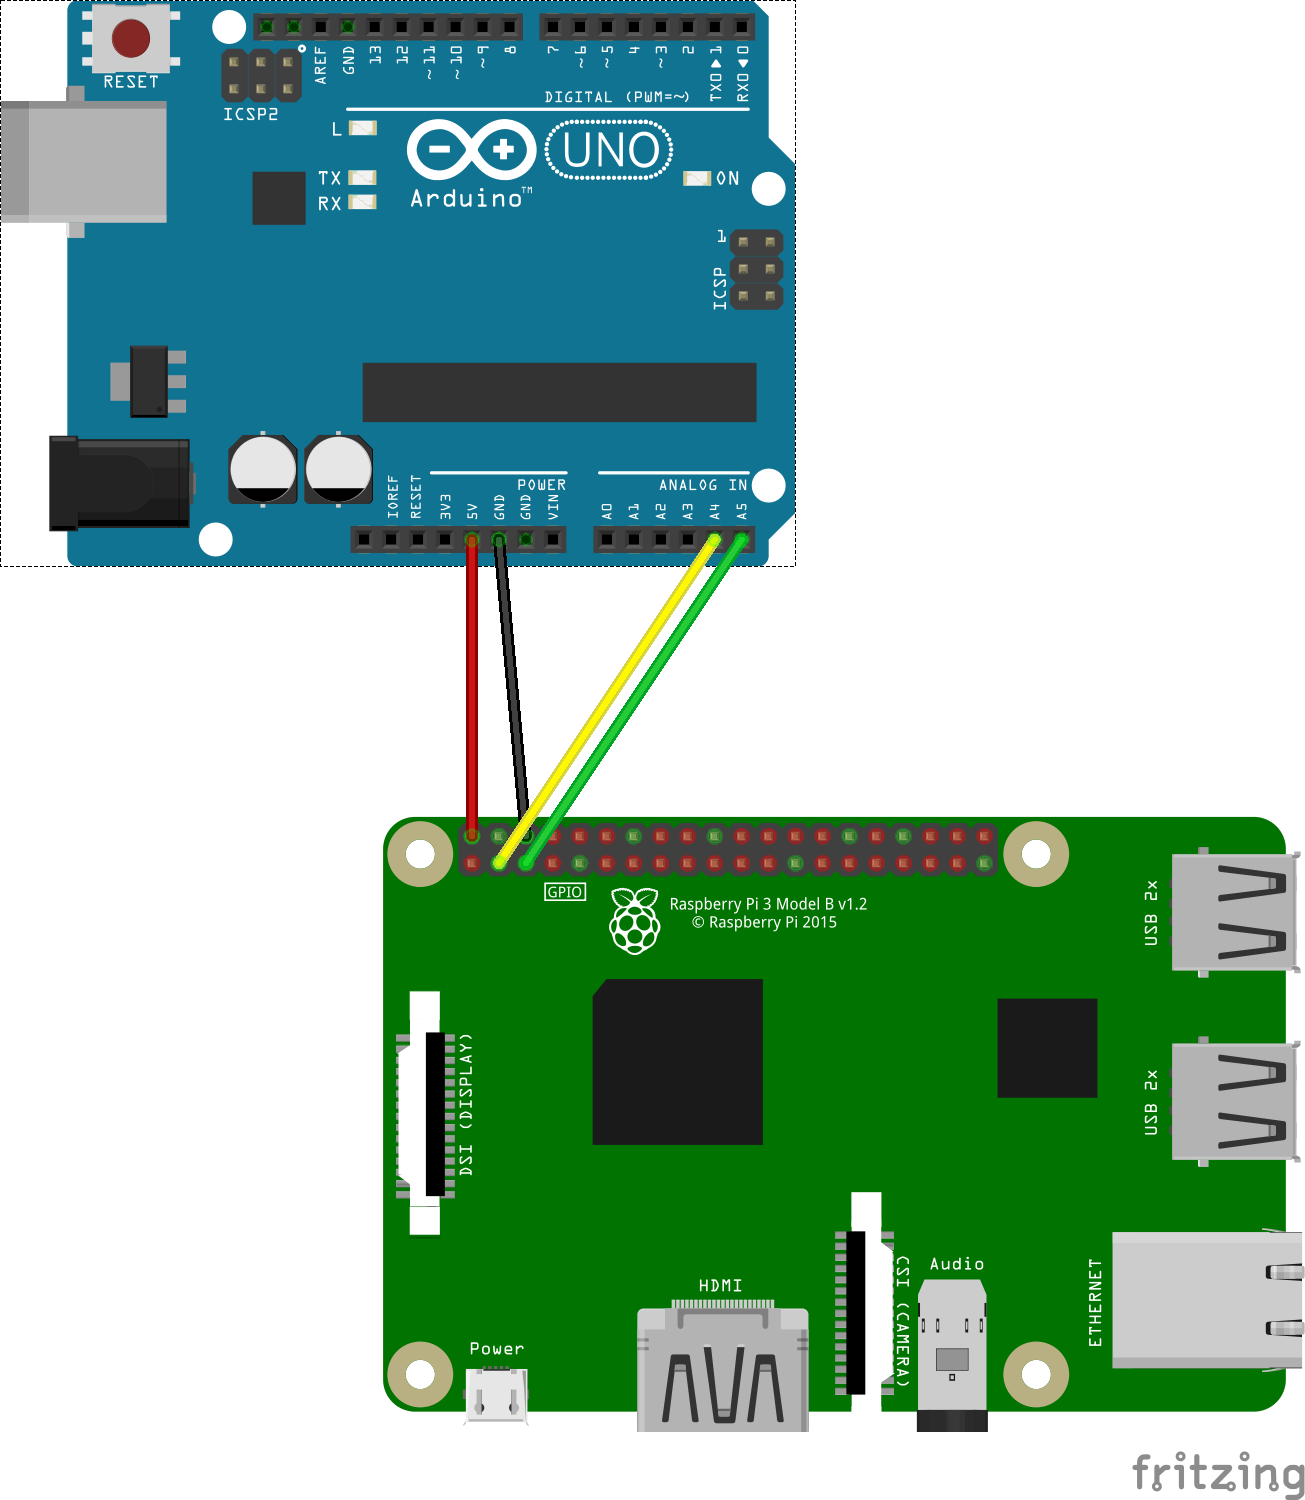
- Connect the Arduino to the Pi according to the schematic. The shematic is a little unclear, so note that the red wire connects to Pi physical pin 6, and the ground to pin 2.
Run the controller program from the python:
python3 ic2.py
This should cause the Arduino's internal LED, associated with pin 13, to light up. The program will also respond with the prompt: Press return to exit
Upon pressing return, the program will exit, and the LED will not be lit up.
Supplementary discussion You can find out the Pi's pin descriptions and physical pins by typing gpio readall
The Pi apparently has two I2C devices: /dev/ic2-0 and /dev/ic2-1. This code uses the latter, as you do not need to be root. /dev/ic2-1 corresponds to bus = SMBus(1) in the python code. You can see the I2C devices available by typing ls /dev/*i2c* .
You need to select an I2C address for the Arduino. You can choose any byte you want for the address, just so long as it is not being used by another device in the chain. In this example, the Arduino is the only device being used. So it does not matter. I chose the value 0x8, which you can see as addr = 0x8 in the python code, and Wire.begin(0x8) in the Arduino code. Whatever value you choose, make sure you use the same in both sets of code.
The libraries assume a certain usage of pins. SDA (data) is on pin A4 on the Arduino, and pin 3 on the Pi. SCL (clock) is on pin A5 on the Arduino, and 5 on the Pi. It may be possible to "emulate" I2C on other pins, but I have not tried this.
There is a lot more to I2C, but this project is a simple proof of concept on getting I2C to work.
Date is written to I2C using bus.write_byte(). I chose the value 0x1 to mean "turn the LED on", and 0x0 to mean "turn it off again". The Arduino reads the byte using char c = Wire.read(), and sets the LED using this value via the digitalWrite() function.


Comments