

Hardware components | ||||||
 |
| × | 1 | |||
 |
| × | 1 | |||
 |
| × | 1 | |||
 |
| × | 1 | |||
 |
| × | 1 | |||
 |
| × | 1 | |||
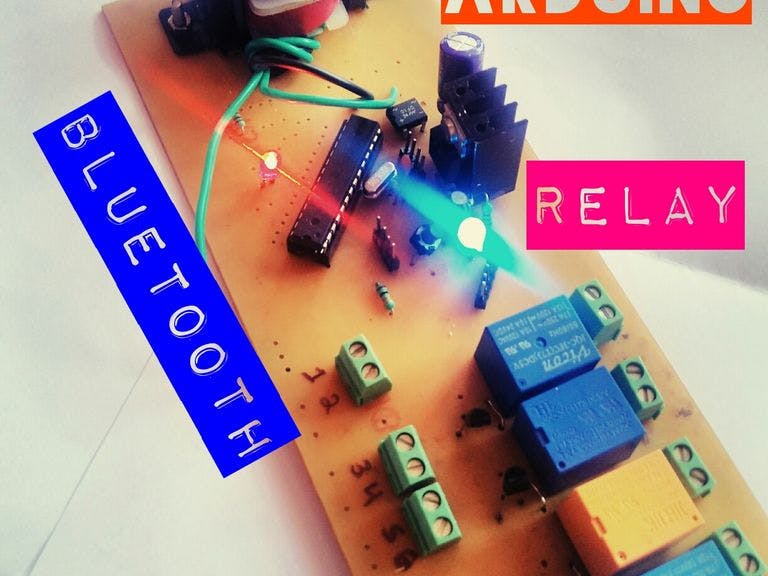
This tutorial will build a board which can directly operate on 220v and can control AC appliances.
Step 1: To Do- PCB design
- PCB etching
- components soldering
- programming
- 12-0-12 500mA transformer
- Atmega 328p-pu
- Bridge rectifier
- Crystal 16MHz
- Transistor BC548/BC547/2n2226)Heat sink
- 7805ic
- Led red 5mm
- Led Blue 5mm
- Capacitor 1000uF
- Capacitor 100uF
- 10k ohm
- 1k ohm
- 12V relay
- Ferrous chloride
- Copper clad board
- Terminal connectors
- Male headers
- Push button
- 22pF capacitor
- PCB Driller
- Drill bit 0.8mm...1mm
Design PCB using Diptrace software. Download project files here :/*will upload soon using mobile now it's in my laptop */Download Diptrace software here:http://diptrace.com/download-diptrace/.
Step 4: NOTEIf you want to add components, or remove, or wish to do any change import project file to Diptrace, make a change and take a printout and then etch it .
Step 5: PCB EtchingGo through this link ..!http://www.instructables.com/id/Arduino-Just-Clone...
And follow etching steps.
Step 6: Components PlacementPlace all the components in its corresponding place to solder
Step 7: Components SolderingPlace the components and solder using solder gun.
Step 8: VideoYouTube
Step 9: Arduino BluetoothFor Code and other info visit my one more tutorial http://www.instructables.com/id/Compact-Home-Autom...


Comments