


Hardware components | ||||||
 |
| × | 1 | |||
 |
| × | 4 | |||
 |
| × | 4 | |||
 |
| × | 2 | |||
I had some Christmas light which had the controller broken, but the lights were still good, so Arduino was the solution.
This project is made for the type of holiday light supplied by battery and wich can be connected in both verses.
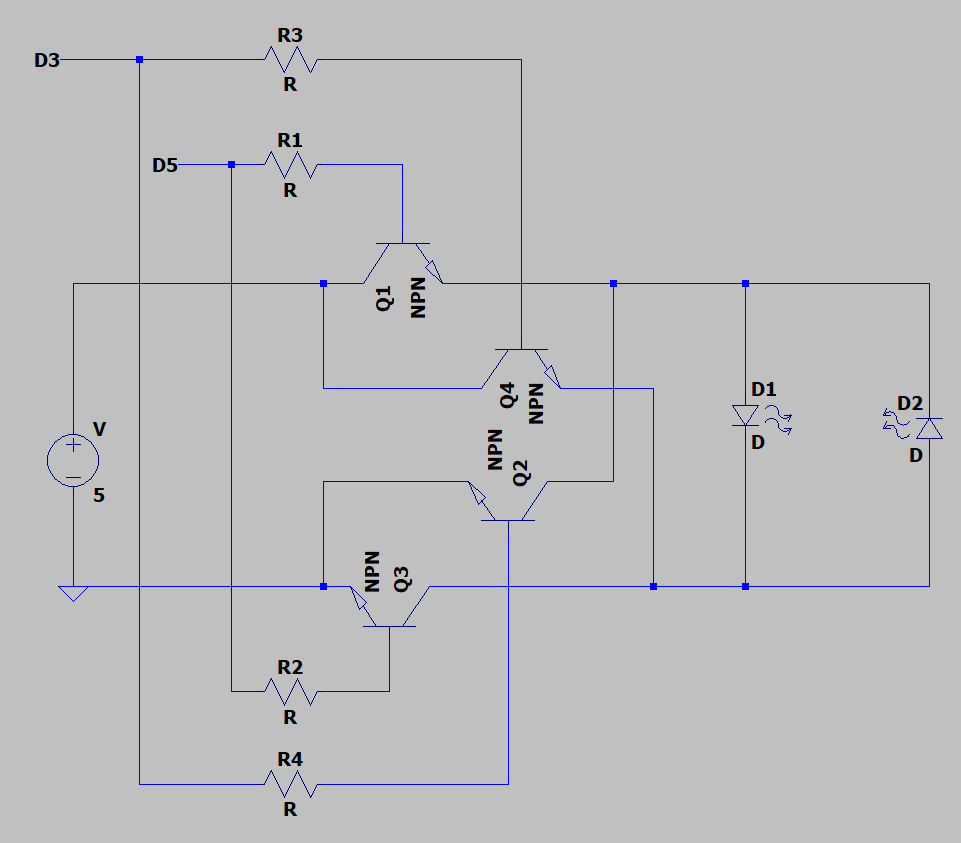
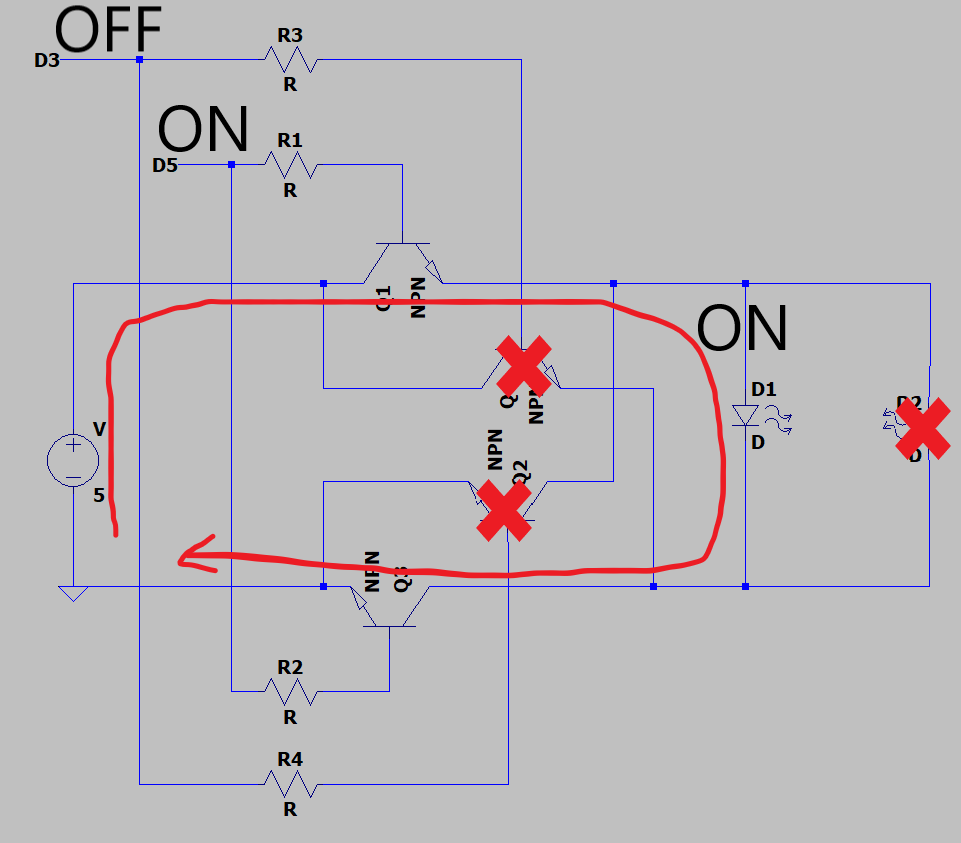
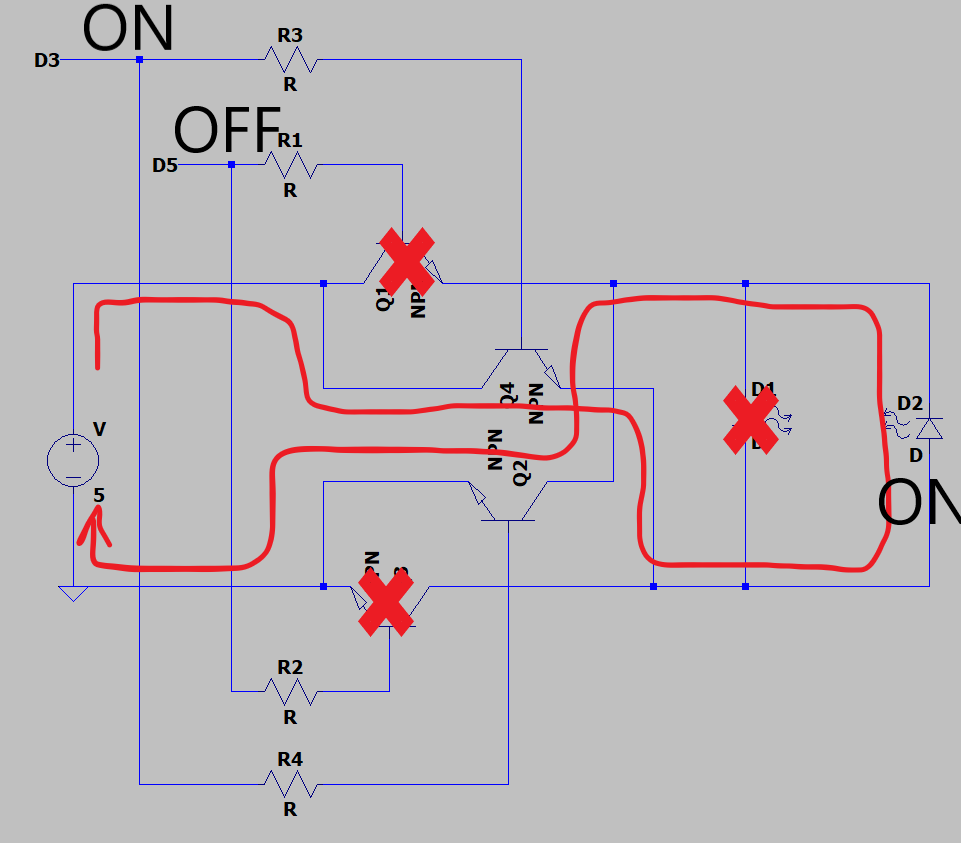
Generally, the Christmas light supplied by battery are a set of 2 type of light, of different color, connected in anti-parallel. So, if you apply the voltage in one way, you'll get some colors, if you apply the voltage in the opposite way, you'll get different colors. With 4 bjt we can get a circuit that invert the voltage applied to the light.
The main purpose of this project is to illustrate the way to invert the voltage, then you can create more complicated light effects.
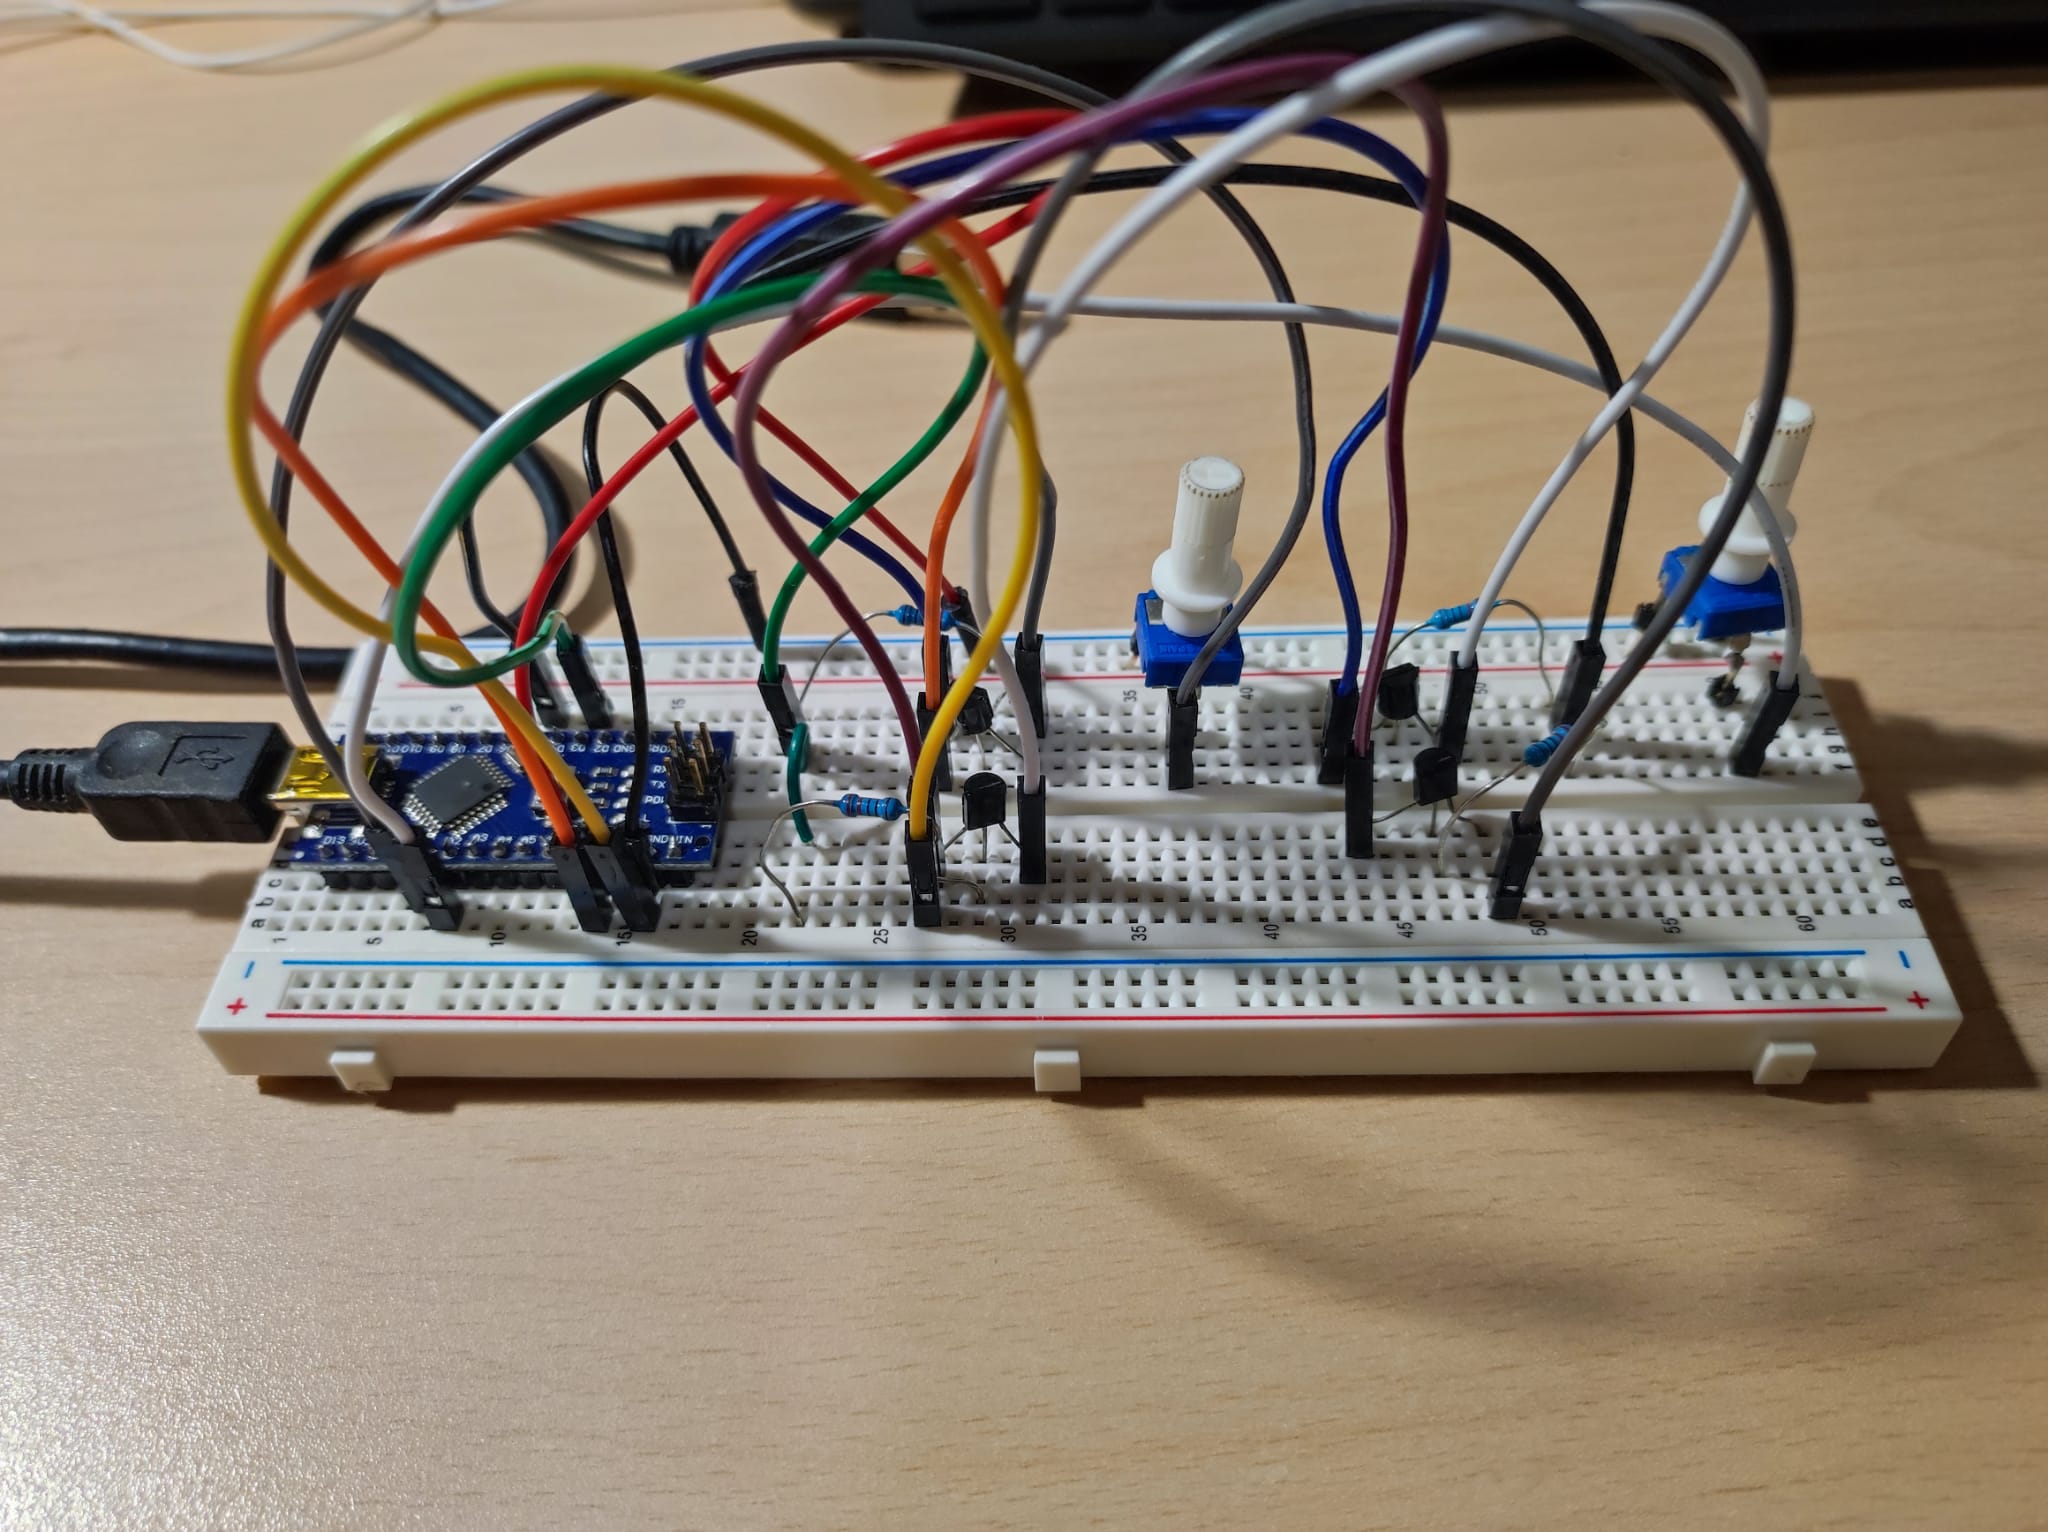
You can supply Arduino with a Power Bank, 5V, directly from the USB, or eventually from 5V an GND if you have an Arduino Uno.
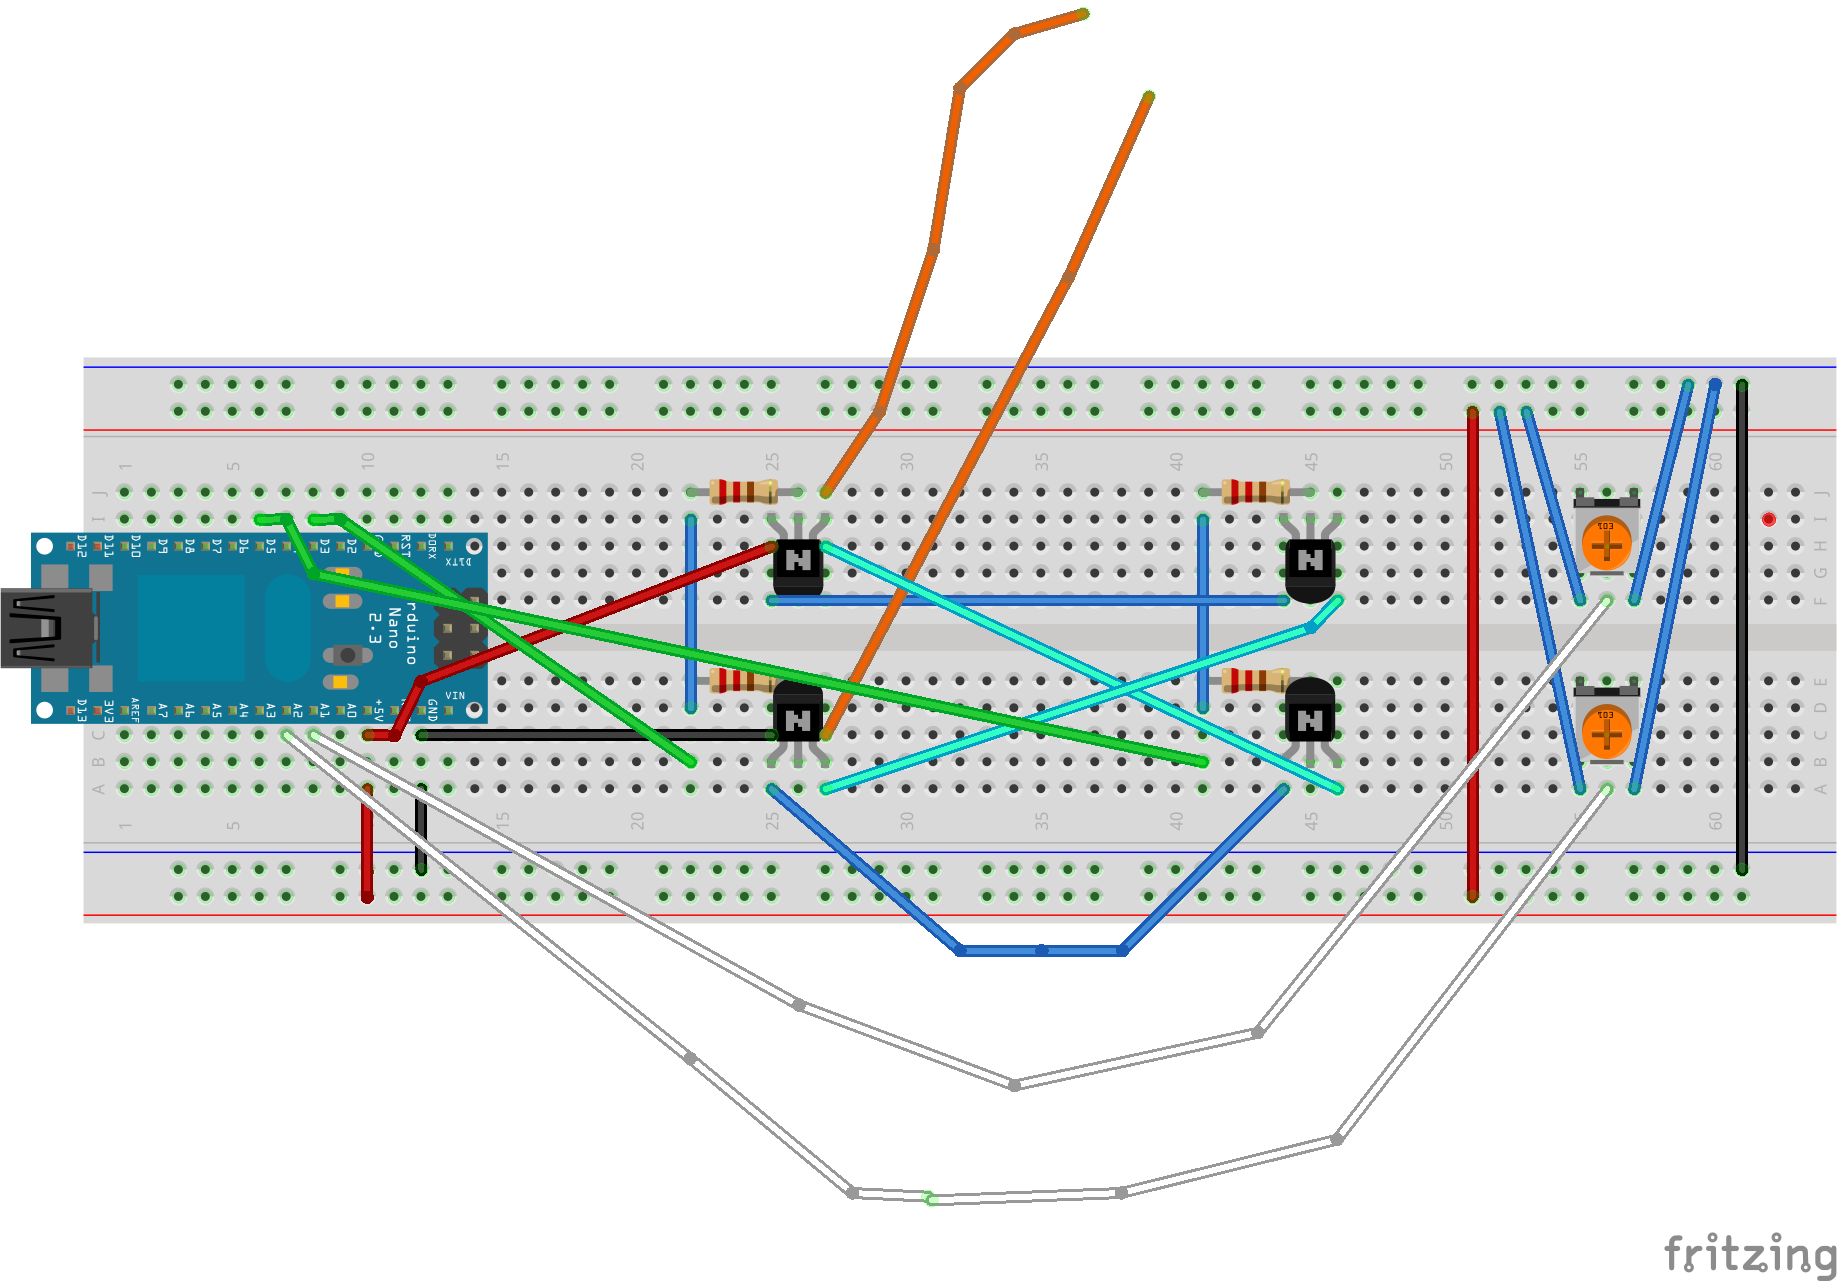
Connection of bjt


Comments