/*
Sketch generated by the Arduino IoT Cloud Thing "Christmas"
https://create.arduino.cc/cloud/things/XXXXXX
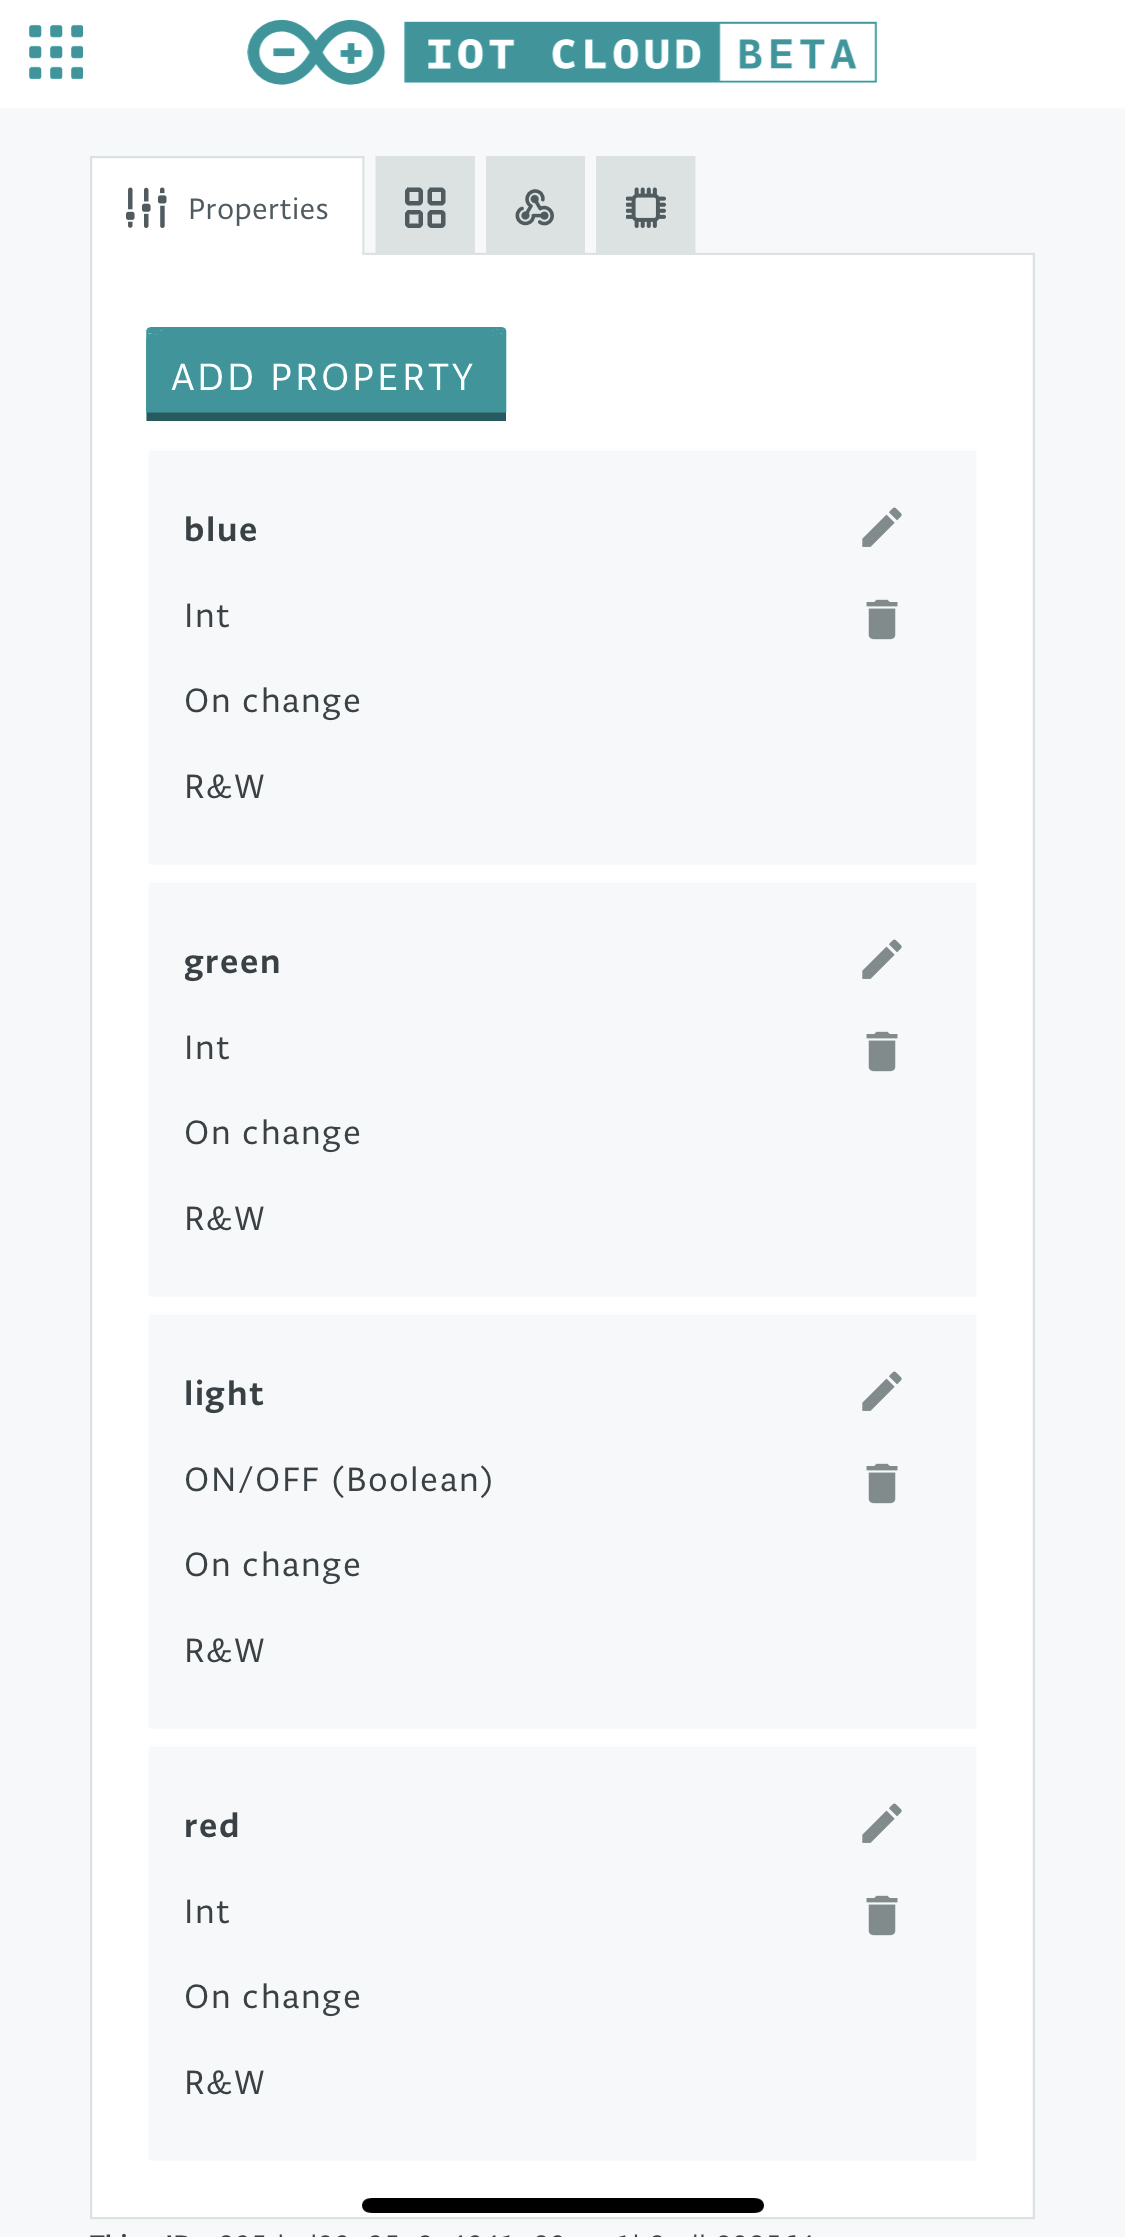
Arduino IoT Cloud Properties description
The following variables are automatically generated and updated when changes are made to the Thing properties
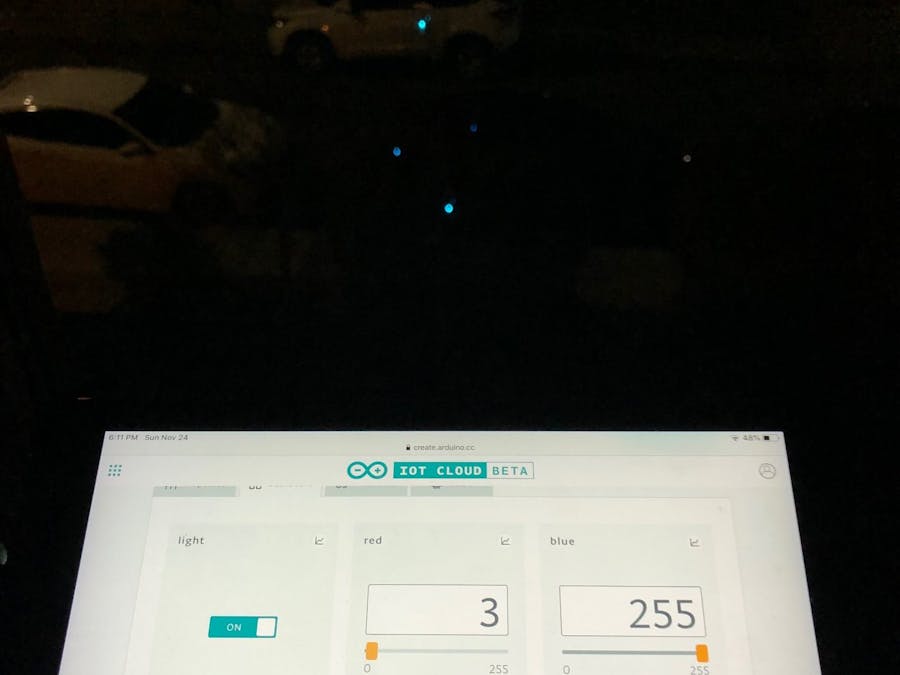
bool light;
int red;
int blue;
int green;
Properties which are marked as READ/WRITE in the Cloud Thing will also have functions
which are called when their values are changed from the Dashboard.
These functions are generated with the Thing and added at the end of this sketch.
*/
#include "thingProperties.h"
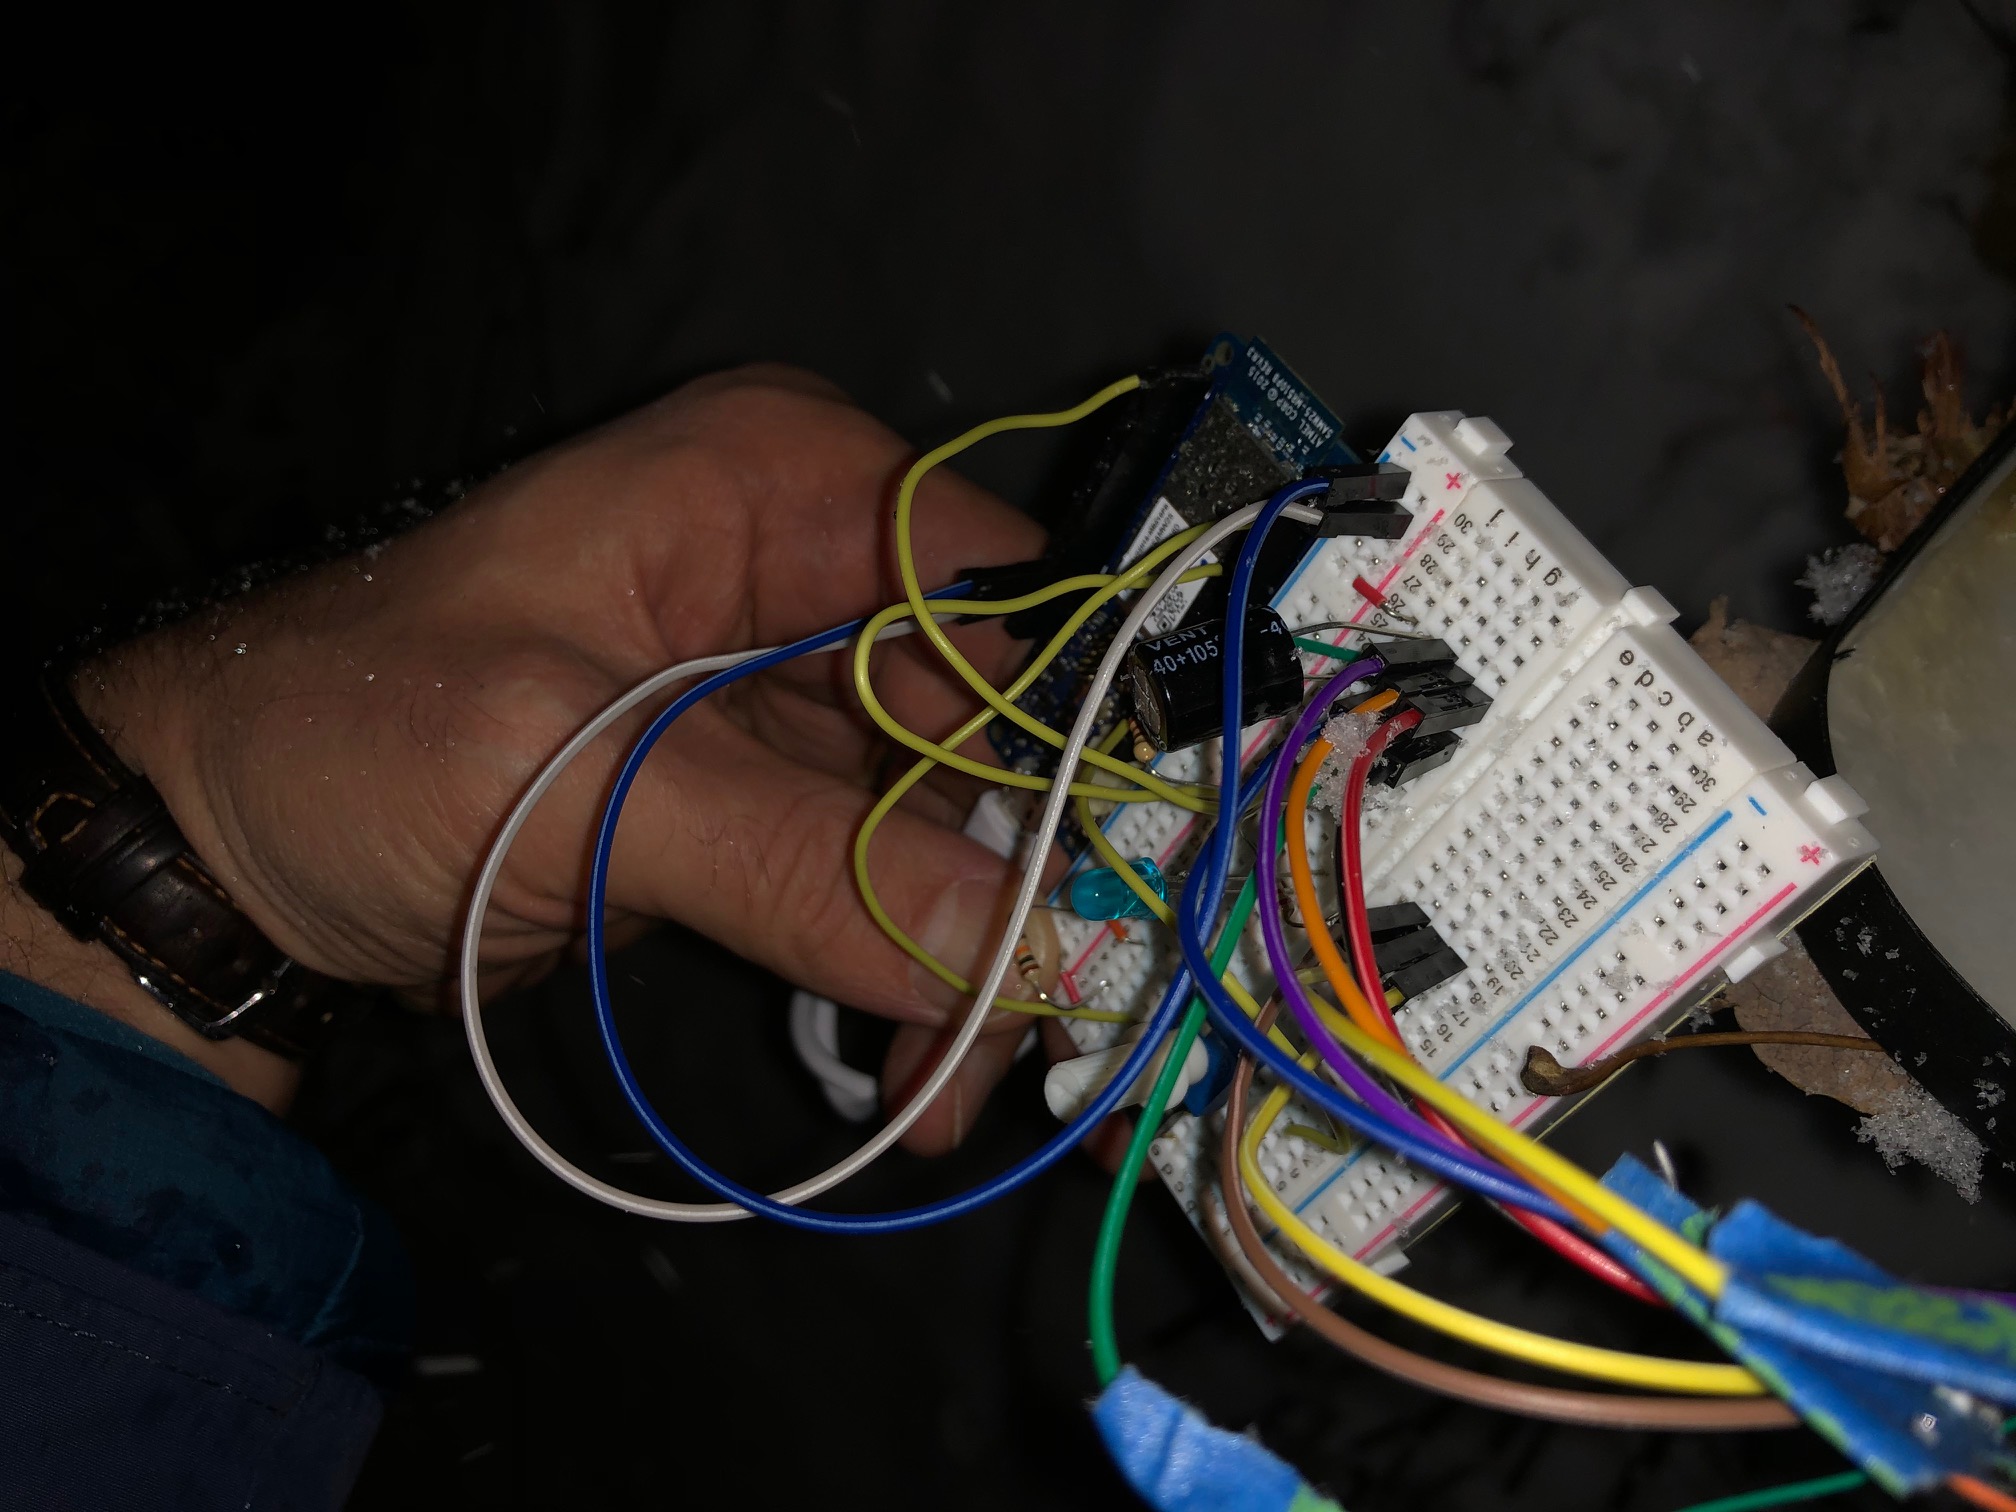
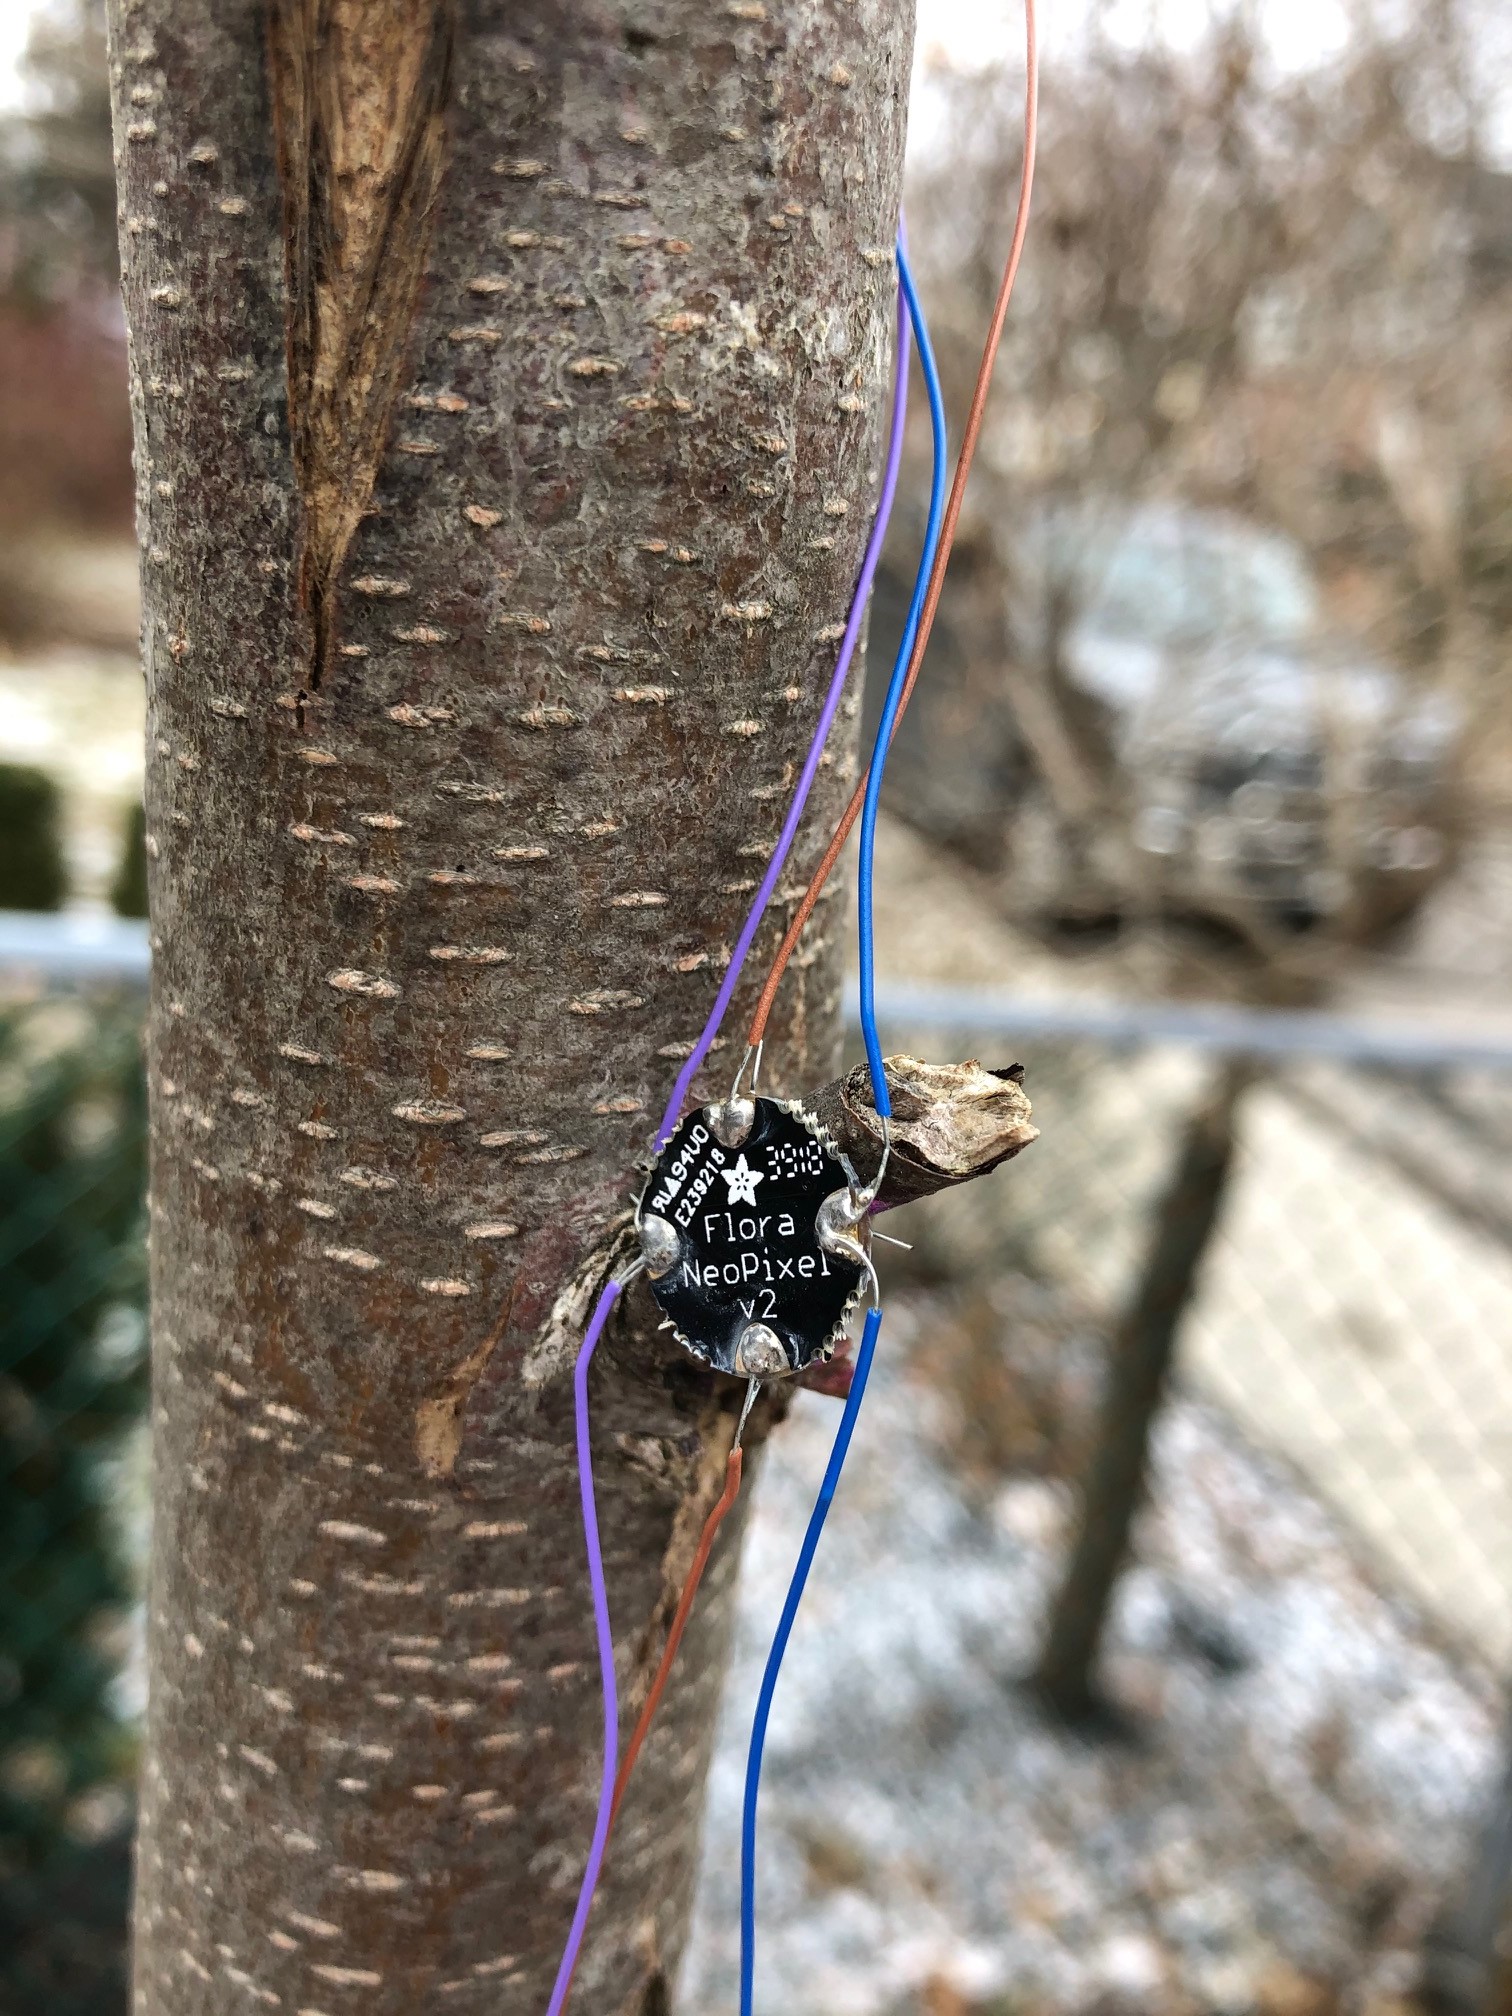
#include <Adafruit_NeoPixel.h>
#define LED_PIN 6 //Which pin on the Arduino is connected to the NeoPixels?
#define LED_COUNT 4 // How many NeoPixels are attached to the Arduino?
int btnState;
int btnPrevState = 0;
// Declare our NeoPixel strip object:
Adafruit_NeoPixel strip(LED_COUNT, LED_PIN, NEO_GRB + NEO_KHZ800);
// Argument 1 = Number of pixels in NeoPixel strip
// Argument 2 = Arduino pin number (most are valid)
// Argument 3 = Pixel type flags, add together as needed:
// NEO_KHZ800 800 KHz bitstream (most NeoPixel products w/WS2812 LEDs)
// NEO_KHZ400 400 KHz (classic 'v1' (not v2) FLORA pixels, WS2811 drivers)
// NEO_GRB Pixels are wired for GRB bitstream (most NeoPixel products)
// NEO_RGB Pixels are wired for RGB bitstream (v1 FLORA pixels, not v2)
// NEO_RGBW Pixels are wired for RGBW bitstream (NeoPixel RGBW products)
void setup() {
pinMode(LED_PIN, OUTPUT);
// Initialize serial and wait for port to open:
Serial.begin(9600);
// This delay gives the chance to wait for a Serial Monitor without blocking if none is found
delay(1500);
// Defined in thingProperties.h
initProperties();
// Connect to Arduino IoT Cloud
ArduinoCloud.begin(ArduinoIoTPreferredConnection);
/*
The following function allows you to obtain more information
related to the state of network and IoT Cloud connection and errors
the higher number the more granular information you’ll get.
The default is 0 (only errors).
Maximum is 4
*/
setDebugMessageLevel(2);
ArduinoCloud.printDebugInfo();
strip.begin(); //call begin() to prepare the data pin for NeoPixel output:
strip.setBrightness(64);
strip.show(); // Initialize all pixels to 'off'
}
void loop() {
ArduinoCloud.update();
// Your code here
if (light == 1) {
strip.setPixelColor(0, red, green, blue); //strip.setPixelColor(n, red, green, blue);
strip.setPixelColor(1, red, green, blue);
strip.setPixelColor(2, red, green, blue);
strip.setPixelColor(3, red, green, blue);
strip.show();
} else {
uint32_t off = strip.Color(0,0,0);
strip.fill(off, 0, 4);
strip.show();
}
}
void onGreenChange() {
// Do something
Serial.print("Green = ");
Serial.println(green);
}
void onRedChange() {
// Do something
Serial.print("Red = ");
Serial.println(red);
}
void onBlueChange() {
// Do something
Serial.print("Blue = ");
Serial.println(blue);
}
void onLightChange() {
// Do something
digitalWrite(LED_PIN, light);
Serial.print("The light is ");
if (light) {
Serial.println("ON");
} else {
Serial.println("OFF");
}
}


Comments