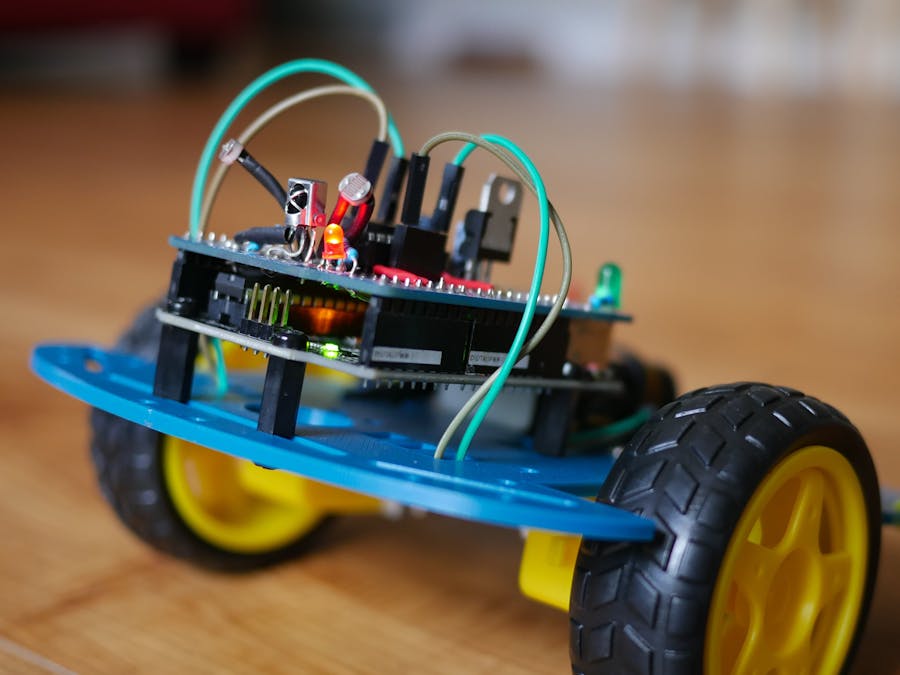
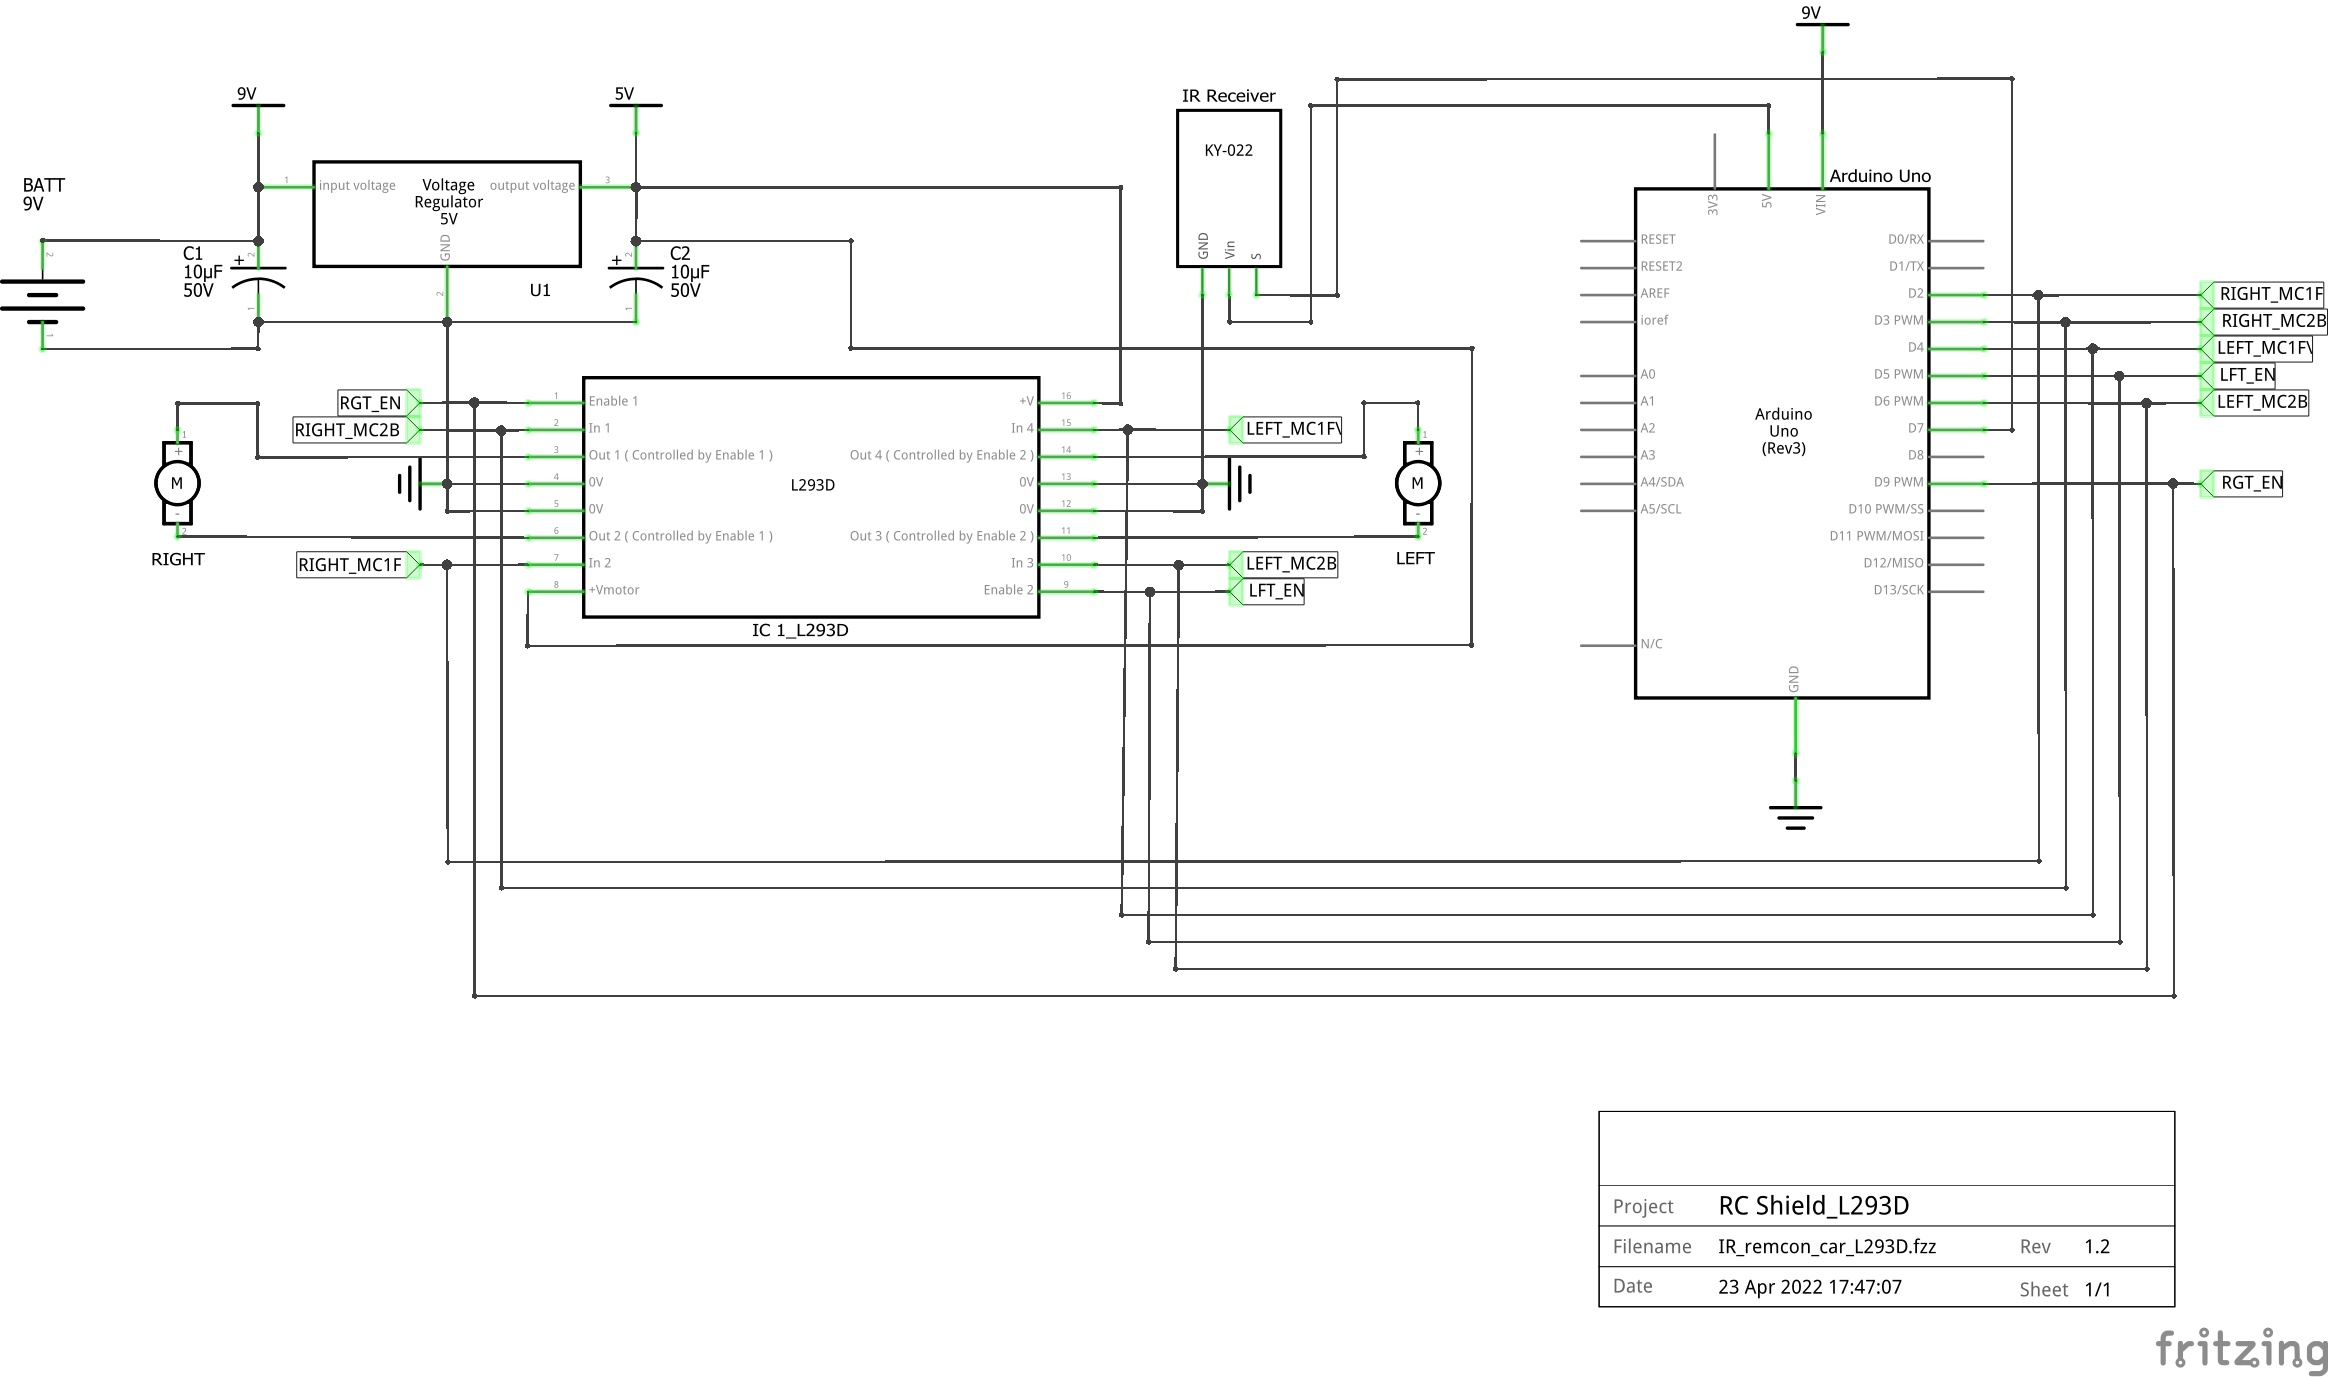
I started a project that was worth moving from a breadboard and onto a protoshield; an IR remote controlled car using an L293D H-bridge motor driver.
NOTEThe story I have written below is actually the script in the video below. The video also shows three other protoshield project ideas. Additionally, the video also shows the pinouts for the IR receiver I used in the final version. Please consider watching the video first. I think it might be a better experience. I put a lot of work into the production of this video. I hope it is useful.
VIDEOPROTOSHIELD AND SMART CAR JOURNEYBefore I started this project I also purchased a smart car kit. It was very easy to assemble and I thought the car was too big so, I was disappointed with the experience.
However, to be fair, I think the point of those kits is to introduce us to its basic concepts and components and that leads to next steps. So, my next step was to make a slightly smaller version of this smart car. I replaced this l298N H-bridge motor driver
with one of these L293D H-bridge motor drivers..
Using a smaller H-bridge was when I realized that a protoshield was a big part of how I would simplify this project.
I thought about which protoshield to use? My Elegoo shield wasn’t going work for this because the female header pins were already soldered onto the board. My official Arduino Shield wasn’t an option because it cost $14 and I wasn’t willing to waste it on this project. I wanted something like the official Uno protoshield that came without the headers pre soldered but was laid out like the Elegoo Uno protoshield and was also inexpensive. I looked online and found these and they looked promising.
This is a pack of 9 Uno protoshields by ElectroCookie, that came without the header pins pre-soldered and provided three different layouts. The biggest attraction was the price; $15.00 That's around $1.50 per shield! Now I was ready to create my first protoshield.
SMART CAR UPGRADEThis was originally a project from Chapter 4 of Jeremy Blum’s book, “Exploring Arduino”. The last project in this chapter covers building an autonomous car that follows light. It is a great chapter that introduces transistors, voltage regulators, dc motors, h-bridges, reading schematics and other great lessons. I built the project on a breadboard and re-created the layout and schematic using Fritzing.
This project was very rewarding and fun. I highly recommend Blum’s book. The project was to make an actual working car using the breadboard, but Instead, I decided to take it off of the breadboard and use a protoshield. This was when I started looking for a protoshield and found the previously mentioned ElectroCookie shields.
It was my first time creating a circuit on a protoshield, so I chose one and gave it a shot. I couldn’t come up with a way to use software to plan the layout for the circuit because I wanted to use both sides, so I decided to just place the components on the shield, I visualized the layout and soldered as I thought best. I utilized the existing traces as much as possible. I 3d printed a chassis instead of purchasing another one. I put it all together and it worked. That's how I made this shield!
While all of this was fun, a car that follows light isn’t.
IR REMOTE CONTROLLED CARBlum gives you enough to get you started but leaves you ready for more. I think that is a great way to teach. I wanted to do more. I turned again at the smart car kit for inspiration and realized I could sort of recreate it on this shield.
I decided upgrade this project and make an IR Remote controlled car. I made a new prototype on a breadboard. The first version used this IR receiver.
It didn’t seem right to solder this beautiful Keystudio IR receiver onto the shield. It was too nice. I decided to use a different one instead and I also added an led indicator for the IR receiver.
I thought about whether or not to start with a new shield and make an entirely different board, but it seemed like that would be a waste of components, shields, and money. I looked to the smart car kit again for inspiration. I noticed that the kit had all three versions assembled as one unit; IR remote, obstacle avoidance and ultrasonic sensor. All you have to do is upload the new sketch for whichever version you want.
STRATEGY AND INSPIRATIONI based my code heavily on the smart car kit. I changed the H-bridge component to an L293D and renamed a few things. I pasted the code at the bottom. I decided to add the IR receiver to the existing board and not waste any components or money.
PARTSHere are the parts I used just in case the list at the top isn't clear:
- 1- Arduino Uno.
- 1- Protoshield of your choice.
- 32-Male header pins.
- 1- 7805 5V Voltage Regulator.
- 1- Heatsink for the regulator.
- 1- L293D Dual H-bridge motor driver.
- 2- 50V 10 micro farad electrolytic capacitors.
- 1- IR receiver.
- 1- Remote.
- 1- 9V battery and battery clip.
- 2- 4pin female headers.
- Solid core hookup wires.
- 2- 3-6V Geared DC motors.
- The nuts, bolts and wires that go with it all.
- 2- wheels and a 3d printed chassis.
I knew I wouldn’t ever use the light following version of this car but I had another idea. There are 10 available pins left. I could use the photoresistors to make automatic headlights that turn on when its dark. I could also add the night rider/chasing leds feature and activate it with the remote.
Maybe I could also add a horn by using a piezo buzzer and also activate that with the remote. I won’t do all of that now but this shield has potential.
I’m sure others have made the same or more complex cars but I wanted to explore uses for protoshields.
This is a journey that I hope will continue on and will result in project and video updates.


_ztBMuBhMHo.jpg?auto=compress%2Cformat&w=48&h=48&fit=fill&bg=ffffff)


Comments