

Hardware components | ||||||
| × | 1 | ||||
_ztBMuBhMHo.jpg?auto=compress%2Cformat&w=48&h=48&fit=fill&bg=ffffff) |
| × | 1 | |||
For my next project I'm going to use some capacitive touchpad, and before releasing it, I decided to make a small tutorial about the kit that I received for DFRobot.
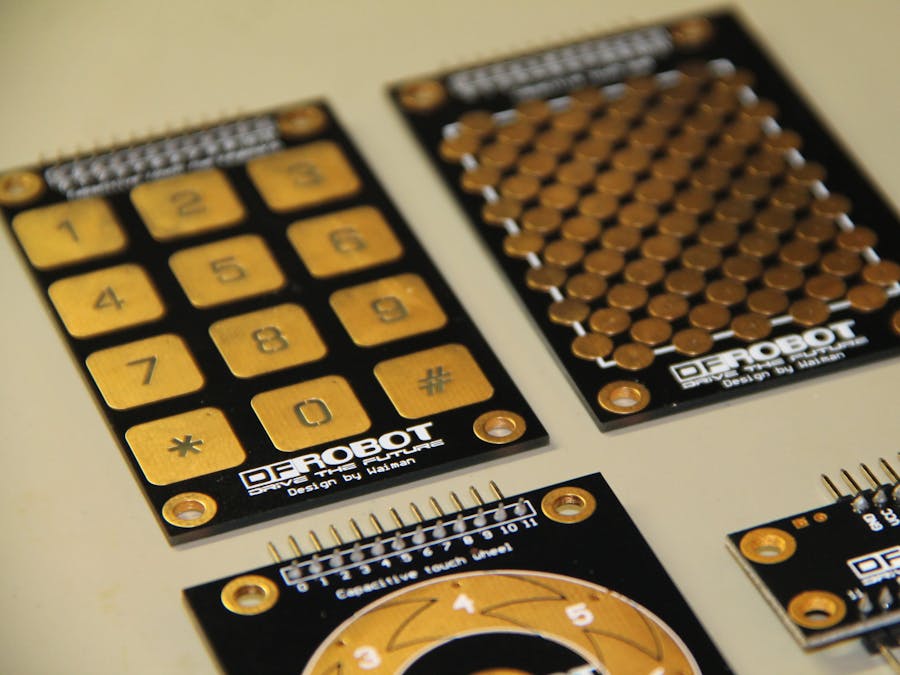
The kit brings 3 touchpads:
- Numeric keypad
- Wheel pad
- Touch pad
Connector board and rainbow cable. The kit only allow the use of one pad at a time connected to the Arduino. To start you will need the touch kit library, available here. Download and install it on your Arduino Library folder.
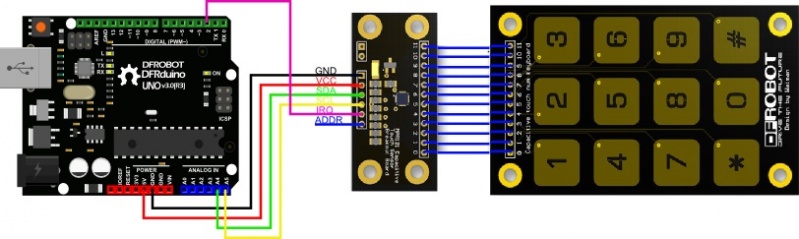
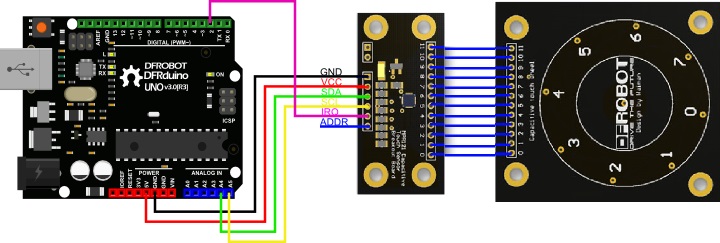
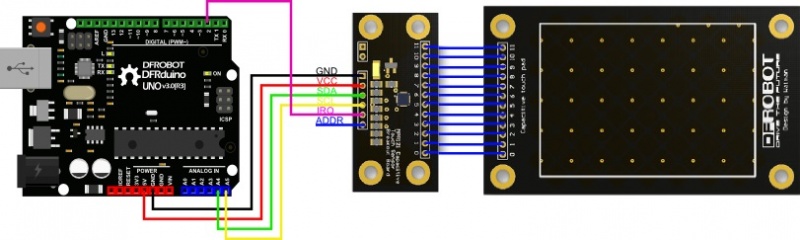
SchematicJust follow one of the schematic, to connect them in your arduino board.
The communication is done trough I2C (A4 and A5 for arduino UNO) and an adicional pin D2 (I did not confirm this but I think that this library need an interruption pin, so I do not know about compatibility with other boards)
CodeJust do to the example folder of your Arduino IDE locate the MPR121 folder and load the example code according to the keypad that you have connected.
Or upload the ones in the attachment files.
Test it.
I've you like this project, do not forget to click it as Favorite.
I'm starting my Youtube channel, so fell free to stop by and subscribe it to be notified of the latest video.
Check also my previous tutorials.
Also, all suggestions and improvements are welcome.
"Do not get bored, do something"

Comments