

With technological advancements in consumer electronics, nowadays almost every appliance in our home is remote controlled.
Managing a different Remote (average figure) for TV, AC, Fan, DVD, DTH, etc., is quite difficult. What if we could have only one remote capable of working as a dedicated remote for any appliance any time?
Presented here is such a device based on Arduino that can act as Remote control for any appliance when needed.
The remote controls for electronic appliances use IR (Infra-Red) communication technique. A specific code is assigned to each key of the remote, based on a standard protocol.
There are various protocols designed by manufacturers, such as NEC, Sony SIRC, Philips RC5, Philips RC6; each carrying a different coding scheme. For example, in NEC protocol based remote, 32-bit code is transmitted, whereas in SONY, 12-bit code is transmitted.
Basically, these codes are nothing but pulses with two levels viz. High and Low. The duration of each pulse is in milliseconds, which is decided by the manufacturer.
The frequency at which the signal is modulated is standardized to 38 kHz. To prevent interference from IR sources such as sunlight or lights, the LED is not turned on steadily, but is turned on and off at a modulation frequency (typically 36 or 38KHz). Thus every receiver must be capable of receiving a 38 kHz signal effectively. A very simple and reliable device for IR signal reception is TSOP17XX, where XX denotes the frequency to which it responds. TSOP1738 is commonly used in IR receiver applications.
TSOP 1738
The TSOP is a miniaturized receiver for infrared remote control systems. PIN diode and preamplifier are assembled on lead frame, while the epoxy package is designed as IR filter. The demodulated output signal can be directly decoded by a microprocessor. TSOP is the standard IR remote control receiver series, supporting all major transmission codes. Its output is active low.
How to Decode a Remote?To know what signal is transmitted when a key on remote is pressed, we need to decode it. This can be done with the help of oscilloscope. Although it seems quite difficult, finding an oscilloscope at home is not possible. Well, an affordable solution to this problem lies in Arduino Library. “IRremote” library provides a ready code to decode the IR remote and display it on the serial monitor.
In Arduino IDE 1.0.5 and later, this comes pre-loaded, whereas for older version you can get the library from Arduino’s official website.
‘IRrecvDemo’ is a program to decode the IR signals. Get an Arduino and make connections with TSOP1738 as shown below.
Now upload the code ‘IRrecvDemo’ to the board.
After being done with uploading, open serial monitor window and point the remote you want to decode towards the TSOP sensor.
Press any key and a code (Hexadecimal) will appear on window. Note down the code for further reference.
If you do not know about the type of protocol of your remote, use the program ‘IRrecord’ in the examples. Upload the program and repeat the above procedure. On the serial monitor, you’ll find protocol type along with the HEX code.
Similarly, record the codes for all keys and remotes that you want to replicate into one. These HEX codes will be inserted in the program of universal remote.
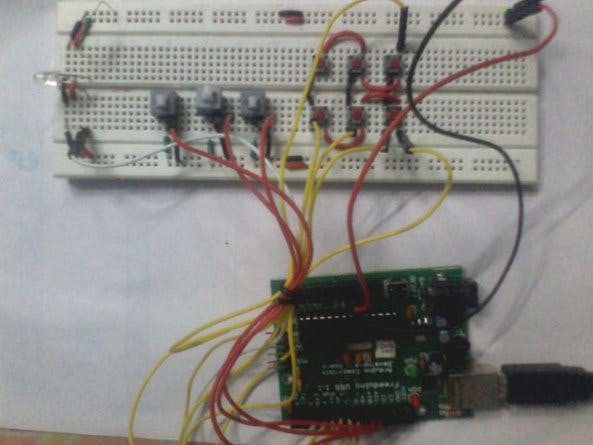
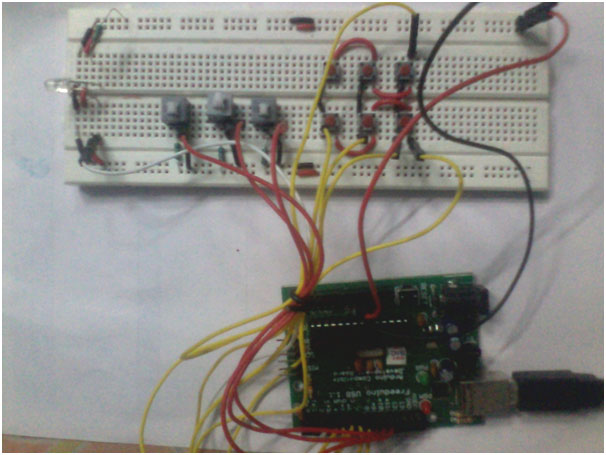
Making Up the Universal RemoteIn the remote we have made 6 keys viz., Channel UP; Channel DOWN; Volume UP; Volume DOWN; Power ON/OFF and MUTE.
These 6 keys are connected in a 2x3 matrix, which is easy to interface with Arduino.
Also, to select which appliance is to be operated, (since appliances have different protocols) we provide select buttons. The number of select buttons depends on the number of remotes to be replicated.
For the sake of simplicity we have taken 3 select buttons, 1 each for TV, DVD and DTH (You can choose any appliance depending on your requirement).
Thus, the remote control will have a total of 9 keys, (3 select and 6 operational keys).
The IR LED is connected between Digital pin 3 of Arduino and Ground through a 330E resistor.
Select switches are connected to digital pins 9, 10 and 11, whereas the operational keys are interfaced in the form of a 2x3 matrix with digital pins 4, 5, 6, 7 and 8.
Operation
The operation of the remote is quite simple and straight forward. The select buttons help to decide, which appliance will be controlled by the remote. Say, if Switch1 is pressed, Applliance1 (here, T.V.) will be controlled. Now, upon pressing operational keys, corresponding code will be transmitted.
After pressing operation, all work is done by the heart of the remote, i.e. Arduino and finally IR LED plays like cherry on the cake.

Comments