

Hardware components | ||||||
_ztBMuBhMHo.jpg?auto=compress%2Cformat&w=48&h=48&fit=fill&bg=ffffff) |
| × | 1 | |||
| × | 1 | ||||
| × | 2 | ||||
 |
| × | 4 | |||
| × | 1 | ||||
 |
| × | 6 | |||
Software apps and online services | ||||||
 |
| |||||
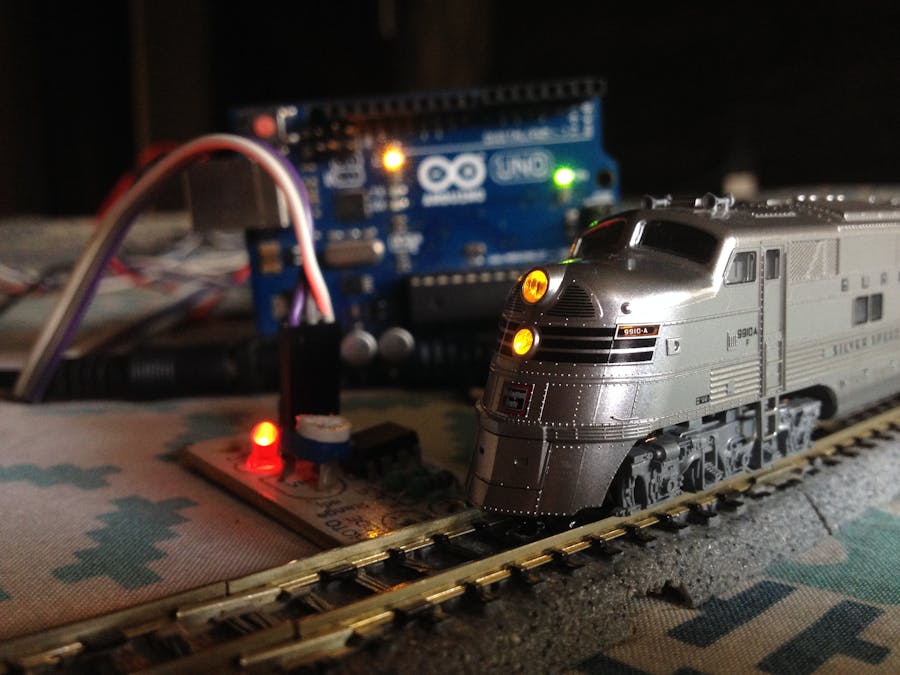
This project is an upgraded version of one of my previous projects. This uses an Arduino microcontroller, a great open-source prototyping platform, to automate a model railway layout. The layout comprises of a simple oval loop and a yard siding branching out from it to house the train. The Arduino microcontroller gets feedback from two 'sensored' tracks installed at two locations of the layout to carry out specific functions when the train crosses over them.
So, without further ado, lets get started!
Step 1: Watch the VideoWatch the above video to understand how this project works.
Step 2: Get All the Parts and StuffFor this project, you will require:
- An Arduino microcontroller board compatible with the Adafruit motor shield v2
- An Adafruit motor driver shield v2(Learn more about it here)
- An expansion shield(Optional but recommended to expand the power and ground pin connections for the sensors.)
- Two 'sensored' tracks
- Two sets of 3 male to female jumper wires(To connect the 'sensored' tracks to the Arduino board.)
- 4 male to male jumper wires(2 each for connecting the track power and the turnout to the motor shield's output terminals.)
- A 12-volt DC power source with a current capacity of at least 1A(1000mA)
- An appropriate USB cable (To connect the Arduino board to a computer.)
- A computer(To program the Arduino microcontroller.)
Make sure you have the Adafruit motor driver shield v2 library installed in your IDE. Go through the Arduino code to get an idea of how it works and how you can modify it in the future to experiment with the setup.
Connect the Arduino board to your computer and upload the attached Arduino code on it.
Step 4: Make a Test LayoutClick on the above image before proceeding to get more info about the layout. Make sure all the rail joints are properly made and the track's rails are cleaned to prevent the train from derailing and/or stalling.
Step 5: Install the Motor Shield on the Arduino BoardInstall the shield carefully on the Arduino board by aligning the pins of the shield with the headers of the Arduino board. Do it gently and make sure no pins of the shield get bent.
Step 6: Connect the Track Power Feeder and the Turnout Wires to the Motor ShieldConnect the output terminals of the shield marked as M1 to the track power wires and those marked as M4 to the turnout wires. Make note that the setup is compatible with only two wire solenoid type turnouts.
Step 7: Connect the 'Sensored' Tracks to the Arduino BoardInstall the expansion shield on the motor shield and connect each sensor's GND and VCC pins to the GND and +5-volt headers of the shield. Then make the following pin connections:
- Connect the output pin of the first sensor to the input pin A0 of the Arduino board.
- Connect the output pin of the second sensor to the input pin A1 of the Arduino board.
Place the train in the yard siding to prepare for the test run. Use of a rerailer tool is recommended to ensure that the locomotive and the rolling stock are placed properly on the tracks to prevent derailments.
Step 9: Connect the Arduino Board to PowerConnect the 12-volt DC power source to the Arduino board either through the power terminal block of the motor shield or the female barrel jack connector of the Arduino board. Before turning on the power, make sure all the wiring connections are made correctly and none of them are loose.
Step 10: Turn On the Power and Watch Your Train GoAfter turning on the power if the turnout switches the wrong way or the train starts to move in the wrong direction, reverse the polarity of the respective wires connected to the motor shield's output terminals.
Step 11: What's Next?If you have reached this far, you might want to relax a bit and enjoy your project. But if you want to do more stuff then you can try to modify the Arduino code and experiment with the setup to do something new. Whatever you do, all the best!


Comments