

Hardware components | ||||||
 |
| × | 1 | |||
 |
| × | 1 | |||
Software apps and online services | ||||||
 |
| |||||
Hand tools and fabrication machines | ||||||
 |
| |||||
 |
| |||||
Let's get started by live demo to get you all motivated :-)
https://randomnerdtutorials.com/how-to-install-esp...
Recommend to install version 1.8.3 or higher Arduino IDE
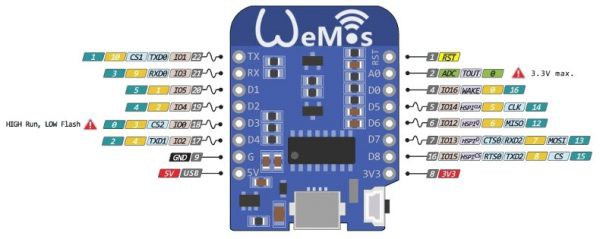
Note: After completing above step you should be able to see "Wemos D1 R & mini".
Refer attached images.
Connect the 10mm LED +ve to D3 of board and LED -ve to Boards Gnd pin. You can either use 1.5v x 2 AA baterry to power the board in non debug mode/production or use type 'c' USB data cable to connect to computer/laptop USB cable to debug or re-program.
AA battery +ve and -ve source is connected to Boards 3.3v and Gnd respectively.
Step 3:Compile and Upload the code.
Step 4:Go to WiFi in task bar -> connect to hot spot name: esphotspot. Password is embedded in code.
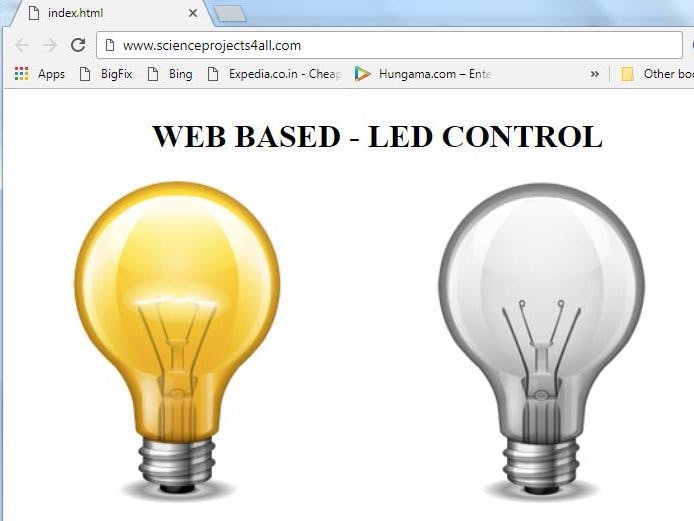
Open index.html
1. In case you want to update SSID, then need to refer to this WiFi Manager library examples how to go about as the board stores this details in EEPROM and merry change in Arduino code won't allow the board to update previously successfully connected hot spot SSID details. SO for beginners dont expect to change SSID or password to start with.
2. When operating from external power source here 2 AA baterry might not last very long as wifi connectivity drains the battery quite fast. Better option would be use mobile power bank say 10 or 20000 MAH and connect to boards 'c' type USB.
3. In case board is not detected there could be chances you are not running or logged in as Administrator account in OS and/or may not have USB port enabled.


Comments