

Hardware components | ||||||
 |
| × | 1 | |||
| × | 1 | ||||
| × | 1 | ||||
Software apps and online services | ||||||
 |
| |||||
Always wanted to make this project where we just don't open and close gripper manually. Here we use esp8266 and web socket concept to remotely control the Robotic arm.
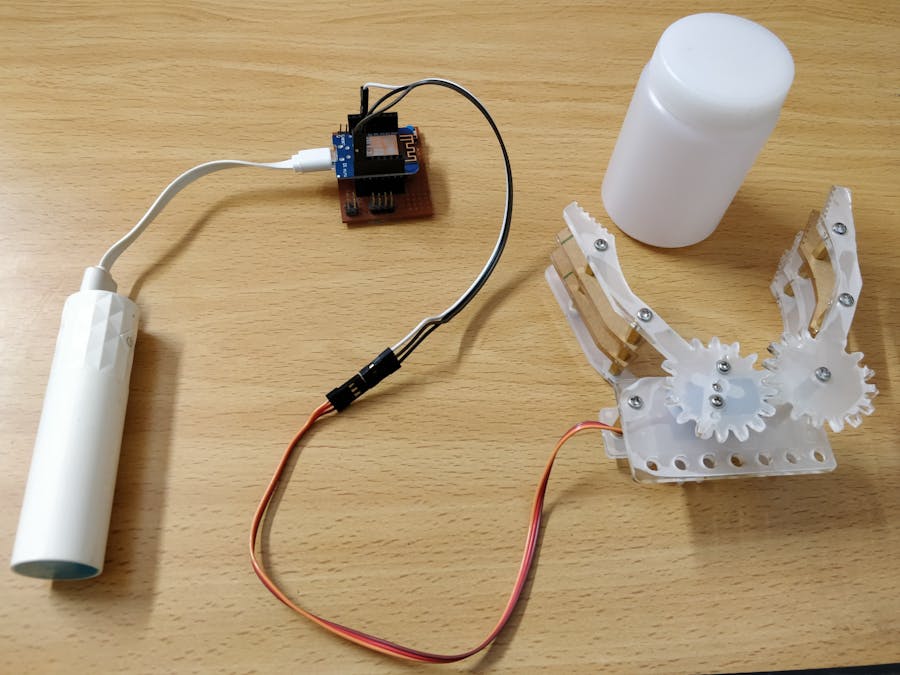
Live Demo:Step 1:How to connect the grippers servo motor to Wemos(ESP8266) board?
Connect the brown wire from the micro servo to the GND pin on the Wemos. Connect the red wire from the servo to the +5V on the Wemos. And finally, connect the orange wire from the SG90 servo to a digital pin (D7) on the Wemos.
Step 2:Upload code to Wemos Board. Refer code section.
Step 3:Testing -> Connect the laptop or mobile to hotspot: "espHotSpot". Password is embedded in the code.
Open browser and type url: http://192.168.4.1
Press enter. Change the position of the slider to see the gripper arm opening and closing based on slider position. If slider position is left most of screen then gripper is closed and slider is slides to right most of screen then gripper arm opens to max.
Note: The response is quite fast as it uses web sockets.
Setup snapshot
https://www.aliexpress.com/item/1set-Acrylic-Robot-Arm-Clamp-Claw-Mount-Kit-With-9G-Servo-For-Arduino-DIY-Robot-Kit/32783986597.html?ws_ab_test=searchweb0_0,searchweb201602_1_10152_10151_10065_10068_10344_10342_10343_10340_10341_10698_10697_10696_10084_10083_10618_10307_10059_308_100031_10103_441_10624_10623_10622_10621_10620,searchweb201603_25,ppcSwitch_5&algo_expid=c5297009-e816-440f-8bf0-b8c35a3715a0-0&algo_pvid=c5297009-e816-440f-8bf0-b8c35a3715a0&transAbTest=ae803_2&priceBeautifyAB=0


Comments