

Hardware components | ||||||
_ztBMuBhMHo.jpg?auto=compress%2Cformat&w=48&h=48&fit=fill&bg=ffffff) |
| × | 1 | |||
| × | 1 | ||||
| × | 1 | ||||
Software apps and online services | ||||||
 |
| |||||
Hand tools and fabrication machines | ||||||
 |
| |||||
Sponsored by DigitSpace
Products used: Sharp IR proximity sensor and 0.96″ OLED display 128×64 Blue/Yellow
Hello and welcome, this the first sponsored project from DigitSpace, and it’s about distance measuring using the Sharp IR proximity sensor GP2Y0A02YK0F, the measurement is in both metric and imperial systems, and we’ll use an OLED screen, there are a lot of possibilites to do with it: display the measurements with different units in the same time, switch between them…
The sensor emits beams of infrared light, and they reflect back to the sensor. the output can sometimes be digital like FC 51 IR module, which means at a certain distance it will give you a HIGH or LOW level, or like the one we’re using here which has an Analog Ouput: It gives you a voltage value depending on how far is the object to detect, but don’t forget that it depends on the object reflectiveness and the lighting conditions.
The range can also differ depending on the version mein has 20 cm -> 120 cm, so it’s better to use yours and test it to know its limits.
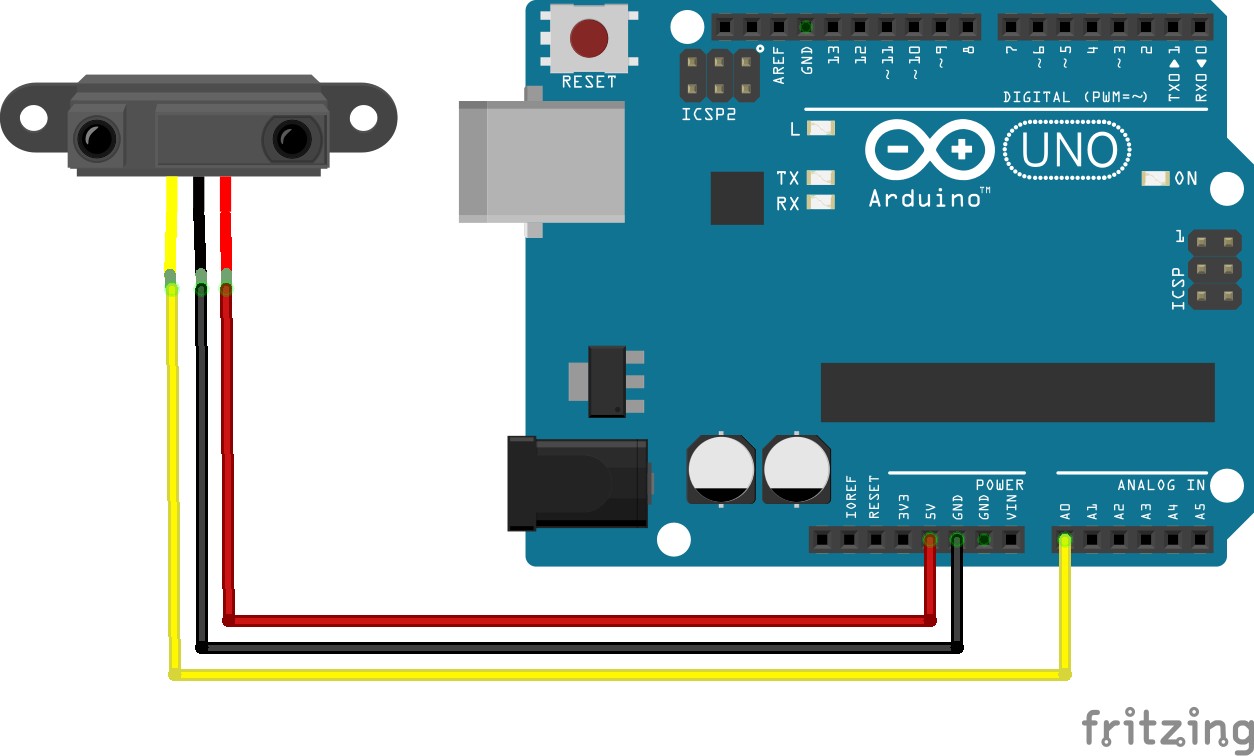
The Module has 3 wires: Vcc, Gnd and The Data or Output (Analog).
Test 1The first test is just direct wiring and distance measuring with display to the serial monitor.
WiringWiring 1 can be found below.
LibraryThere are different libraries to use but this one worked for me very well, you can download it from the link right here.
To install it, just: Arduino IDE -> Sketch -> Include library -> Add.ZIP file and select the library.
CodeCode 1 can be found below.
ResultUpload the code and open the serial monitor:
The issue with the module is that at distances inferior to 20 cm it starts to give strange values (40 cm 35 cm…) which is not suitable for close range applications.
OR AM I THE ONLY ONE WHO HAS THIS ISSUE? Well test and tell me.
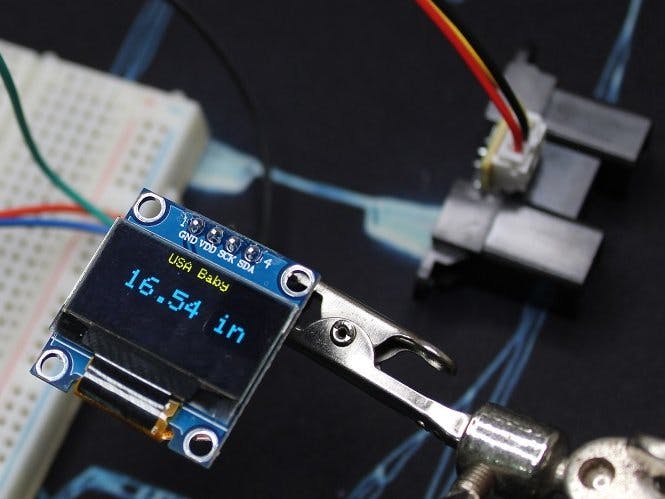
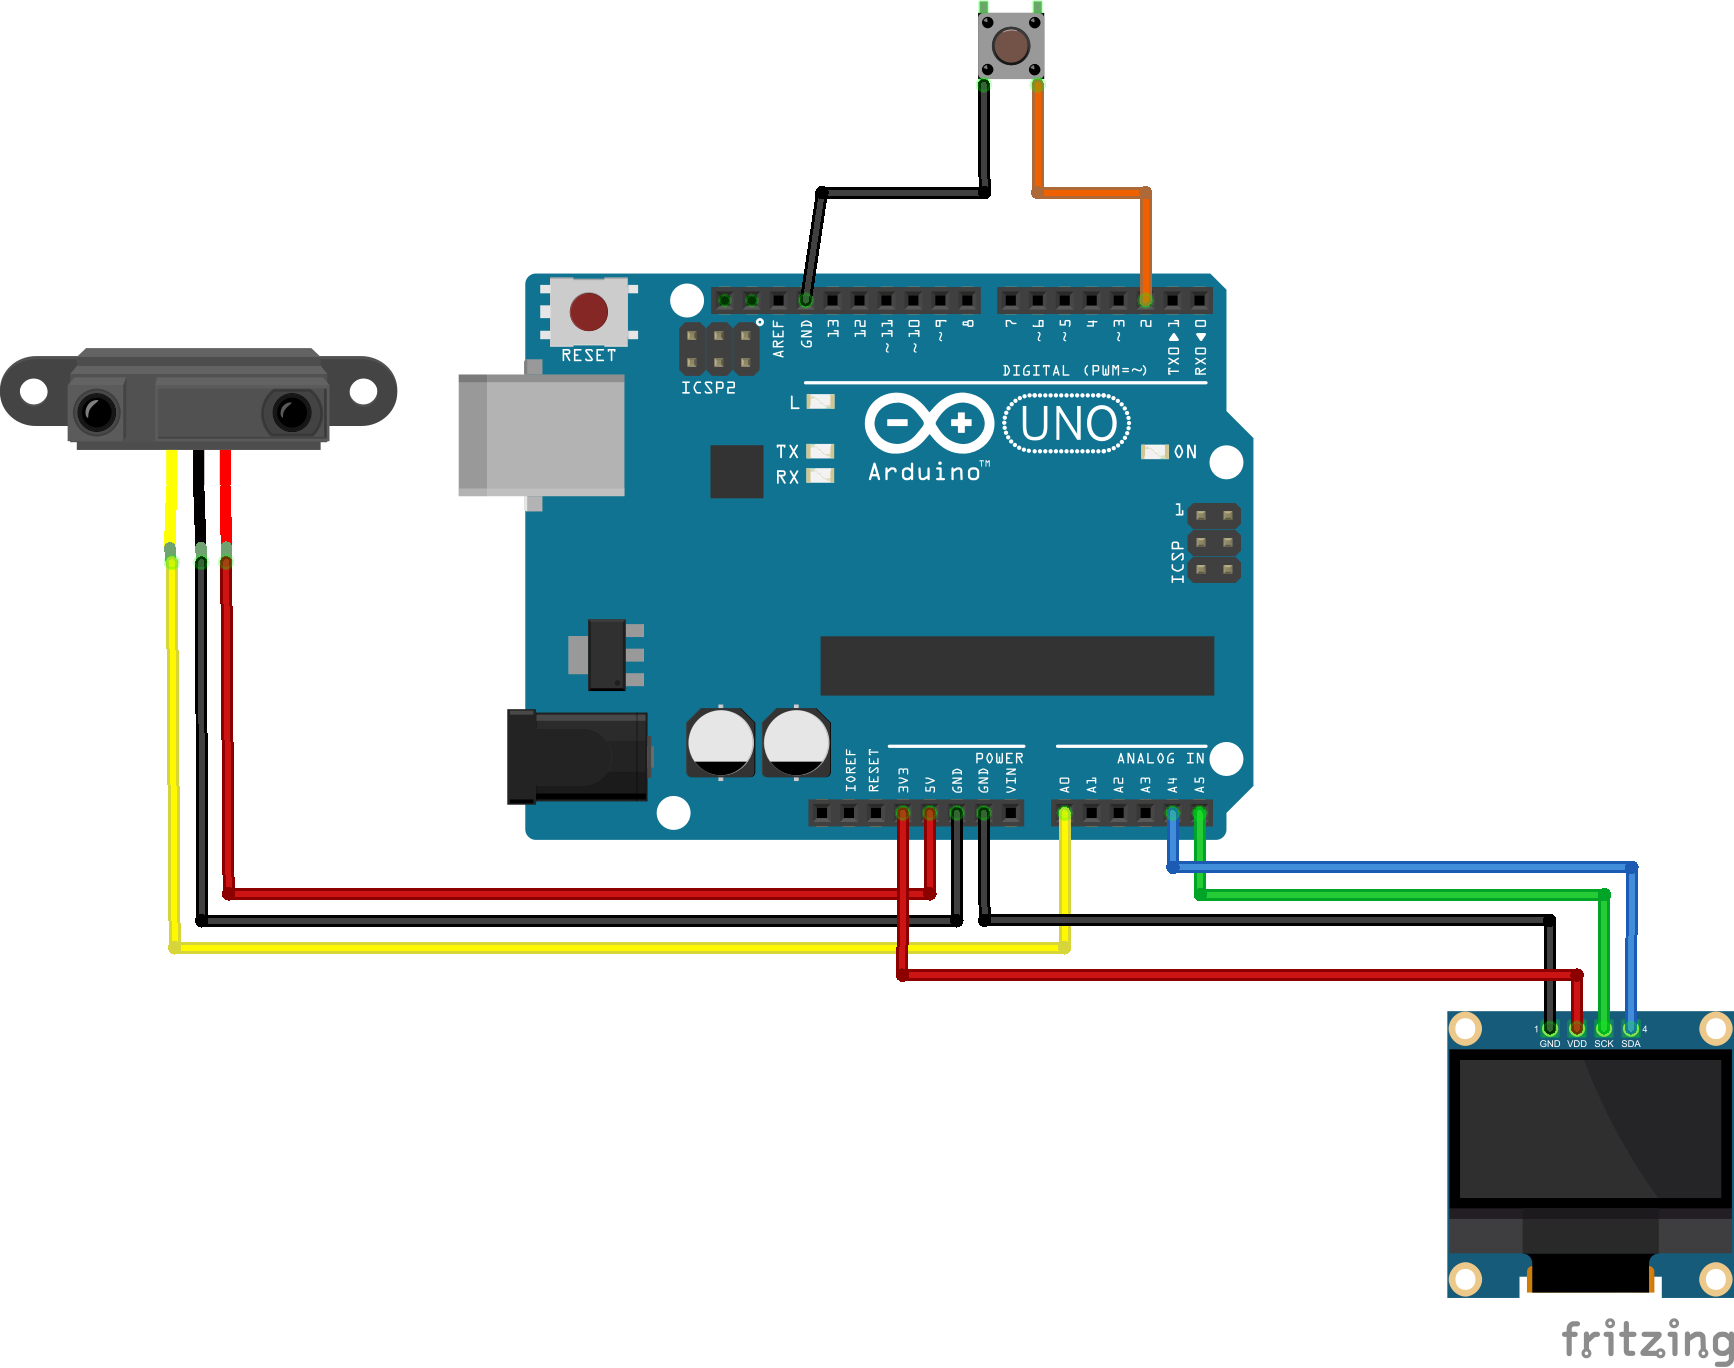
The test 2, just replace the serial monitor with an OLED display, and add a push button to switch between some units (cm-mm-in).
WiringWiring 2 can be found below
For the push button I like to use this wiring, and in the code I activate the internal pull-up, the button is always at HIGH state and when I press it goes LOW, you can use the usual method but you need to wire it with 5v and add a pull down resistor then set the pinMode as Input only and in the code activate the state as HIGH level instead of LOW.
And of course you can replace the OLED with the 128×32 version or LCD or whatever you like.
LibrariesIn addition of the sensor library used before: download it from the link right here, you should add the OLED Adafruit libraries:
Download here Adafruit OLED SSD1306 library. Download here Adafruit GFX Library.
CodeCode 2 can be found below.
ResultPress the button to switch between different units
You can do manual calibration to the module if you want, you can begin with voltage measuring for different distances and you can adjust from the code or library directly... pay attention to reflective and round objects.
You can of course add your prefered units or replace with your prefered display.


Comments