

Hardware components | ||||||
_ztBMuBhMHo.jpg?auto=compress%2Cformat&w=48&h=48&fit=fill&bg=ffffff) |
| × | 1 | |||
 |
| × | 2 | |||
Hello everyone,
Today we gonna see the full tutorial on how to control the 2-Axis FPV camera cradle with joystick module, the camera cradle comes in a little package containing some acrylic supports and pieces, some screws and two servo motors.
Requirement: So please before you proceed, if you’re not familiar with the joystick, neither the servo motors, here are two tutorials for you:
So here we’ll use two methods to control the servos: the first one where the servos follow the position of the joystick and they move while we move our stick, the second one the servos start moving toward the direction where the joystick is pointing and they stay there until we move the stick again or change direction.
This is a demo of what we gonna have at the end:
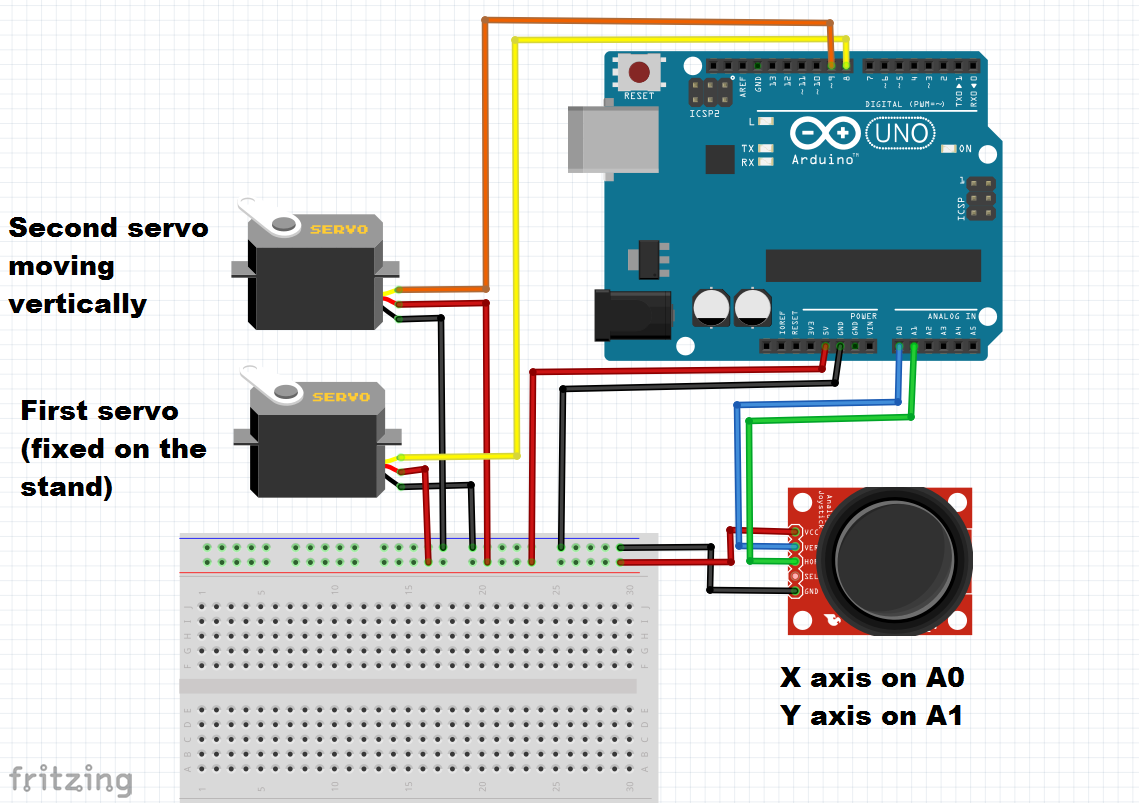
In the tutorial video I went step by step while wiring or calibrating also step by step while coding, but here I’ll give you the whole wiring which is not a problem because no module or servo is affecting the others.
To not be confused by the joystick axis my joystick has (X axis on top then Y axis) here in the picture they are inverted and named otherwise but I let the wiring as I used you can change it as you like (servo pins, joystick inputs, directions …)
So not to confuse you because I’ve actually used a lot of codes in the video, but they are very basic (servo positionning, reading analog value from joystick…) I’ve did this before you can check my other tutorials, so here I’ve only uploaded the two codes for the two final versions as seen in the video.
If you need anything about this you can contact me.


Comments