
Hardware components | ||||||
 |
| × | 1 | |||
 |
| × | 1 | |||
Software apps and online services | ||||||
 |
| |||||
Hello IOT starters. Surilli.io is back with yet another project made for beginners. In this tutorial we will learn how to read temperature and humidity of some specified surrounding. Both the temperature and humidity will be stored inside their variables and can be used for numerous practical applications. For now, we will just read and print the value in serial monitor.
STEP 1: Plug in your Surilli to the PCMake sure you have selected the right port, board and processor for the Surilli as shown in the picture below and it is programmable (compile and upload “Blink” from File>Examples>Digital>Blink onto your Surilli to check if everything is working fine).
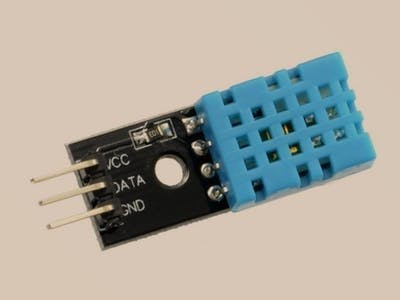
Connect the pins of DHT11 and Surilli as follows. DHT11 -> SURILLI
- GND -> GND
- VCC -> 3.3V
- DATA -> PIN10
- Download the library for DHT given below. Unzip it and paste in into: This PC > Documents > Arduino > libraries.
- Now you have completed setting up your hardware. Copy and paste the code given below into your Arduino IDE sketch and hit upload.
- After it is uploaded, Open serial monitor to visualize the temperature and humidity values.
#include <dht.h>
#define dht_apin 10 // Analog Pin sensor is connected to
dht DHT;
void setup(){
 Serial.begin(9600);
 delay(500);//Delay to let system boot
 Serial.println("DHT11 Humidity & temperature Sensor\n\n");
 delay(1000);//Wait before accessing Sensor
}
//end "setup()"
void loop(){
 //Start of Program
   DHT.read11(dht_apin);
   Serial.print("Current humidity = ");
   Serial.print(DHT.humidity);
   Serial.print("%  ");
   Serial.print("temperature = ");
   Serial.print(DHT.temperature);
   Serial.println("C  ");
   delay(5000);//Wait 5 seconds before accessing sensor again.
//Fastest should be once every two seconds.
}// end loop(
That’s all for now. If you have any queries, visit surilli.io or contact our support. Something big is coming up in the next couple of tutorials which will show you people the power of Surilli. Stay tuned ;)


Comments