The Grove AI HAT for Edge Computing is built around Sipeed MAix M1 AI MODULE with Kendryte K210 processor inside. It's a low-cost but powerful Raspberry PI AI HAT that assists the Raspberry Pi to run AI at the edge. It can also work independently for edge computing applications.
Today, we design a face counter demo to show you how to perform fast, accurate face detection with pre-trained deep learning face detector model.
Applications- You can use it in bookshop, unmanned supermarket, and clothing store to count the people who is interested in the specific product. Then base on the purchase record, you can determine how to improve conversion rate.
- You can use it in construction site or mine, to count the people going inside and match with the people coming outside for safety improvement.
This is just a simple application. We hope you can use this development board to create more AI applications to improve our lives.
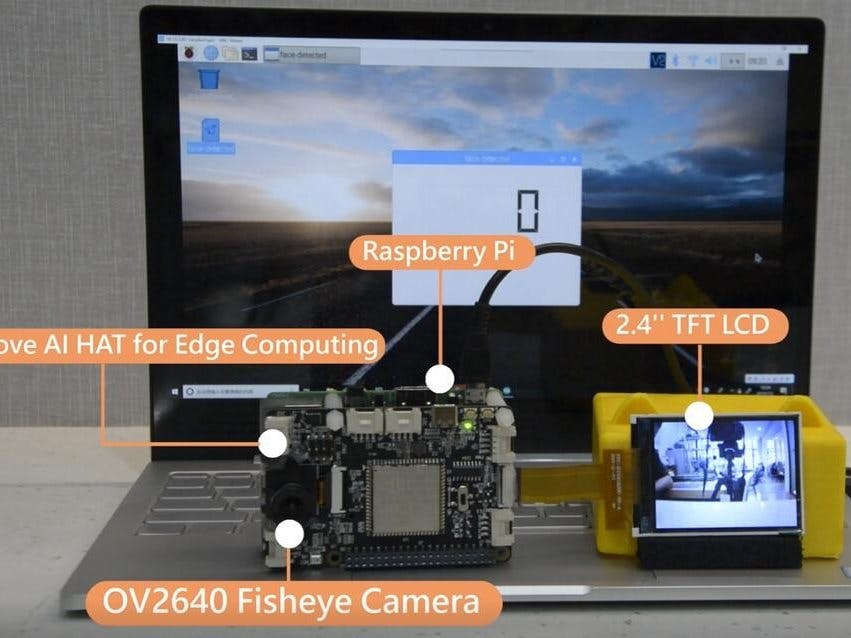
How does it work?The Grove AI HAT for Edge Computing and Kendryte face detect model are used to detect the face and the Raspberry Pi to count the faces.
Setup Grove AI HAT
- Step 1: Follow here to setup Arduino IDE.
- Step 2: Download Face_Detect_Demo on your desktop.
- Step 3: Follow here to download Face Detect Demo to Grove AI HAT.
- Step 4: Now you can use the camera to shoot faces, rotate the focus ring on the camera or adjust the distance from the camera to the face to make the face clear. A red box appears when it recognizes a face.
Set up Raspberry Pi- Step 1: Follow the instructions below to set up the face detection application.
cd ~
sudo apt-get install qt4-dev-tools
git clone https://github.com/LynnL4/face-detected.git
cd face-detected
sudo chmod -R 777 installer
cd installer
sudo ./setup.sh
- Step 2: There will be face detected icon on the raspberry pi desktop.
- Step 3: If it does not work, you can run below command.
sudo ./face-detected.sh
Stack Grove AI HAT on Raspberry Pi:- Step 1: Please power off the Grove AI HAT and Raspberry Pi.
- Step 2: Stack the Grove AI Hat on top of Raspberry Pi as shown below.
- Step 3: When the board is plugged into the Raspberry Pi, J4 needs to be dialed to the ON end. You just need to power on the rasspberry pi as above.
- Step 4: Follow here to setup raspberry pi wifi and get the ip address.
- Step 5: Follow here to setup vnc server on raspberry pi and vnc client on windows PC.
- Step 6: Open the vnc client on windows pc and connect to raspberry pi with ip address. The user name is pi and the password is raspberry.
- Step 7: Double click the face detect icon on raspberry pi desktop.
- Step 8: Now you can use the camera to shoot faces, the counter will accumulative count the face detected.


Comments