

Hardware components | ||||||
_ztBMuBhMHo.jpg?auto=compress%2Cformat&w=48&h=48&fit=fill&bg=ffffff) |
| × | 1 | |||
 |
| × | 1 | |||
Software apps and online services | ||||||
 |
| |||||
 |
| |||||
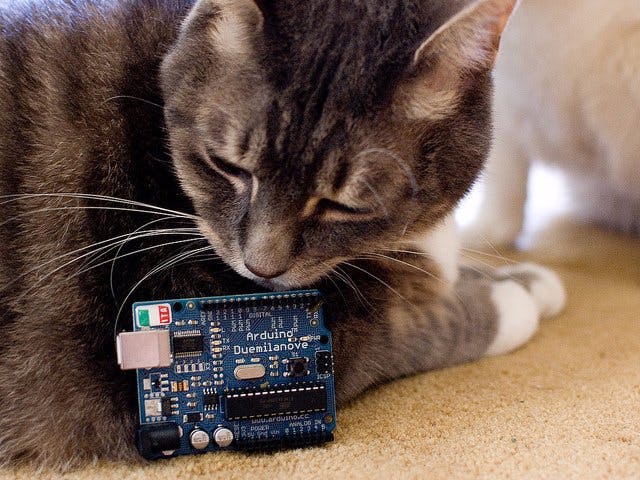
We live in a world where are lives are largely depended on technology, smartphones, social media, VR headsets, but have we ever asked ourselves how animals see and react to all this. Well I decided to conduct a small test "Prank" and find out. Very simple project to put together and code especially with the help of circuito.io well its a simple case of drag'n'drop. Below you'll find BOM, Schematic and Code from my circuito project. Now for prank purposes you can also use the code I've provided for the Arduino Genuino/101 using a base shield, buzzer and its on board Bluetooth.
BOM:
Wire:
The following video shows my cats reaction to my idea for a prank.
Arduino Genuino BLE Code
ArduinoThis is an other type of code you can use apart from the one given by circuit.io
#include <CurieBLE.h>

const int speaker = 4;

BLEPeripheral blePeripheral; // create peripheral instance

BLEService ledService("19B10000-E8F2-537E-4F6C-D104768A1214"); // create service

// create switch characteristic and allow remote device to read and write
BLECharCharacteristic switchChar("19B10001-E8F2-537E-4F6C-D104768A1214", BLERead | BLEWrite);

void setup() {
   Serial.begin(9600);
  pinMode(speaker, OUTPUT); // use the LED on pin 13 as an output

  // set the local name peripheral advertises
  blePeripheral.setLocalName("LEDCB");
  // set the UUID for the service this peripheral advertises
  blePeripheral.setAdvertisedServiceUuid(ledService.uuid());

  // add service and characteristic
  blePeripheral.addAttribute(ledService);
  blePeripheral.addAttribute(switchChar);

  // assign event handlers for connected, disconnected to peripheral
  blePeripheral.setEventHandler(BLEConnected, blePeripheralConnectHandler);
  blePeripheral.setEventHandler(BLEDisconnected, blePeripheralDisconnectHandler);

  // assign event handlers for characteristic
  switchChar.setEventHandler(BLEWritten, switchCharacteristicWritten);
// set an initial value for the characteristic
  switchChar.setValue(0);

  // advertise the service
  blePeripheral.begin();
  Serial.println(("Bluetooth device active, waiting for connections..."));
}

void loop() {
   // poll peripheral
   blePeripheral.poll();
}
void blePeripheralConnectHandler(BLECentral& central) {
  // central connected event handler
  Serial.print("Connected event, central: ");
  Serial.println(central.address());
}

void blePeripheralDisconnectHandler(BLECentral& central) {
  // central disconnected event handler
  Serial.print("Disconnected event, central: ");
  Serial.println(central.address());
}

void switchCharacteristicWritten(BLECentral& central, BLECharacteristic& characteristic) {
  // central wrote new value to characteristic, update LED
  Serial.print("Characteristic event, written: ");

  if (switchChar.value()) {
    Serial.println("LED on");
    digitalWrite(speaker, HIGH);
  } else {
    Serial.println("LED off");
    digitalWrite(speaker, LOW);
  }
}
// Include Libraries
#include "Arduino.h"
#include "BLEHM10.h"
#include "PiezoSpeaker.h"


// Pin Definitions
#define BLEHM10_PIN_RXD	10
#define BLEHM10_PIN_TXD	11
#define PIEZOSPEAKER_PIN_SIG	5

// Global variables and defines
String blehm10Str = "";
unsigned int piezoSpeakerHoorayLength          = 6;                                                      // amount of notes in melody
unsigned int piezoSpeakerHoorayMelody[]        = {NOTE_C4, NOTE_E4, NOTE_G4, NOTE_C5, NOTE_G4, NOTE_C5}; // list of notes. List length must match HoorayLength!
unsigned int piezoSpeakerHoorayNoteDurations[] = {8      , 8      , 8      , 4      , 8      , 4      }; // note durations; 4 = quarter note, 8 = eighth note, etc. List length must match HoorayLength!
// Constructors
BLEHM10 blehm10(BLEHM10_PIN_RXD,BLEHM10_PIN_TXD);
PiezoSpeaker piezoSpeaker(PIEZOSPEAKER_PIN_SIG);


// define vars for testing menu
#define TIMEOUT 10000       //define timeout of 10 sec
char menuOption = 0;
long time0;
/* This code sets up the essentials for your circuit to work. It runs first every time your circuit is powered with electricity. */
void setup() {
    // Setup Serial which is useful for debugging
    // Use the Serial Monitor to view printed messages
    Serial.begin(9600);
    while (!Serial) ; // wait for serial port to connect. Needed for native USB
    Serial.println("start");

    blehm10.begin(9600);
    //This example uses HM-10 BLE to communicate with an Android or iOS device.
    //For Android download Hm BLE Terminal from google play store, or any other BLE app.
    //For iOS download LightBlue from App Store, or any other BLE app.
    //On both apps, pair and connect to your HM-10
    //You should see this message your Smartphone
    blehm10.println("BLE On....");
}

/* This code is the main logic of your circuit. It defines the interaction between the components you selected. After setup, it runs over and over again, in an eternal loop. */
void loop() {
    // Read data from serial monitor if received
    while (Serial.available()) {
        char c = Serial.read();
        if (isAlphaNumeric(c)) {
          menuOption = c;
          printselection();
          time0 = millis();
    }}

    if(menuOption == '1' && testTimeout()) {
    //BLEHM10_SoftwareSerial - Test Code
    //Receive String from bluetooth device
    if (blehm10.available())
    {
        //Read a complete line from bluetooth terminal
        blehm10Str = blehm10.readStringUntil('\n');
        // Print raw data to serial monitor
        Serial.print("BT Raw Data: ");
        Serial.println(blehm10Str);
    }
    //Send sensor data to Bluetooth device
    blehm10.println("PUT YOUR SENSOR DATA HERE");

    }
    else if(menuOption == '2' && testTimeout()) {
    //PiezoSpeaker - Test Code
    // The Speaker will play the Hooray tune
    piezoSpeaker.playMelody(piezoSpeakerHoorayLength, piezoSpeakerHoorayMelody, piezoSpeakerHoorayNoteDurations);
    delay(500);
    }


    else
        menu();


}


// This is a menu function for selecting the components to be tested
// Follow serial monitor for instrcutions
char menu()
{
    Serial.println(F("\nWhich component would you like to test?"));
    Serial.println(F("(1) BLEHM10_SoftwareSerial"));
    Serial.println(F("(2) PiezoSpeaker"));
    Serial.println(F("(menu) send anything else or press on board reset button\n"));
    while (!Serial.available());
    delay(20);

}

// This section is used to print the selected option to the serial monitor
void printselection()
{
    if(menuOption == '1') 	Serial.println(F("Now Testing BLEHM10_SoftwareSerial"));
    else if(menuOption == '2') 	Serial.println(F("Now Testing PiezoSpeaker"));
    else  Serial.println(F("illegal input!"));
    Serial.println();
}

// This is a testTimeout function for the testing duration of a component
// Time out value is set by testTimeout which is defined before setup(), you can change it to make testing duration shorter/longer
bool testTimeout()
{
    if (millis() - time0 > TIMEOUT)
        return false;
    else
        return true;
}


/*******************************************************

*    Circuito.io is an automatic generator of schematics and code for off
*    the shelf hardware combinations.

*    Copyright (C) 2016 Roboplan Technologies Ltd.

*    This program is free software: you can redistribute it and/or modify
*    it under the terms of the GNU General Public License as published by
*    the Free Software Foundation, either version 3 of the License, or
*    (at your option) any later version.

*    This program is distributed in the hope that it will be useful,
*    but WITHOUT ANY WARRANTY; without even the implied warranty of
*    MERCHANTABILITY or FITNESS FOR A PARTICULAR PURPOSE.  See the
*    GNU General Public License for more details.

*    You should have received a copy of the GNU General Public License
*    along with this program.  If not, see <http://www.gnu.org/licenses/>.

*    In addition, and without limitation, to the disclaimers of warranties
*    stated above and in the GNU General Public License version 3 (or any
*    later version), Roboplan Technologies Ltd. ("Roboplan") offers this
*    program subject to the following warranty disclaimers and by using
*    this program you acknowledge and agree to the following:
*    THIS PROGRAM IS PROVIDED ON AN "AS IS" AND "AS AVAILABLE" BASIS, AND
*    WITHOUT WARRANTIES OF ANY KIND EITHER EXPRESS OR IMPLIED.  ROBOPLAN
*    HEREBY DISCLAIMS ALL WARRANTIES, EXPRESS OR IMPLIED, INCLUDING BUT
*    NOT LIMITED TO IMPLIED WARRANTIES OF MERCHANTABILITY, TITLE, FITNESS
*    FOR A PARTICULAR PURPOSE, NON-INFRINGEMENT, AND THOSE ARISING BY
*    STATUTE OR FROM A COURSE OF DEALING OR USAGE OF TRADE.
*    YOUR RELIANCE ON, OR USE OF THIS PROGRAM IS AT YOUR SOLE RISK.
*    ROBOPLAN DOES NOT GUARANTEE THAT THE PROGRAM WILL BE FREE OF, OR NOT
*    SUSCEPTIBLE TO, BUGS, SECURITY BREACHES, OR VIRUSES. ROBOPLAN DOES
*    NOT WARRANT THAT YOUR USE OF THE PROGRAM, INCLUDING PURSUANT TO
*    SCHEMATICS, INSTRUCTIONS OR RECOMMENDATIONS OF ROBOPLAN, WILL BE SAFE
*    FOR PERSONAL USE OR FOR PRODUCTION OR COMMERCIAL USE, WILL NOT
*    VIOLATE ANY THIRD PARTY RIGHTS, WILL PROVIDE THE INTENDED OR DESIRED
*    RESULTS, OR OPERATE AS YOU INTENDED OR AS MAY BE INDICATED BY ROBOPLAN.
*    YOU HEREBY WAIVE, AGREE NOT TO ASSERT AGAINST, AND RELEASE ROBOPLAN,
*    ITS LICENSORS AND AFFILIATES FROM, ANY CLAIMS IN CONNECTION WITH ANY OF
*    THE ABOVE.
********************************************************/


Comments