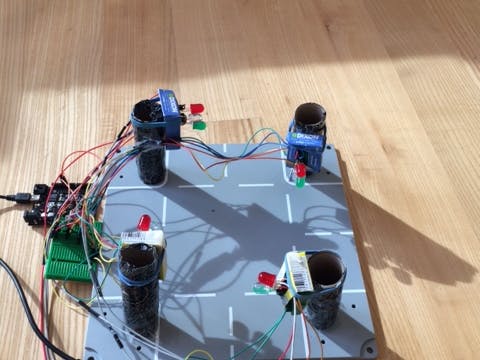
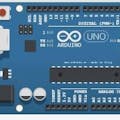
Rosaliew
Published © Apache-2.0

Traffic Station!

This is a model of a real traffic station. It is powered with 2 Arduino's. I made it for a CSTEM expo at school. I hope you enjoy it.

IntermediateShowcase (no instructions)777
Traffic Station!

Things used in this project

Story

Read more

Schematics

Schema Traffic Station

A schema to make the Traffic Light.

Code

Code Arduino1

Arduino
The code of Arduino1
/*
  Blink
  Turns on an LED on for one second, then off for one second, repeatedly.

  Most Arduinos have an on-board LED you can control. On the UNO, MEGA and ZERO 
  it is attached to digital pin 13, on MKR1000 on pin 6. LED_BUILTIN is set to
  the correct LED pin independent of which board is used.
  If you want to know what pin the on-board LED is connected to on your Arduino model, check
  the Technical Specs of your board  at https://www.arduino.cc/en/Main/Products
  
  This example code is in the public domain.

  modified 8 May 2014
  by Scott Fitzgerald
  
  modified 2 Sep 2016
  by Arturo Guadalupi
  
  modified 8 Sep 2016
  by Colby Newman
*/

void setup() {
  pinMode(13, OUTPUT);//red
  pinMode(12, OUTPUT);//green
  pinMode(11, OUTPUT);//yellow
}

// the loop function runs over and over again forever
void loop() {
  digitalWrite(13, HIGH);  
  delay(8000);                      
  digitalWrite(13, LOW); 
digitalWrite(12, HIGH);
  delay(5000);                      
digitalWrite(12, LOW);
digitalWrite(11, HIGH);
delay(3000);
digitalWrite(11, LOW);
}

Arduino2

Arduino
The code of Arduino2
void setup() {
  // put your setup code here, to run once:
pinMode(13, OUTPUT); //Green
pinMode(12, OUTPUT);//Yellow
pinMode(11, OUTPUT);//red
}

void loop() {
  // put your main code here, to run repeatedly:
  digitalWrite(13, HIGH);  
  delay(5000);                      
  digitalWrite(13, LOW); 
digitalWrite(12, HIGH);
  delay(3000);                      
digitalWrite(12, LOW);
digitalWrite(11, HIGH);
delay(8000);
digitalWrite(11, LOW);
}

Credits

Rosaliew

Rosaliew

2 projects • 6 followers

Comments