Romekmil
Published © CC BY-ND

Johanus convert to consola MIDI for Hauptwerk or GrandOrgue

Johanus Opus electronic analog organ convert to consola MIDI for Hauptwerk or GrandOrgue

IntermediateWork in progress10 hours329
Johanus convert to consola MIDI for Hauptwerk or GrandOrgue

Things used in this project

Story

Read more

Schematics

Board in Esy Eda online

Board in Esy Eda online

Code

Registry Johanus

C/C++
Program Registers Arduino Nano r3
/*
 * I_man_ZAMBROW_NEW-ver_Midi_matrix_for_micro__7x8_keyboard_in_surfacecontroll
 * Author: R. Milewski
 * for nano and uno
 *
 * 
 *  Written by PieterP, 28-01-2019  
 * https://github.com/tttapa/Control-Surface
 */
#include <Control_Surface.h>
//Instantiate a MIDI over USB interface.
//USBDebugMIDI_Interface midi;
//HardwareSerialMIDI_Interface midi;
//HardwareSerialMIDI_Interface midi = Serial;
HardwareSerialMIDI_Interface midiser = Serial;
//HairlessMIDI_Interface midiser;

MIDI_PipeFactory<1> pipes;

// The note numbers corresponding to the buttons in the matrix
// inny kirunek diód
const AddressMatrix<8, 6> addresses = {{
  { 36, 44, 52, 60, 68, 76 }, 
  { 37, 45, 53, 61, 69, 77 }, 
  { 38, 46, 54, 62, 70, 78 },  
  { 39, 47, 55, 63, 71, 79 },  
  { 40, 48, 56, 64, 72, 80 }, 
  { 41, 49, 57, 65, 73, 81 }, 
  { 42, 50, 58, 66, 74, 82 },  
  { 43, 51, 59, 67, 75, 83 },  
  
}};

NoteButtonMatrix<8, 6> buttonmatrix = {
  
 {2, 3, 4, 5, 6, 7, 8, 9}, // row pins
 
 {A0, A1, A2, A3, A4, A5}, // column pins
 
  addresses, // address matrix
  CHANNEL_6, // channel and cable number
};
void setup() {
  // Initialize everything
Control_Surface.begin();
 midiser >> pipes >> midiser; //all incoming midi from Serial is looped back
     midiser.begin();
}

void loop() {
  // Update the control surface
Control_Surface.loop();
 midiser.update();
}

Johanuss - man I and manII

C/C++
Keyboard man. I and man II - arduino mega 2650
/**
 * for ATmega328p or Arduino uno, nano, pro mini
 * Autor: Ro. Milew
 *
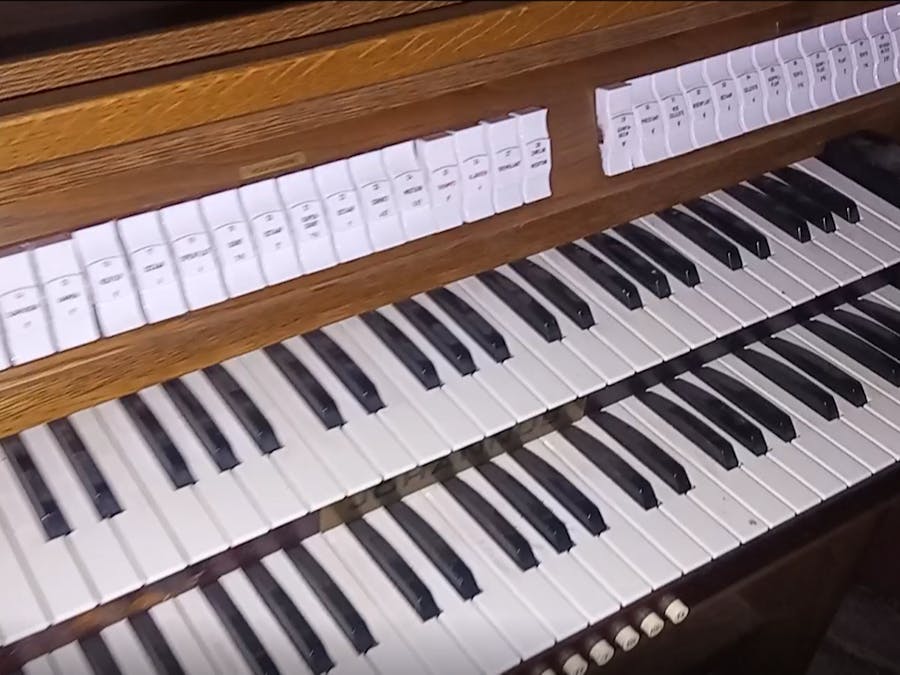
 * The third processor for registers converted Yamaha E-10AR to a MIDI console
 * @brief   This example demonstrates the use of push buttons that send note 
 *          events.
 * 
 * ### Connections
 * 
 *  - 2:  momentary push button (to ground)
 *  - 3:  momentary push button (to ground)
 * 
 * The internal pull-up resistors for the buttons will be enabled automatically.
 * 
 * ### Behavior
 * 
 * Pressing the first button will send note on/off events on middle C.
 * Pressing the second button will send note on/off events for middle C sharp.
 * 
 * Written by PieterP, 28-01-2019  
 * https://github.com/tttapa/Control-Surface
 */

// Include the Control Surface library
#include <Control_Surface.h>

// Instantiate a MIDI over USB interface.
//USBDebugMIDI_Interface midi;
//HardwareSerialMIDI_Interface midi;
//HardwareSerialMIDI_Interface midi = Serial;
HardwareSerialMIDI_Interface midiser = Serial;
//HairlessMIDI_Interface midi;

MIDI_PipeFactory<1> pipes;

using namespace MIDI_Notes;

// Instantiate the momentary push buttons that send out MIDI Note events.
NoteButton buttons[] = {
    //{2, note(C, 4)}, // digital input pin, note number
    //{3, note(Db, 4)},
    
    // If you want to set the channel specifically, you can use:
    // for UNO , nano
    {A0, {note(C, 2), CHANNEL_1}},
    {A1, {note(Db, 2), CHANNEL_1}},
    {A2, {note(D, 2), CHANNEL_1}},
    {A3, {note(Eb, 2), CHANNEL_1}},
    {A4, {note(E, 2), CHANNEL_1}},
    {A5, {note(F_, 2), CHANNEL_1}},
    {A6, {note(Gb, 2), CHANNEL_1}},
    {A7, {note(G, 2), CHANNEL_1}},
    {A8, {note(Ab, 2), CHANNEL_1}},
    {A9, {note(A, 2), CHANNEL_1}},
    {A10, {note(Bb, 2), CHANNEL_1}},
    {A11, {note(B, 2), CHANNEL_1}},
    {A12, {note(C, 3), CHANNEL_1}},
    {A13, {note(Db, 3), CHANNEL_1}},
    {A14, {note(D, 3), CHANNEL_1}},
    {A15, {note(Eb, 3), CHANNEL_1}},
    {2, {note(E, 3), CHANNEL_1}},
    {3, {note(F_, 3), CHANNEL_1}},
    {4, {note(Gb, 3), CHANNEL_1}},
    {5, {note(G, 3), CHANNEL_1}},
    {6, {note(Ab, 3), CHANNEL_1}},
    {7, {note(A, 3), CHANNEL_1}},
    {8, {note(Bb, 3), CHANNEL_1}},
    {9, {note(B, 3), CHANNEL_1}},
    {10, {note(C, 4), CHANNEL_1}},
    {11, {note(Db, 4), CHANNEL_1}},
    {12, {note(D, 4), CHANNEL_1}},
    {14, {note(Eb, 4), CHANNEL_1}},
    {15, {note(E, 4), CHANNEL_1}},
    {47, {note(F_, 4), CHANNEL_1}},
    {16, {note(Gb, 4), CHANNEL_1}},
    {17, {note(G, 4), CHANNEL_1}},
    {18, {note(Ab, 4), CHANNEL_1}},
    {19, {note(A, 4), CHANNEL_1}},
    {20, {note(Bb, 4), CHANNEL_1}},
    {21, {note(B, 4), CHANNEL_1}},
    {22, {note(C, 5), CHANNEL_1}},
    {23, {note(Db, 5), CHANNEL_1}},
    {24, {note(D, 5), CHANNEL_1}},
    {25, {note(Eb, 5), CHANNEL_1}},
    {26, {note(E, 5), CHANNEL_1}},
    {27, {note(F_, 5), CHANNEL_1}},
    {28, {note(Gb, 5), CHANNEL_1}},
    {29, {note(G, 5), CHANNEL_1}},
    {30, {note(Ab, 5), CHANNEL_1}},
    {31, {note(A, 5), CHANNEL_1}},
    {32, {note(Bb, 5), CHANNEL_1}},
    {33, {note(B, 5), CHANNEL_1}},
    {34, {note(C, 6), CHANNEL_1}},
    {35, {note(Db, 6), CHANNEL_1}},
    {36, {note(D, 6), CHANNEL_1}},
    {37, {note(Eb, 6), CHANNEL_1}},
    {38, {note(E, 6), CHANNEL_1}},
    {39, {note(F_, 6), CHANNEL_1}},
    {40, {note(Gb, 6), CHANNEL_1}},
    {41, {note(G, 6), CHANNEL_1}},
    {42, {note(Ab, 6), CHANNEL_1}},
    {43, {note(A, 6), CHANNEL_1}},
    {44,  {note(Bb, 6), CHANNEL_1}},
    {45,  {note(B, 6), CHANNEL_1}},
    {46,  {note(C, 7), CHANNEL_1}},
  
    
};

void setup() {
    // Initialize everything
    Control_Surface.begin();
    midiser >> pipes >> midiser; //all incoming midi from Serial is looped back
     midiser.begin();
}

void loop() {
    // Update the control surface
    Control_Surface.loop();
    midiser.update();
}

Johanus - Ped.

C/C++
Pedal - arduino Nano r3
/*
 * I_man_ZAMBROW_NEW-ver_Midi_matrix_for_micro__7x8_keyboard_in_surfacecontroll
 * Author: R. Milewski
 * for nano and uno
 *
 * 
 *  Written by PieterP, 28-01-2019  
 * https://github.com/tttapa/Control-Surface
 */
#include <Control_Surface.h>
//Instantiate a MIDI over USB interface.
//USBDebugMIDI_Interface midi;
//HardwareSerialMIDI_Interface midi;
//HardwareSerialMIDI_Interface midi = Serial;
HardwareSerialMIDI_Interface midiser = Serial;
//HairlessMIDI_Interface midiser;

MIDI_PipeFactory<1> pipes;

// The note numbers corresponding to the buttons in the matrix
// inny kirunek diód
const AddressMatrix<8, 6> addresses = {{
  { 36, 44, 52, 60, 68, 76 }, 
  { 37, 45, 53, 61, 69, 77 }, 
  { 38, 46, 54, 62, 70, 78 },  
  { 39, 47, 55, 63, 71, 79 },  
  { 40, 48, 56, 64, 72, 80 }, 
  { 41, 49, 57, 65, 73, 81 }, 
  { 42, 50, 58, 66, 74, 82 },  
  { 43, 51, 59, 67, 75, 83 },  
  
}};

NoteButtonMatrix<8, 6> buttonmatrix = {
  
 {2, 3, 4, 5, 6, 7, 8, 9}, // row pins
 
 {A0, A1, A2, A3, A4, A5}, // column pins
 
  addresses, // address matrix
  CHANNEL_6, // channel and cable number
};
void setup() {
  // Initialize everything
Control_Surface.begin();
 midiser >> pipes >> midiser; //all incoming midi from Serial is looped back
     midiser.begin();
}

void loop() {
  // Update the control surface
Control_Surface.loop();
 midiser.update();
}

Arduino code

Arduino code C++

Credits

Romekmil
15 projects • 12 followers

Comments