

Have you seen ghost haunting TV series. How they got to know where is spirit. What machine they use & what science is behind that machine. You will get the answer in this tutorial. We are going to make an EMF detector, also known as Ghost Detector. Ghost haunter community believes that spirit entities (ghosts) are an energy form. This energy in turn creates a disruption in the EMF field thus allowing your EMF meter to detect their presence. In short we are making Arduino EMF ghost detector with LCD. So let’s get started.
Components required:- Arduino,
- LCD display 16X2,
- I2C,
- 470k ohms Resistor, (You can use up to 3.3M ohms),
- LED,
- Piezo Buzzer,
- Jumper Wires,
- Soldering wire as an Antenna, (You can also use solid wire).
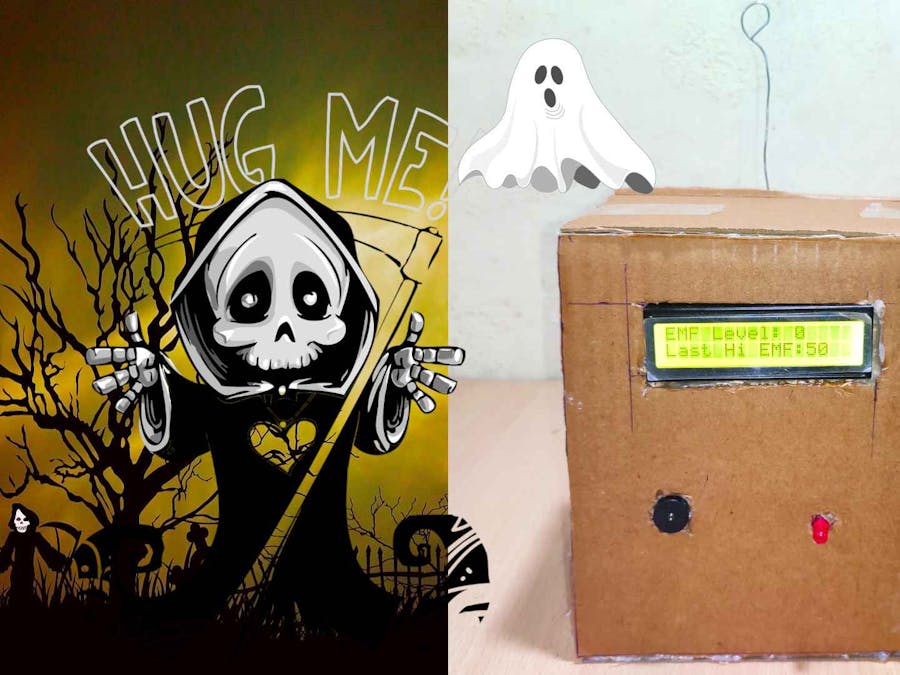
Whenever it detects EMF, LED will Light up and buzzer will make sound until detector is in EMF range. We have also added LCD, it will show how much EMF level is there and also note down last highest EMF was detected. To reset that highest value, either you can unplug power or press reset button on Arduino.
Required Libraries:Download library for I2C from GitHub, Open Arduino IDE, go to
Sketches → Include Libraries → Add.Zip File → add downloaded.zip file
Library added successfully, you can see confirmation at the bottom of Arduino IDE. To know more about how to add library click here.
Circuit for EMF Ghost Detector with LCD:for antenna you can use solid wire or soldering wire like I am using in this project. It works fine, detects EMF within 30 CM range.
Code for EMF Ghost Detector with LCD://RoboticaDIY.com
#include <LiquidCrystal_I2C.h>
// Set the LCD address to 0x27 for a 16 chars and 2 line display
LiquidCrystal_I2C lcd(0x3F, 16, 2);
int Antenna = A0;
int val = 0;
int LED = 11;
int buzzer = 6;
int high_emf, curr_emf;
void setup() {
pinMode(buzzer, OUTPUT);
Serial.begin(9600);
lcd.begin();
}
void loop() {
val = analogRead(Antenna);
lcd.setCursor(0, 0);
lcd.print("EMF Level: ");
lcd.setCursor(11, 0);
lcd.print(val);
lcd.setCursor(0, 1);
lcd.print("Last Hi EMF:");
lcd.setCursor(12, 1);
lcd.print(high_emf);
if(val >= 2){
val = constrain(val, 2, 100);
curr_emf = val;
val = map(val, 2, 100, 1, 255);
analogWrite(LED, val);
if (curr_emf> high_emf){
high_emf =curr_emf;
}
digitalWrite(buzzer, HIGH);
delay(100);
lcd.clear();
}else{
analogWrite(LED, 0);
digitalWrite(buzzer, LOW);
}
//Serial.println(val);
}Reading the analog value of the Antenna and storing value to val.
val = analogRead(Antenna);LCD present these texts and information about EMF Level.
lcd.setCursor(0, 0);
lcd.print("EMF Level: ");
lcd.setCursor(11, 0);
lcd.print(val);
lcd.setCursor(0, 1);
lcd.print("Last Hi EMF:");
lcd.setCursor(12, 1);
lcd.print(high_emf);If Antenna reading is greater then or equal to 2, it will turn ON light. We are also mapping val value to LED output. As a result brightness of LED also shows intensity of EMF. Val value is constrain 2 to 100, feel free to experiment with this value.
if(val >= 2){
val = constrain(val, 2, 100);
curr_emf = val;
val = map(val, 2, 100, 1, 255);
analogWrite(LED, val);when we get the reading on LCD, it is too fast to notice exact number. We can’t use delay because it will cause delay in detecting also. In order to notice that number I have written this piece of code, which will find the last highest emf value and print on lcd for us.
if (curr_emf> high_emf){
high_emf =curr_emf;
}Buzzer will make sound for 100 millisecond.
digitalWrite(buzzer, HIGH);
delay(100);
lcd.clear();If nothing detected or val is below given condition, LED & Buzzer remain OFF.
analogWrite(LED, 0);
digitalWrite(buzzer, LOW);I enjoyed making this project and I know you also enjoyed to implement this project. For more updates Please like and Subscribe my YouTube Channel. Till then Keep Learning Keep Making.
Recent Posts- How to make Arduino EMF ghost detector with LCD April 18, 2020
- How to Make Gesture Control Game with Arduino Leonardo April 16, 2020
- Slap Virtually with Arduino Leonardo – Fun Project April 14, 2020
- Raspberry Pi 4 Data Logger- DHT11/DHT22 Sensor Data Logger April 12, 2020
- ESP8266- Blynk Plot Sensor Readings in Live Charts & Export CSV File April 10, 2020

Comments