

Hardware components | ||||||
 |
| × | 1 | |||
Software apps and online services | ||||||
| ||||||
| ||||||
 |
| |||||
| ||||||
| ||||||
Hand tools and fabrication machines | ||||||
| ||||||
Temboo permits to créate Arduino applications using Temboo/Choreo platfom to link to Dropbox application folder. Therefore, after creating this APP in Choreo and Dropbox, and after an authorization procedure, you can do things like activate an input in your Arduino YUN. This board will send the command to the Linino side of the YUN to take a picture, and thanks to the Temboo/Choreo tool, this picture will be uploaded to your Dropbox app folder.
I have followed up, line by line, the following tutorial from Adafruit, and it works properly.
Step 1There are some Little issues when you run the Authout sketch but after loading the Tembo example of the Arduino IDE, just the example sketch of Temboo, UploadToDropbox, the communication to Choreo is established, and the picture can be uploaded to Dropbox Automatically.
https://learn.adafruit.com/wireless-security-camera-arduino-yun/introduction
I recommend to buy the same camera c270, since there are some incompatible cameras in Linux and the first time when I started with the project, I waste a couple of days with a problem of incompatibility.
Then, having the hardware, all works.
Step 2When you register the first time to Temboo, you can have 30 days plan with 100,000 calls and after this first month you will have the free plan with 250 calls.
"Call" is similar like a data transaction. If you upload a picture you will spend one or two calls. For one calendar month you have 250 calls and it is enough for playing and have an experience with Temboo.
Enjoy.
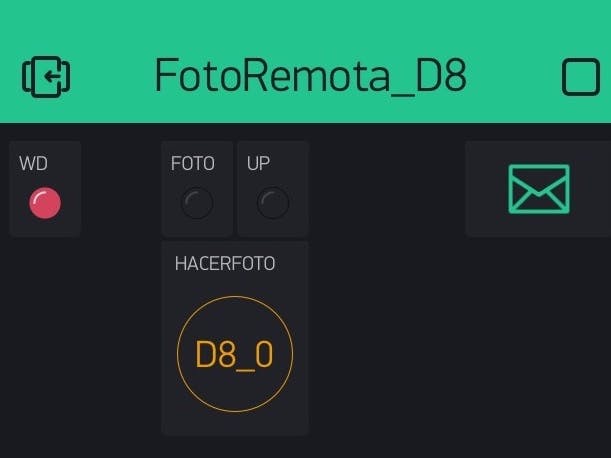
ConclusionsI have also added the Blynk library because you can add a control panel of the desired process from your mobile all around the world.
.........................................
If you did like this project you can donate some cents of Crypto currency
Bitcoins SV in the following address.
1sAZQMy5Ci1G88CmbucFJDsF7TxeXAcko
or bitcoin cash in the address:
qzmjpeqrlgd3flltpavm9t2xh0nz8y97mggajvvqnv
or Stellar XLM in the address:
GBAWDPQ4FTRXWE2ZUWVYYZ7XSCQGBYZGOWQMAHSA2FPGJ5QTLF4IJ3NX
thanks


Comments