


Hardware components | ||||||
_ztBMuBhMHo.jpg?auto=compress%2Cformat&w=48&h=48&fit=fill&bg=ffffff) |
| × | 1 | |||
 |
| × | 1 | |||
 |
| × | 1 | |||
- Jun 17
- 5 min read
- Ramesh G
Water Level Depth Detection and LED control with Bluetooth HC-05
In this article, we’re going to do an Arduino based water level depth sensor and (PWM) LED brightness control and interface with HC-05 Bluetooth module for Graphical representation using android mobile application and LCD display for Sensor dipped in water level data print.
Water sensor brick is designed for water detection, which can be widely used in sensing the rainfall, water level, even the liquate leakage. The brick is mainly comprised of three parts: An Electronic brick connector, a 1 MΩ resistor, and several lines of bare conducting wires. This sensor works by having a series of exposed traces connected to ground and interlaced between the grounded traces are the sense traces. The sensor traces have a weak pull-up resistor of 1 MΩ. The resistor will pull the sensor trace value high until a drop of water shorts the sensor trace to the grounded trace. Believe it or not this circuit will work with the digital I/O pins of your Arduino or you can use it with the analog pins to detect the amount of water induced contact between the grounded and sensor traces. This item can judge the water level through with a series of exposed parallel wires stitch to measure the water droplet/water size. This High Sensitivity Water Sensor can easily change the water size to analog signal, and output analog value can directly be used in the program function, then to achieve the function of water level alarm. This item have low power consumption, and high sensitivity, which are the biggest characteristics of this module. The High Sensitivity Water Sensor can be compatible with Arduino UNO, Arduino mega2560, Arduino ADK etc.
However, one commonly known issue with these sensors is their short lifespan when exposed to a moist environment. Having power applied to the probe constantly speeds the rate of corrosion significantly. To overcome this, we recommend that you do not power the sensor constantly, but power it only when you take the readings
The working of the water level sensor is pretty straightforward.
The series of exposed parallel conductors, together acts as a variable resistor (just like a potentiometer) whose resistance varies according to the water level. The change in resistance corresponds to the distance from the top of the sensor to the surface of the water.
The resistance is inversely proportional to the height of the water:
- The more water the sensor is immersed in, results in better conductivity and will result in a lower resistance.
- The less water the sensor is immersed in, results in poor conductivity and will result in a higher resistance.
The sensor produces an output voltage according to the resistance, which by measuring we can determine the water level.
Features :- Working voltage: DC5V
- Working Current: <20ma
- Interface: Analog
- Width of detection: 40mm×16mm
- Working Temperature: 10°C~30°C
- Humidity: 10% -90% non-condensing
- Arduino compatible interface
- Low power consumption
- High sensitivity
- Output voltage signal: 0~4.2V
- "S" stand for signal input
- "+" stand for power supply
- "-" stand for GND
r
LiquidCrystal_I2C.h : you need to Download and install the LiquidCrystal_I2C library.
Follow the next steps to install those libraries.
In your Arduino IDE, to install the libraries go to Sketch > Include Library > Add.ZIP library… and select the library you’ve just downloaded.
After installing the required libraries, copy the following code to your Arduino IDE.
Mobile outputSubscribe and Download code.
Download Android application.
Final result:
MIT Block for mobile application.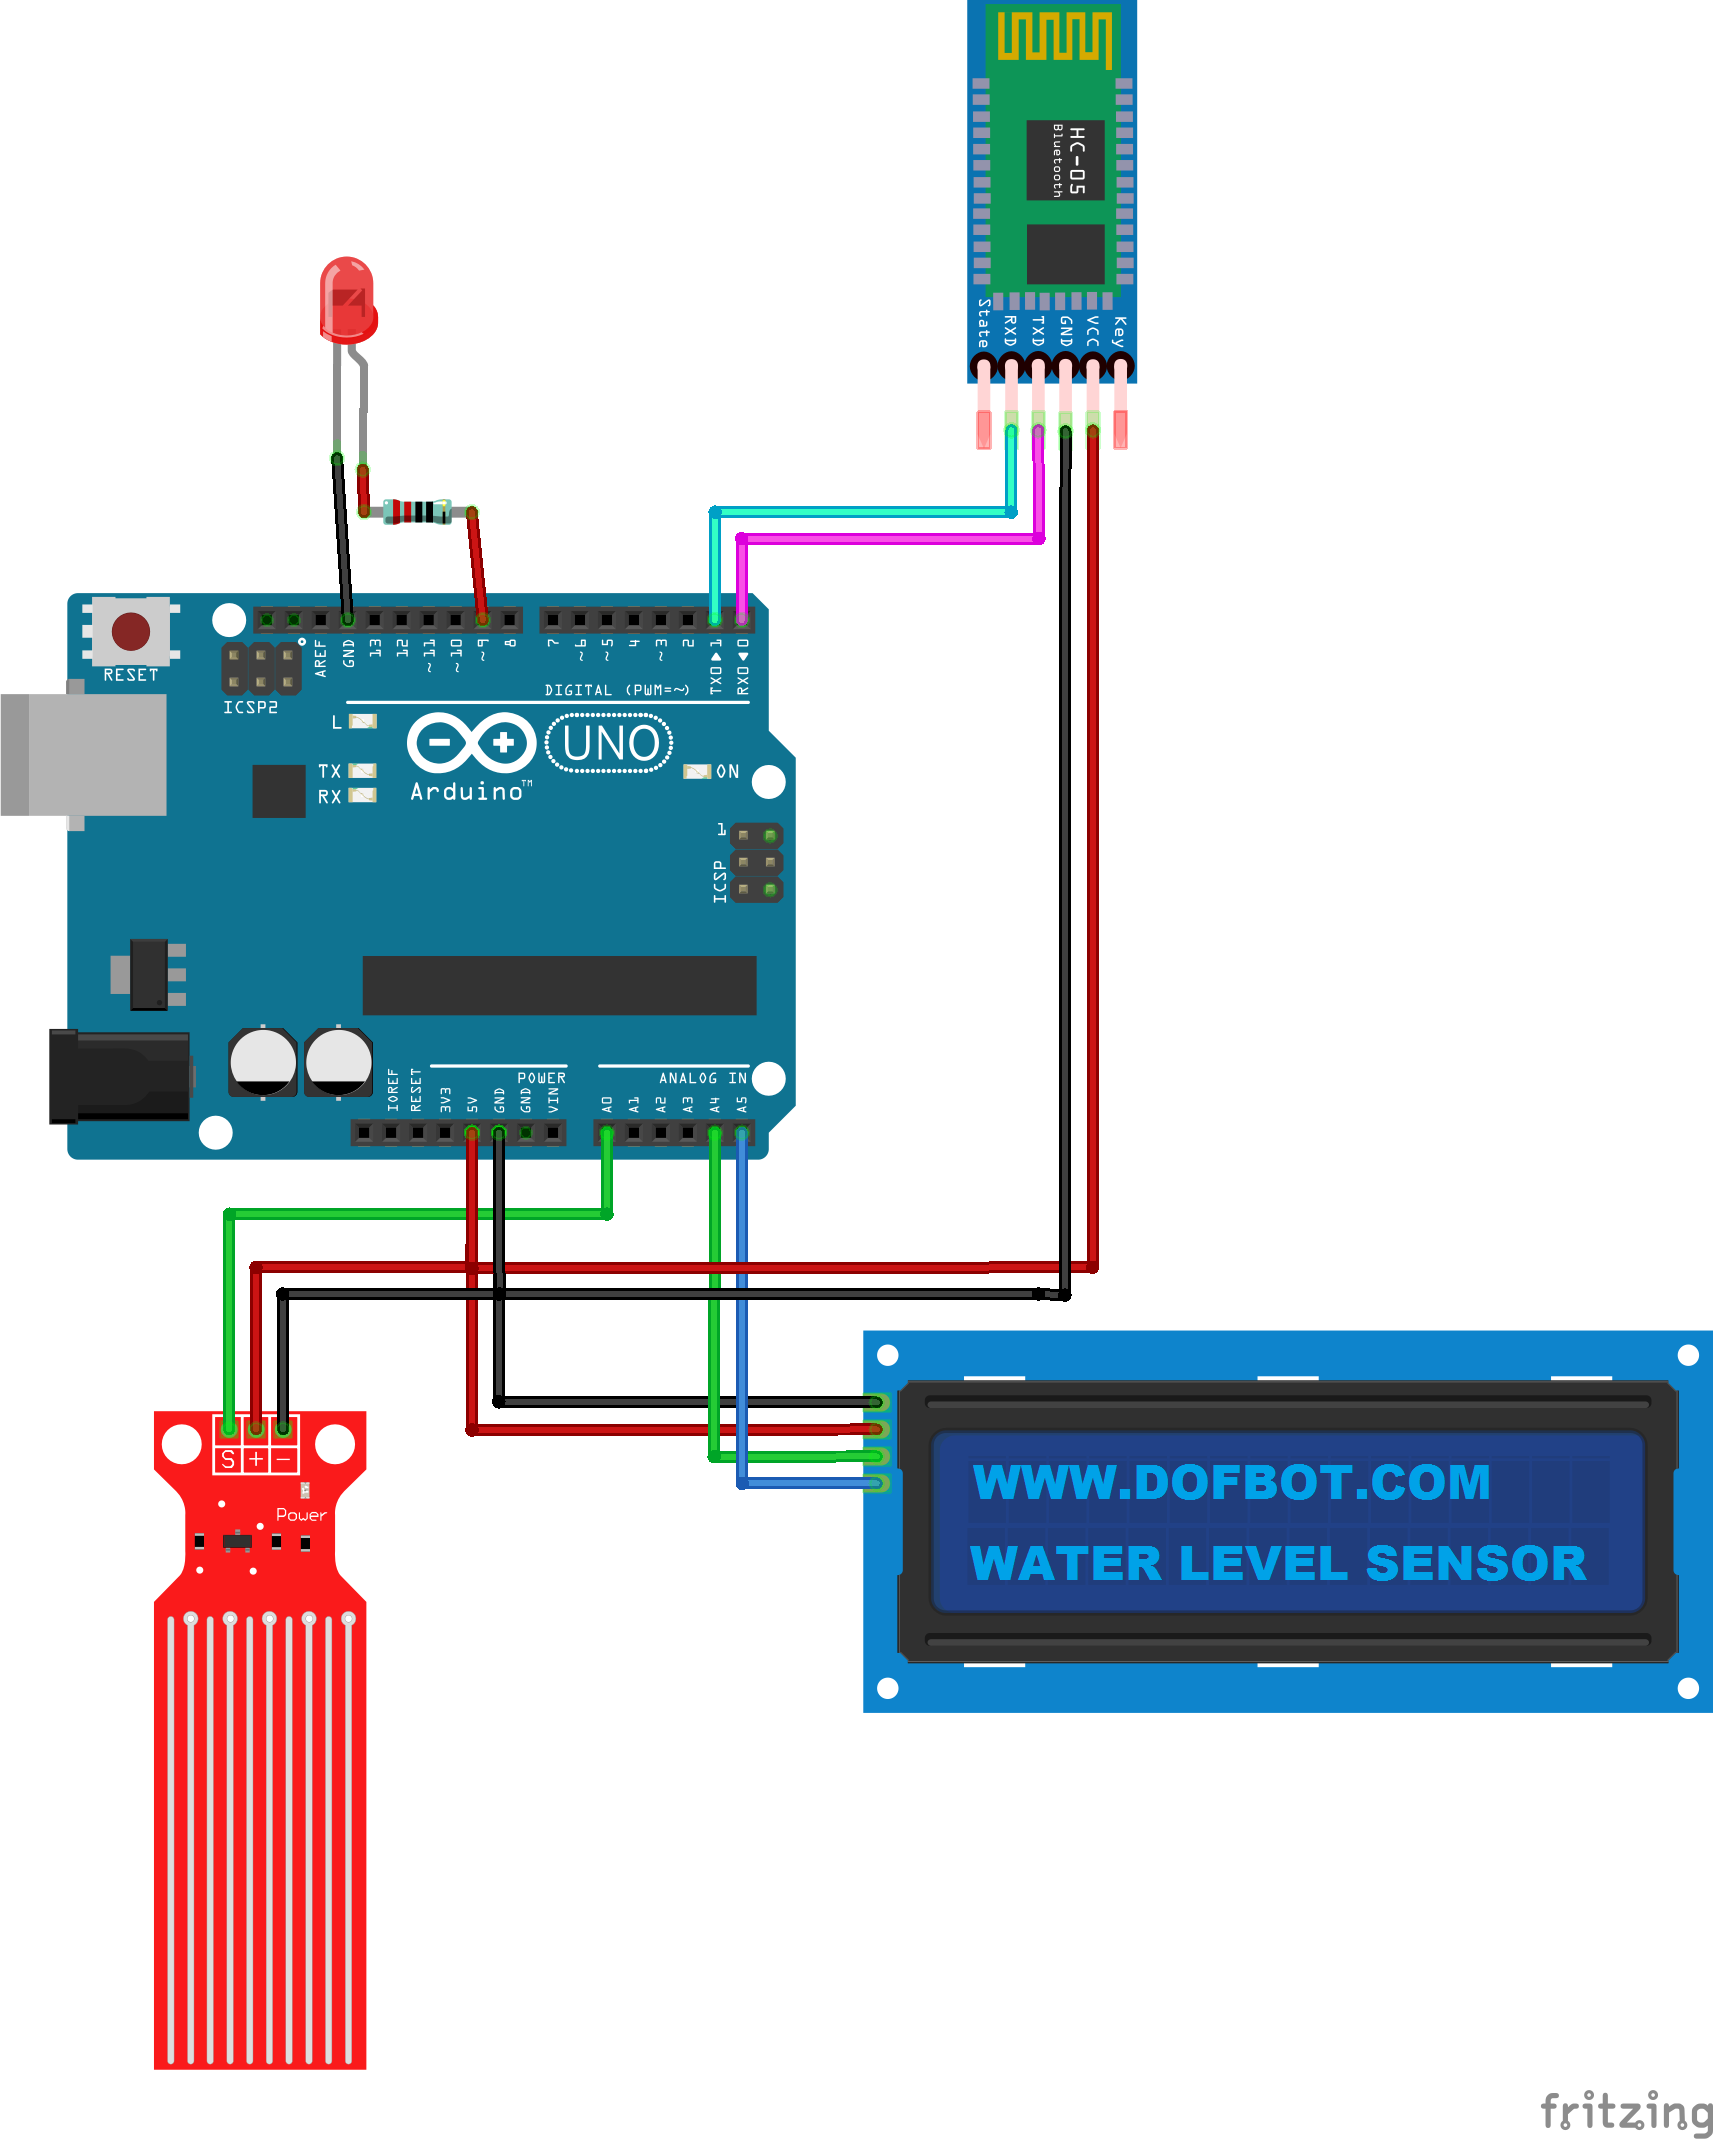

Comments