


Hardware components | ||||||
 |
| × | 1 | |||
 |
| × | 1 | |||
Software apps and online services | ||||||
 |
| |||||
| ||||||
Hand tools and fabrication machines | ||||||
| ||||||
My grandson has been interested in trains since he started with a non-powered Mega Bloks train when he was a toddler. He has since graduated to a Lego Duplo Steam train at home that has a battery powered engine and also can be controlled by a phone app. A friend recently bought him an older used Duplo train set that came with two battery powered engines, a lot of track, and other accessories. We use that at our house when we watch him. Not as full featured as his Steam train but it does have sound and a timed shutdown. He found a fake light bar among the accessories and he asked me why it didn't work. I explained to him that it wasn't a real light but it got me to wondering how difficult it would be to add some LEDs on the old train engine,
ImplementationI didn't want to do anything that required modifying the existing train engine, so I thought that I would add a standalone module that would could plug onto the existing Duplo brick pattern. The module would have its own battery and power switch.
The simplest implementation would would just use a single color self blinking LED that commonly flashes at about 1.5Hz. That would probably satisfy my grandson for now, but I thought it would be neat build him something that would be extensible in the future.
I've used M5Stack M5StickC modules to interface and control sensors remotely and they have neat features like a small LCD for display, a power button, a couple of user buttons, and a small LiPo battery with charging circuit. The latest version the Plus2 has a 200 mAh battery which should be fine if I'm just operating LEDs. I have the previous version, the Plus, which will be fine for proof of concept.
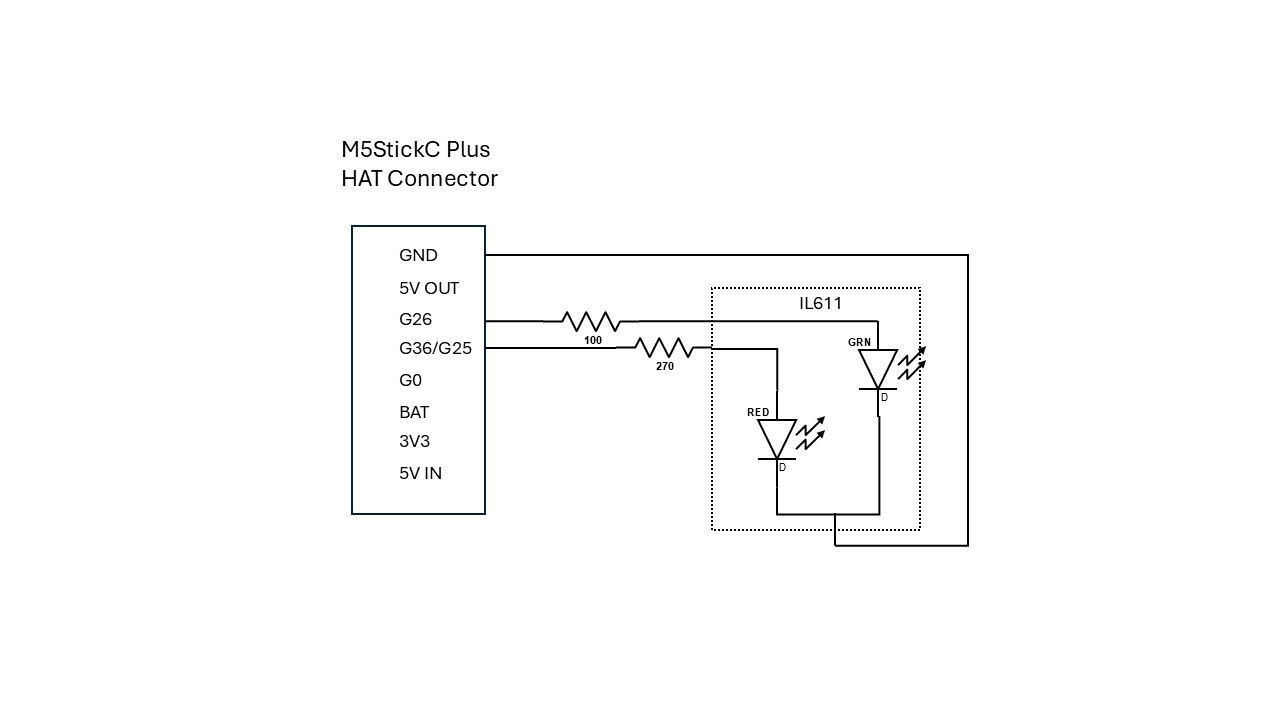
I decided to use a single 5mm RGB diffused common cathode LED and just control the red and green LEDs with the M5StickC Plus. I 3D printed a housing for the StickC and the RGB LED that fits onto the 2x4 brick pattern on top of the engine cab. I am driving the individual LEDs using 2 GPIOs on the female HAT header interface. The components are shown below.
Demonstrates operation of the program which is written using the Arduino IDE. The RGB LED blinking cycles through Red to Green to Off with successive presses of btnA on the front of the M5StickC Plus.
Engine assemblyMounted on the Duplo train engine.
A quick spin around a short track.


Comments