![How to Blink an LED with Arduino? [FOR BEGINNERS]](https://prod.hackster-cdn.online/assets/transparent-a0c1e3063bcabc548a5f3fa7328f3c1c97f747e6e764da4c14439567baa79ae1.gif)

![How to Blink an LED with Arduino? [FOR BEGINNERS]](https://hackster.imgix.net/uploads/attachments/938755/blob_7BGZr2bXjg.blob?auto=compress%2Cformat&w=900&h=675&fit=min)
Hardware components | ||||||
 |
| × | 1 | |||
 |
| × | 1 | |||
 |
| × | 1 | |||
_ztBMuBhMHo.jpg?auto=compress%2Cformat&w=48&h=48&fit=fill&bg=ffffff) |
| × | 1 | |||
Are you new to the world of Arduino and looking for some very simple project to begin with ?
Here is a small hobby project which can be made by anyone following some very simple instructions.
So let’s begin!
For more information visit Engineering World.
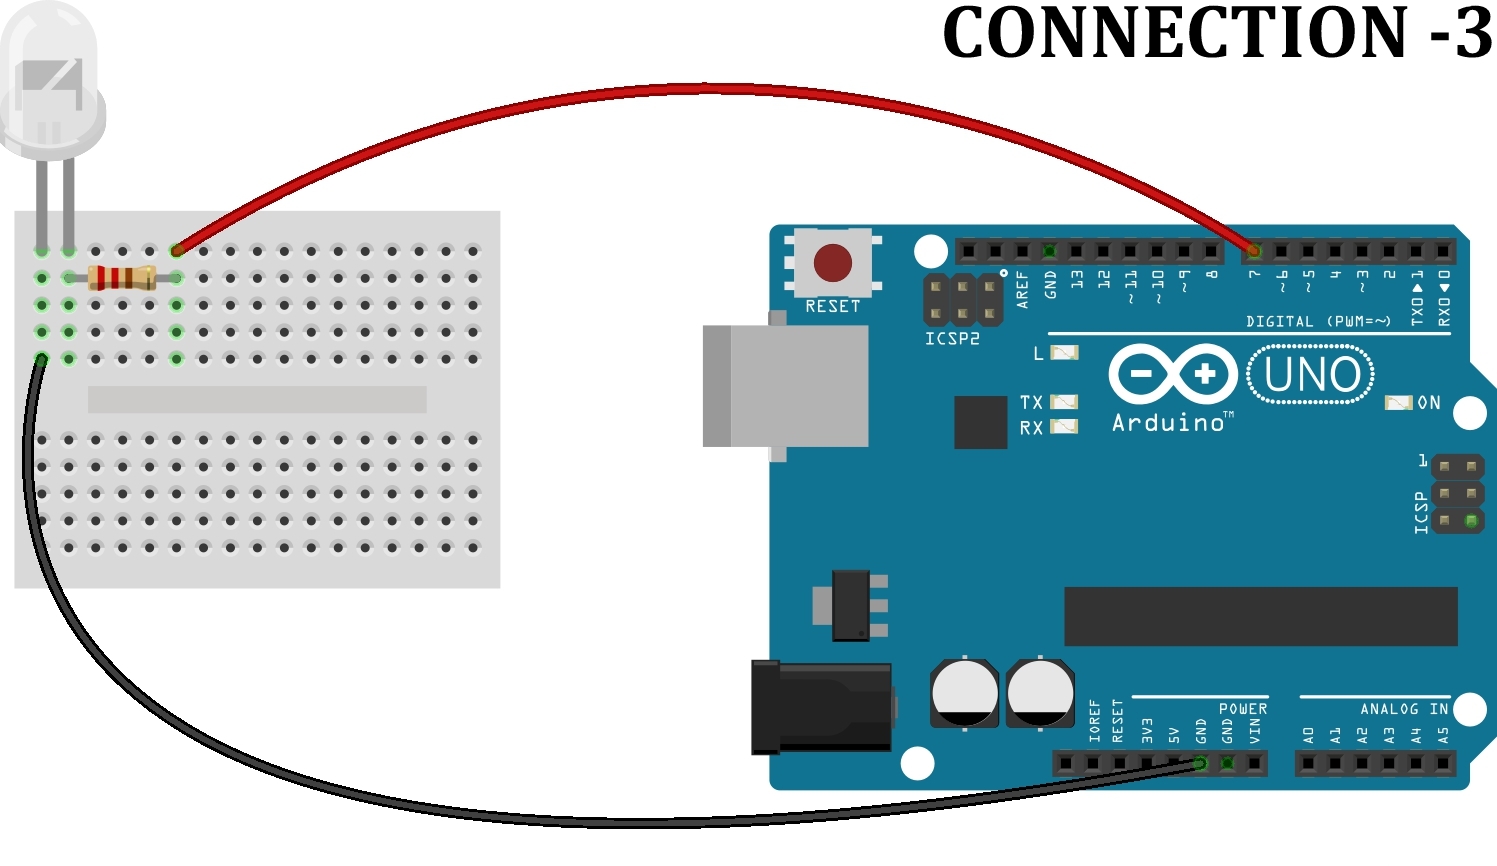
How Does It Work?The arduino board is programmed to give a +5V on pin number 7 for 1 second and then switch to 0V after 1 second thus giving a blinking the LED continuously.
Steps to follow :- Place the LED on the breadboard and connect the resistor in series with the LED as shown in the step by step connection diagrams.
- Using the connecting wires, connect the Arduino board with the LED and resistor, with this you will be done with the circuit.
- Now you need to plug the Arduino board into the computer and upload the code using Arduino IDE
- Once the code is uploaded, BINGO ! the LED should flash continuously. It will do that for as long as the device is plugged in and powered.


Comments