Hi, my name is Piyush, and this is my Ardu-Flute device - an electronic flute that produces sound using a passive buzzer, with active control of pitch, volume, and reactive lighting. I made this documentation for YOU to build it—have fun making it!
SUPPLIES Materials:
- Wires
- 1 Rechargeable 3.7 V battery
- 2 Cut Male Wire
- 1 Arduino Pro Mini
- 5 Led's Led Strip
- 5 Tactile Push Button
- 1 Passive Buzzer
- 1 Mini Potentiometer
- 1 Servo Motor
- 1 Servo Shaft
- Wooden Sticks
- FTDI
Other things Needed :
- Arduino IDE
- Soldering Iron
- Solder Wire for Soldering Iron
- Glue Gun
- USB Mini-b (5 pin) Cable
- Computer obvi
Assembly Of Structure
Attach the Wooden Sticks to the Water Flow Sensor in the way shown in the image.
Step 2: Adding the Buttons
When adding the buttons, make sure that it is comfortable for your hand. This is shown in the picture of my hand.
Step 3: Finish the Flute
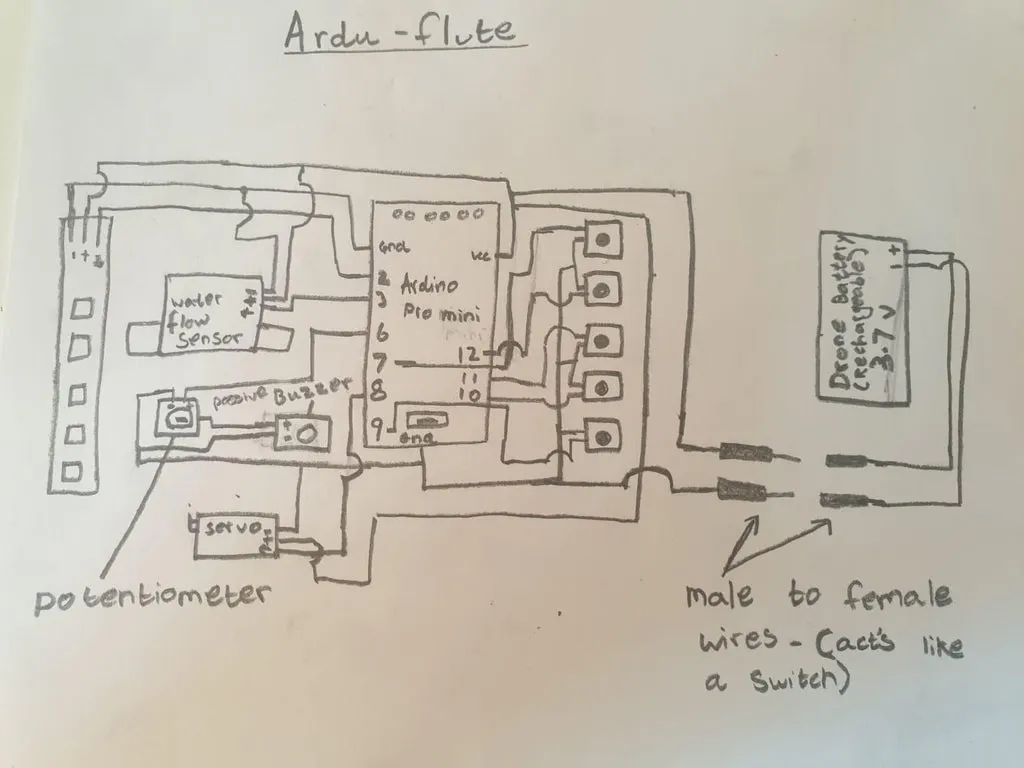
Use the schematic provided and make the Ardu-Flute using the components!
To Controll the Volume of the Passive buzzer, I had the clever idea of manipulating the voltage provided to the Buzzer, and to make the changing of volume automatic, I used a Servo to turn the Pot.
Code Download Ardu_Flute.ino and Upload the Code Into the Arduino Pro Mini using the FTDI
And Watch Me use it on Youtube!
SummaryHope you enjoyed following along me building This cool Project and checkout my other projects too - Much more detailed and cooler ;)


_3u05Tpwasz.png?auto=compress%2Cformat&w=40&h=40&fit=fillmax&bg=fff&dpr=2)
Comments