

Hardware components | ||||||
_ztBMuBhMHo.jpg?auto=compress%2Cformat&w=48&h=48&fit=fill&bg=ffffff) |
| × | 1 | |||
| × | 1 | ||||
| × | 2 | ||||
| × | 2 | ||||
 |
| × | 1 | |||
 |
| × | 1 | |||
| × | 1 | ||||
Software apps and online services | ||||||
 |
| |||||
Get the speed of toy die-cast cars!
We, kids of all ages, enjoy playing with our fancy cars... We NEED to know how fast they run.
Seeing my eight year old boy playing with Hot Wheels cars, running fast on a speed lane and screaming loud, " This is the fastest car in the world! 300km/h!" I started wondering if I could make a device to measure the actual velocity of this wonderfull little cars. And a quick browsing on internet show this crazy thing called "Arduino."
I am a totaly numb on electronics or computing. I still not believe how easy and cheap one can start driving on this road. I did. Step by step. Reading, studying, trying, thinking. So, lets share it with people!
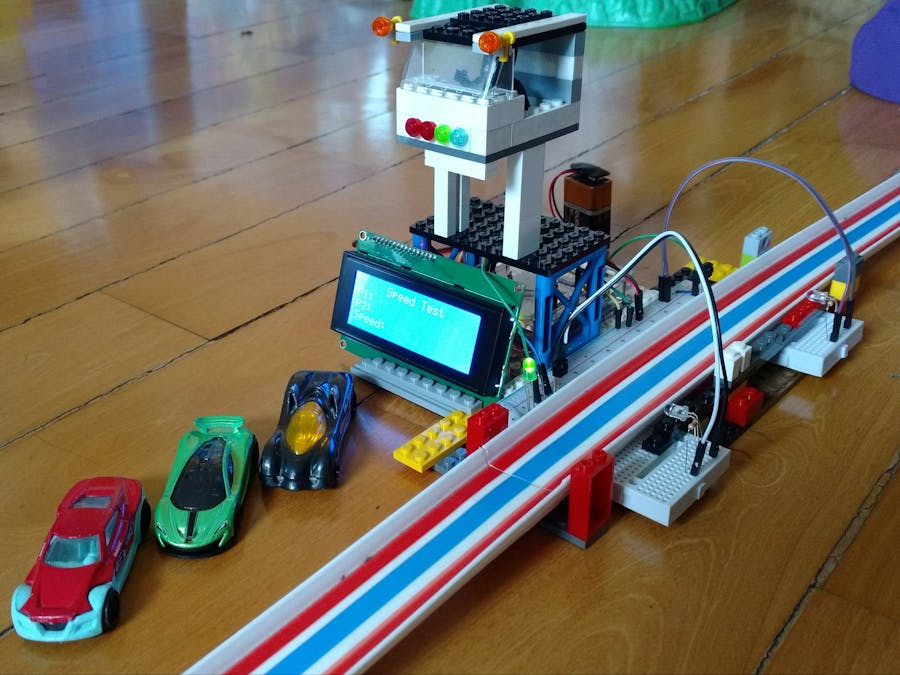
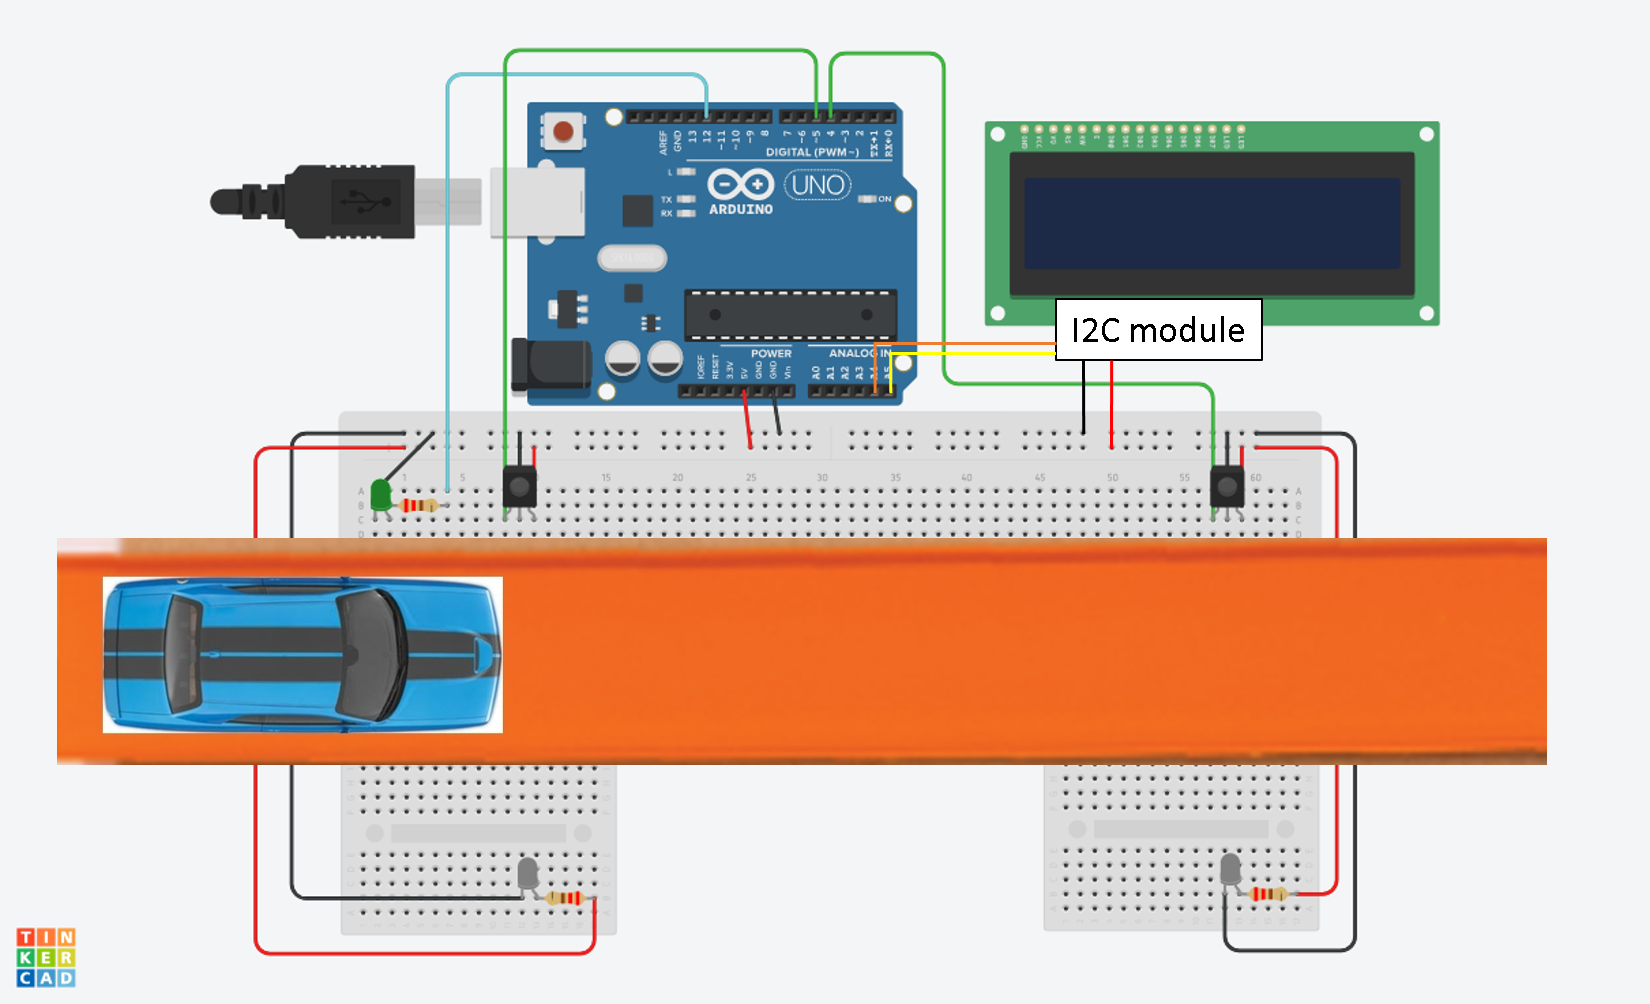
The idea was simple: Measure a given distance, the time when the car passes through a couple of passage sensors. By getting this data, a simple math will show the actual speed that could be presented on a LCD display for the joy of the crowd!
And that's not it! My son (I can not figure out why...) loves Legos! So I will build some kind of a "control tower" where I will install the LCD display like a big "video wall" for the crowd assisting the race, also adding a control room with some minifigures as operational staff.
The project assembled above with some Legos.
This project works OK at the bench when you throw the car smoothly.
But in the "real world" of a Hot Wheels tracks the sensors are not fast reading enough. Please share your improvements if you find a more precise and fast code or reading sensors!
Project creator Fabio Coelho - Rio de Janeiro - Brazil Dec 2018.


Comments