

Hardware components | ||||||
 |
| × | 1 | |||
| × | 1 | ||||
| × | 1 | ||||
| × | 2 | ||||
| × | 1 | ||||
Software apps and online services | ||||||
 |
| |||||
| ||||||
We have all seen examples where we send data to cloud services like Azure or AWS. However, this is taking info from a photon or electron, and sending it to the cloud. In the latest project I was part of (the "force user"), I used a Microsoft Band to get my heart rate and send it to a windows phone where it reports that information and then sends data to a photon to make the LED’s Flash the same BPM as my heartrate. And this got me thinking, how exactly do I send data to the photon? In that example, that was already figured out by Barry Nusz, who made the original project that it was based off of. When I did the research myself, I found there was not explaining this besides a curl call, which I am not used to using as a .net developer. In my quest to learn this, (and my own laziness) I created this hack, which allows you to control the color and lighting in your own home all from your phone.
PurposeWith the plethora of Wi-Fi enabled color changing light bulbs on the market, what would be the benefit to making my own device when buying one would be easier? Why directly call the particle, when we have wonderful services like AWS and azure which we can hook into?
Besides having the fun of inventing your own product, making your own gives you not only a less expensive option, but lets you do things outside the scope of a purchased product’s API. Take, for example, one of the more popular products currently on the market, the Philips HUE bulb. For $79.95. you get a starter kit which comes with the wireless bridge, and 2 light bulbs for just the white lightbulbs. Or if you are looking to add some color to your home, you would want to go with the $199.99 US White and Color Ambiance Starter Kit. These kits are great and give you a lot of out-of-the-box features to get things working quickly, and it is an all around a great product for the price point. But it falls short when you want to go outside the realm of their out-of-the-box features and add your own. For that, you would have to write some code anyway. However, for the same or less cost, I can easily purchase a led strip that lets me accomplish the same functionality as the Philips Hue, without being limited by what is pre-programmed. Every Feature they list can easily be done yourself with just a bit more effort than unwrapping a box.
OK, so why would you want to call the photon directly when there are lots of cloud services you can call to accomplish do the same thing? Simple! Not everything needs the cloud to work. Now don’t get me wrong, the cloud is all the rage and helpful in many ways, but it doesn’t need to be used as the way to talk to all devices. The cloud becomes useful if you are sending data you need to aggregate, analyze or store or if you need a web service to tap into later. If you just need to send a device a command, talking directly is probably the better option. If you are looking to use Alexa, Amazons bit into the voice market, that is the one exception, but that is for a different hack.
Ingredients
- Particle Photon
- Adafruit NeoPixel Digital RGB LED Strip 144 LED (or any WS2812B RGB LED strip)
- Micro-USB cable
- JST SM 2pin Plug
- 2x Male & Female Pair DC Power Jack
- 5v Power Supply (preferably 2 Amps or more if you want more than 1 LED strip)
Software
- Visual Studio 2015 Community Edition or higher OR Xamarin Studio
- Xamarin Indie License or higher
1. Obtaining the hardware for the scale of the project
For this project I opted to use the 144 LED per meter LED strip for its overall brightness since I am lighting a 14’ x 20’ room and wanted complete coverage of the room. You might choose the 60 LED per meter strip to achieve the same effect, but I wanted to get the maximum LED per meter available. Looking back, had I known I was going to be interested in more moving patterns, I would have gone with the DotStars over the NeoPixles as they make “prescience of vision” effects better and have a faster refresh rate than the NeoPixles. Be sure to pick up the proper power supply for the project. While with this demo I am running the one strip just off the photon (5V 1A) It is recommended that you use a separate power source to power the strips. With the way that the NeoPixel led strips are created you will need certain hardware to be able to attach to the cable. Specificly you will need a JST SM 2pin Plug to be able to connect your device to the strip to control the strips, and if you use any power supply from Adrifruit for this project you will need the DC Power Jack’s that I use since their power adapters have a plug that is 2.1mm.
2. Wiring up the Photon & LED strip
Now that we have all the hardware we need for this project we can start connecting everything together. With the amount of power, we will have going through the cables, It is recommended that you make a more secure method of connecting the wires then a breadboard. If you don’t plan to reuse the components or are getting it ready for a long term install, I’d recommend soldering the wires together. If you want to reuse the photon at some point, you can buy male to female wires, strip the male end and solder that to the led strip, and plug the female end into the corresponding photon ports. Since I am reusing these components later, I use a bread board to connect the photon and the control wires together.
Start by taking your Female JST SM 2pin Plug and connecting it to the Male JST SM 2pin Plug on the NeoPixel strip. This is the side you want to connect to and is the start of the flow of the strip.
Once that is set up attach a Male & Female DC Power Jack to the end of the JST SM 2pin Plug wires with no connecter attached. If you are going the Soldering route, you can skip this step.
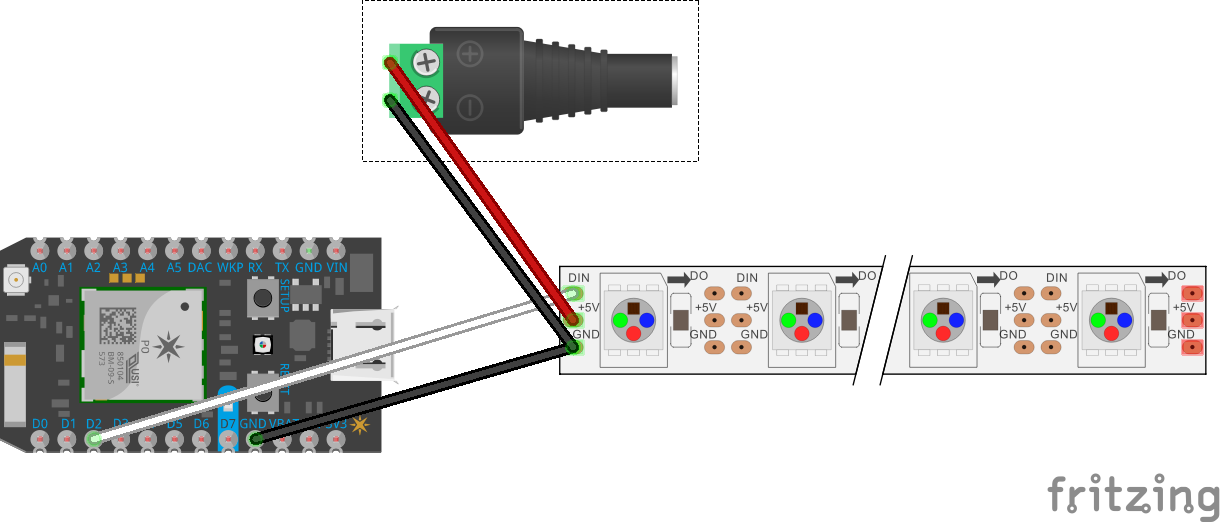
Next you are going to want to take 2 wires and connect the Positive and negative ends of the Male DC Power jack (if you are going the reusable route) and connect the positive wire to the D2 port of the photon and the Negative wire to the GND port. If you are going the soldering route. You can solder the white wire from the LED strip to the D2 port of the particle and the Black wire from the LED strip to the GND of the photon. NOTE: the code sample I have uses the D2 port, but you can use any of the 0-7 D ports on the photon.
To finish the installation, take a Female DC Power Jack and connect the Red (5v / positive) & Black (Ground) lines to that Female DC power jack. Once that is complete, you can hook up the power brick to the Power Jack you just attached.
Your finished hardware setup should look something like the diagram below. Now that your hardware is hooked up, we can move on to coding up the photon.
3. Setting up the code for the Photon
When we write code for the photon we will be doing it in the Particle IDE which can be found by going to https://build.particle.io. If you have not already set up your particle device, you will need to create an account and register your photon to your account. To help you get started particle has a nice document on this that can be found here. If you already have a particle account and your device is claimed, you can continue reading.
Photons can be coded like most Arduino devices, however to use the NeoPixle strip I had to include the NeoPixel library so that we can assign the LED’s the color we want or create fun patterns which they show in the demo library. This demo however just uses solid colors.
Once that is done, you can just copy and paste the code from the gist https://gist.github.com/MobileRez/5d2f21028735221f8592 into your particle code and complete the setup. Then deploy the code onto your photon before continuing.
4.Programming the Mobile App with Xamarin Forms
To be able to call your photon and change your lighting color, I built a cross platform app you can side load yourself, however there is a little work we have to do to get things configured to get the app to work fully. For your convenience I have also added projects for Droid, iOS, Windows Universal, Windows Phone 8.1, and Windows 8.1
1.) Ensure that you have installed:
- Visual Studio Community or greater
- Xamarin Studio with a Xamarin Business License or greater
OR
- Xamarin Studio with a Xamarin Indie License or greater
2.) Grab the Xamarin code from: https://github.com/MobileRez/XamarinLedControl
3.) Open the XamarinLedControl Solution
4.) On lines 21 and 22 of LedControlViewModel.cs in the ViewModel folder you will need to add your Device Id and your Access Token.
5.) You can get your Photon Device Id by going to https://build.particle.io/ => Devices => Select <YourDevice> => Click to expand => Copy <DeviceId>
6.) You can get your Access Token for the particle cloud by going to https://build.particle.io/ => Settings => Copy <Access Token>
7.) You can now deploy the app to your phone and should be able to change the color of your NeoPixel led strip.
How it all WorksTo get the photon to be able to be sent a command from an outside source like a phone app or a website, we use what is called a Particle Function in our particle code to make that available to the API. we define it like so in the setup of our code:
Particle.function("ledcolor", ledColor);
On the Xamarin side we have to make a http post call to the API to let it know what we want to change the led strip color to. We do that on the .NETside by using System.Net.Http.HttpClient which can be found in the LedControlViewModel.cs file.
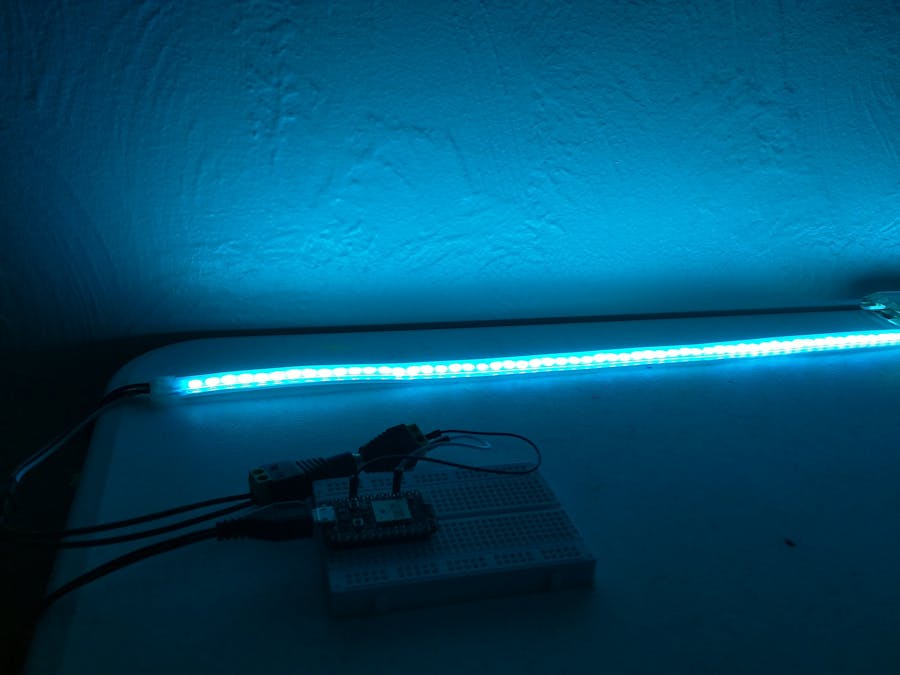
LED Strip In Action
Mobile App running on the mobile platforms
Conclusion
I started this project looking for a way to leverage my knowledge of Xamarin as well as give myself a good foundation base with the particle functions to use that in future projects, and this project has done just that. My choice to use a led strip for this project over doing something else was done to keep the core concept simple and focus on how a particle function works and how to call a particle function from a Xamarin app.


Comments