The first thing I did was download this stencil and start cutting it to create the mold where I'll solder the wires. Pro tip: Once you finish both sides, I recommend securing them temporarily with tape before final assembly!
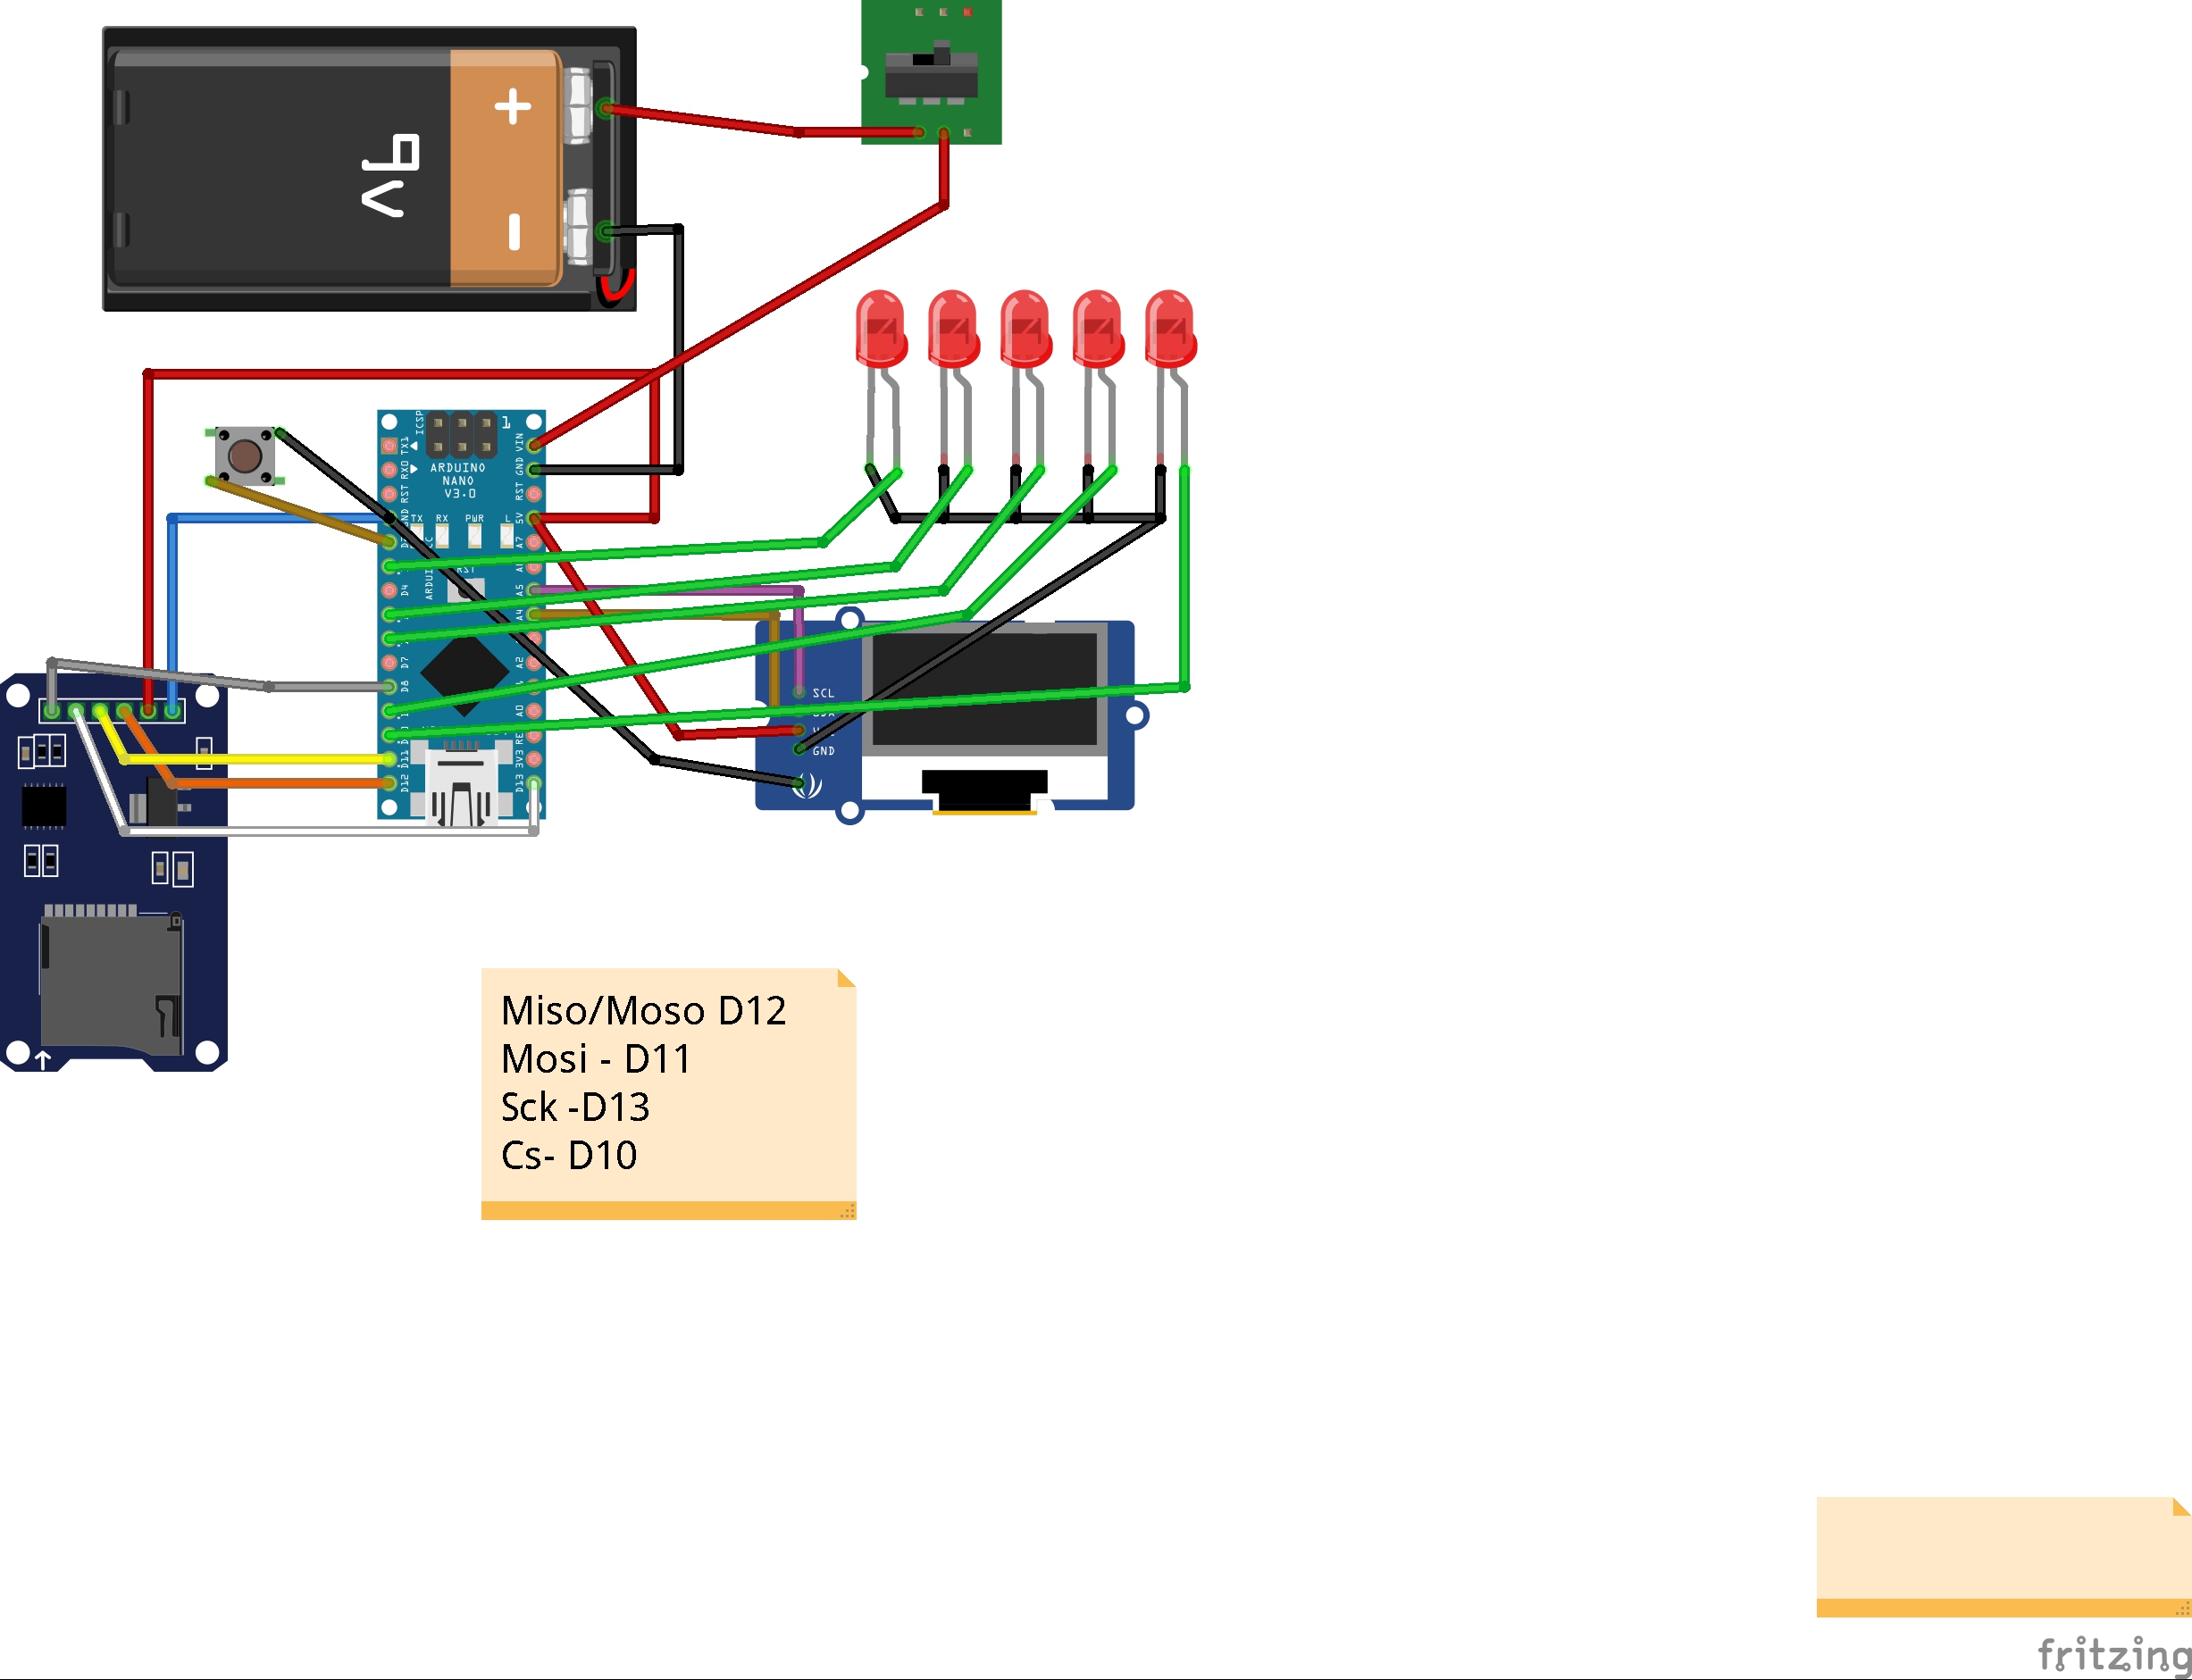
Next, I made the connections (see the diagram below). Tip: I recommend using a breadboard to test the circuit first, then upload my code once everything works!
Image Preparation GuideTo display images correctly, they must be in monochrome bitmap format. Since I'm using a 128x64 pixel display, all images need to match this resolution. Here's my workflow:
Pixel Art Creation:I use Pixilart.com to create/edit pixel-perfect graphics and add text in the exact required size.
Color Conversion:For color images, I convert them to black & white (no grayscale) using PineTools.com.
Size Adjustment:If resizing is needed, I use ImageResizer, then reprocess through Pinetools to ensure pure B/W conversion
Final Export:I arrange everything in PowerPoint (yes, really!) because it reliably exports monochrome bitmaps without gray artifacts.
External Memory AdvantageBy using an SD card module for external storage, you can store a large number of images since the monochrome bitmap format is extremely lightweight. In my current setup, I'm using:
- 40+ unique images
- 13 animation frames for the project's loop sequence
Thank you for checking out my project! This was a labor of love for my amazing girlfriend—my sweet "chefsita de caramelo" (as I call her). Without her inspiration, none of this would exist


_3u05Tpwasz.png?auto=compress%2Cformat&w=40&h=40&fit=fillmax&bg=fff&dpr=2)
Comments