MakerRobotics
Published

Texas Instruments MSP-EXP432 - MultiTasking

MultiTasking ultrasonic and color sensor with Texas Instruments MSP-EXP432 and Energia.

BeginnerProtip1 hour2,575
Texas Instruments MSP-EXP432 - MultiTasking

Things used in this project

Hardware components

MSP-EXP432P401R SimpleLink MSP432 LaunchPad
Texas Instruments MSP-EXP432P401R SimpleLink MSP432 LaunchPad
×1
Ultrasonic Sensor - HC-SR04 (Generic)
×1
color sensor GY-31
×1

Software apps and online services
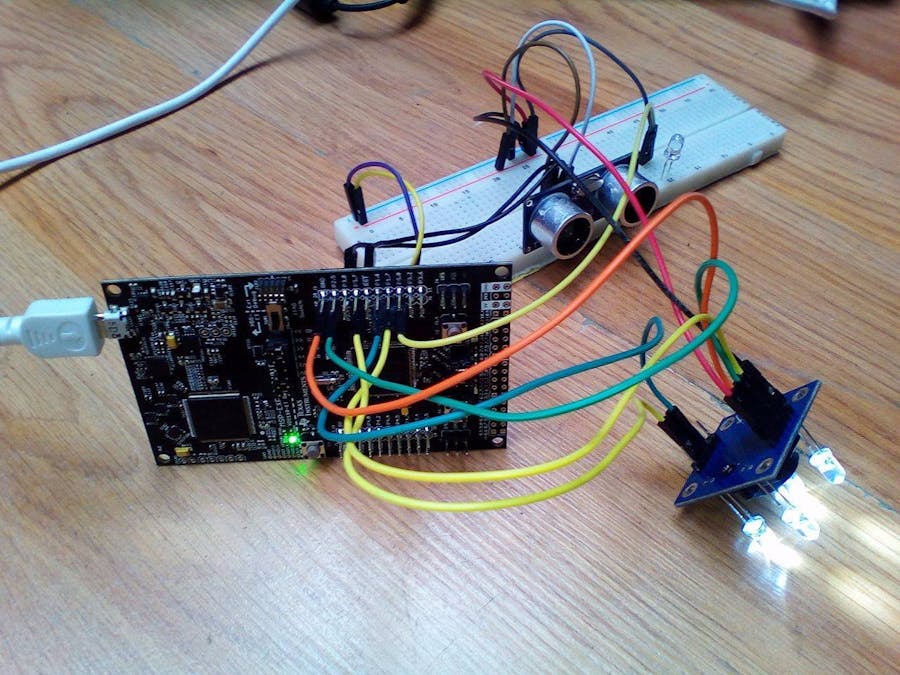
Energia
Texas Instruments Energia

Story

Read more

Code

Main Code - Energia

Arduino
This is main code in Energia. Here are defined all variables that we want to use in other sketches.
/*
 * This tutorial shows how to multithread multiple sensors with Texas Instruments
 * and Energia software. Each Sketch (tab) gets it's
 * own task executing in parallel.
 * Note the names of the setup and loop in these tabs. Energia will look
 * for the keywords with the name setup and loop in it. Each set of matching    setup
 * and loop pairs will automatically create a task for that tab. The loop and setup 
 * names will need to be unigue. So for instance, the Color tab's setup/loop pair are
 * called setupColor() and loopColor(). 
 * Only variables declared in main sketch can be used in other sketches, eg. distance
 * variable can be used in Led sketch, because it's declared in main sketch.
 */

int trig = 38;
int echo = 36;
int elapsed_time, distance;
int frequency1;
int frequency2;
int frequency3;


void setup() {
  pinMode(trig, OUTPUT);
  pinMode(echo, INPUT);
  Serial.begin(9600);
}

void loop() {
    digitalWrite(trig, HIGH); 
    delayMicroseconds(5); 
    digitalWrite(trig, LOW);
    delayMicroseconds(5); 

    elapsed_time = pulseIn(echo, HIGH);
    distance = abs(elapsed_time/2/29.1);
    Serial.println(distance);
    delay(100);
}

Color

Arduino
This is sketch for color sensor.
int s0 = 35;
int s1 = 37;
int s2 = 39;
int s3 = 40; 
int out =34;

// Note names for setup() and loop()

void setupColor() {  
  pinMode(s0, OUTPUT);
  pinMode(s1, OUTPUT);
  pinMode(s2, OUTPUT);
  pinMode(s3, OUTPUT);
  pinMode(out, INPUT);
  
  digitalWrite(s0,HIGH);
  digitalWrite(s1,LOW);
}
void loopColor() {
  digitalWrite(s2,LOW);
  digitalWrite(s3,LOW);

  frequency1 = pulseIn(out, LOW);  // This is value for RED
  Serial.println(frequency1);
  delay(100);

  digitalWrite(s2,HIGH);
  digitalWrite(s3,HIGH);

  frequency2 = pulseIn(out, LOW);  // This is value for GREEN
  delay(100);

  digitalWrite(s2,LOW);
  digitalWrite(s3,HIGH);

  frequency3 = pulseIn(out, LOW);  // This is value for BLUE
  delay(100);
}

Led

Arduino
int led = 33;

void setupLed() {
  pinMode(led, OUTPUT);
}

void loopLed() {
  // You can set any value here for frequency. 
  // Led will turn on if frequency1 (red) is lower than 60
  // and if distance from ultrasonic sensor is lower than 5cm
  
  if (frequency1 < 60 && 0 < distance && distance <= 5){
    digitalWrite(led, HIGH);
  }
  else{
    digitalWrite(led, LOW);
  }
}

Credits

MakerRobotics

MakerRobotics

6 projects • 133 followers

Comments