/*

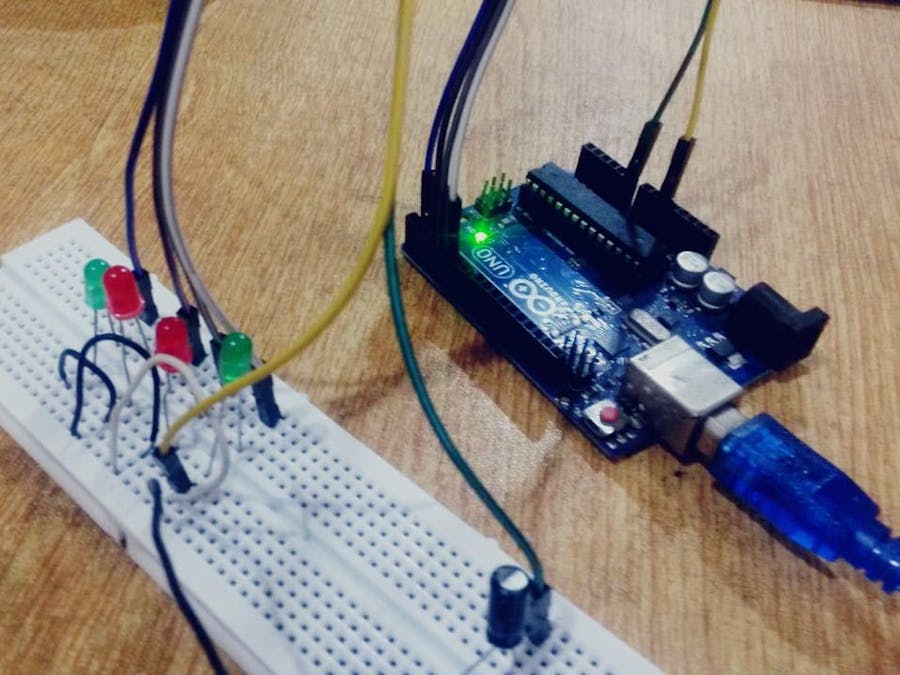
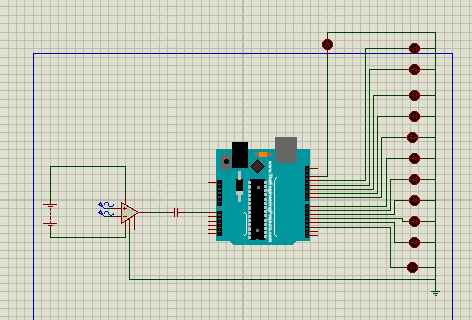
 This code is a basic implementation of a DTMF decoder for detecting the 16 character
 DTMF code from the analog pin A0 and gives the decoded output by checking for all the
 Upper and lower tones in the DTMF matrix and gives us the corresponding number by turning
 on the corresponding digital bit for the numbers 0-9 and by Serially printing the rest of
 the characters.
  This work is entirely based on the Kevin Banks code found at
  http://www.embedded.com/design/embedded/4024443/The-Goertzel-Algorithm
  so full credit to him for his generic implementation and breakdown.
  The Goertzel algorithm is long standing so see
  http://en.wikipedia.org/wiki/Goertzel_algorithm for a full description.
  It is often used in DTMF tone detection as an alternative to the Fast
  Fourier Transform because it is quick with low overheard because it
  is only searching for a single frequency rather than showing the
  occurrence of all frequencies.
  * THIS CODE IS Made/modified by "Mian Mohammad Shoaib" and  Released into the public domain.
  * for any querries related to the code feel free to ask at

  MMSHOAIB8452@GMAIL.COM
 */


#include <Goertzel.h>

int sensorPin = A0;
const int N = 100;                       //it is the number of samples code will take y0u can change for sensitivity and can if large it can slow the arduino
const float threshold = 2000;            //minimum tone amplitude to be considered we can change it for more senstivity
const float sampling_freq = 8900;        //maximum detectable frequency is the sampling rate/2 and arduino uno with 16Mhz can support sampling upto 8900 Hz
float x_frequencies[4];                  // make two arrays for holding x and y axis frequencies to be detected
float y_frequencies[4];

void setup(){
 pinMode(13, OUTPUT);                    //initalize blink led to show if any tone is detected
 pinMode(2, OUTPUT);                     //initialize 10 pins as output to show the dtmf outputs from 2 to number 12 rest will be just derially printed to the monitor
 pinMode(3, OUTPUT);
 pinMode(4, OUTPUT);
 pinMode(5, OUTPUT);
 pinMode(6, OUTPUT);
 pinMode(7, OUTPUT);
 pinMode(8, OUTPUT);
 pinMode(9, OUTPUT);
 pinMode(10, OUTPUT);
 pinMode(11, OUTPUT);
 pinMode(12, OUTPUT);

  Serial.begin(9600);

x_frequencies[0]=1209;                //just initialize the arrays with the x and y axis tone frequencies along with their row and colon number
x_frequencies[1]=1336;
x_frequencies[2]=1477;
x_frequencies[3]=1633;

y_frequencies[0]=697;
y_frequencies[1]=770;
y_frequencies[2]=852;
y_frequencies[3]=941;
}

bool detect_tone(float freq){

Goertzel goertzel = Goertzel(freq, N, sampling_freq);        //initialize library function with the given sampling frequency no of samples and target freq
  goertzel.sample(sensorPin);                               //Will take n samples
  float magnitude = goertzel.detect();                      //check them for target_freq

 if(magnitude>threshold){                                   //if you're getting false hits or no hits adjust the threshold
  digitalWrite(13,HIGH);                                    //blink led on 13 if a pulse is detected
  delay(250);
  digitalWrite(13,LOW);
  Serial.print(freq);
  Serial.print("\n");
  return true;
 }
  else
    return false;
}


void print_number(int row,int column){
int number=0;
if(row==0){                                             //find the number corresponding to the found row and column
  if(column== 0)
  number= 1;
  else if(column== 1)
  number= 2;
  else if(column== 2)
  number= 3;
  else if(column== 3)
  number= 10;
}
else if(row==1){
  if(column== 0)
  number= 4;
  else if(column== 1)
  number= 5;
  else if(column== 2)
  number= 6;
  else if(column== 3)
  number= 11;
}
else if(row==2){
  if(column== 0)
  number= 7;
  else if(column== 1)
  number= 8;
  else if(column== 2)
  number= 9;
  else if(column== 3)
  number= 12;
}
else if(row==3){
  if(column== 0)
  number= 14;
  else if(column== 1)
  number= 0;
  else if(column== 2)
  number= 15;
  else if(column== 3)
  number= 13;
}

if(number <10){
digitalWrite((number+2),HIGH);
Serial.print(number);
}
else if(number ==10)
Serial.print('A');
else if(number ==11)
Serial.print('B');
else if(number ==12)
Serial.print('C');
else if(number ==13)
Serial.print('D');
else if(number ==14)
Serial.print('*');
else if(number ==15)
Serial.print('#');
Serial.print("\n");
delay(800);
for(int i=2;i<=12;i++){
  digitalWrite(i,LOW);
}
}

void loop(){
int column=0,row=0;
int i=0;
while(1){
  if(detect_tone(x_frequencies[i]) == true){
    column = i;
    break;
  }
  i++;
if(i==4)
i=0;
}

i=0;
while(1){
if(detect_tone(y_frequencies[i]) == true){
    row = i;
    break;
  }
   i++;
if(i==4)
i=0;
}
print_number(row,column);

}


_ztBMuBhMHo.jpg?auto=compress%2Cformat&w=48&h=48&fit=fill&bg=ffffff)


Comments