It all started with 8 of the cutest ducks you've ever seen. Okay, I may be a little biased here but who doesn't love duckies? I picked up 8 ducklings at the local tractor supply, and have raised them as pets for the past few months. Also adopted a couple more along the way. As I waited for them to get older and mature, I realized more than half were runner ducks. If you didn't know, runner ducks aren't known to sit on their nest and hatch out their eggs. So being that I was hoping to see some more baby ducks in the near future I decided to make my own incubator. So being that I have a background in programming (c++,java,c#), but limited.
My pet duckies <3!!!
Of the hardware side of things when dealing with micro-controllers, I decided to make it a learning experience. A fun one at that, I might add.
Instead of making a plain old boring incubator I decided to add some color to it. Which if doing as a classroom project, students can decorate the outside as they see fit. Next thing was to automate some of the components and make sure it was cheaper than purchasing a pre-built incubator.
They grew up so fast.
Sensor Guide: use a protoboard to solder the components for a more permanent project.
DHT22 Sensor
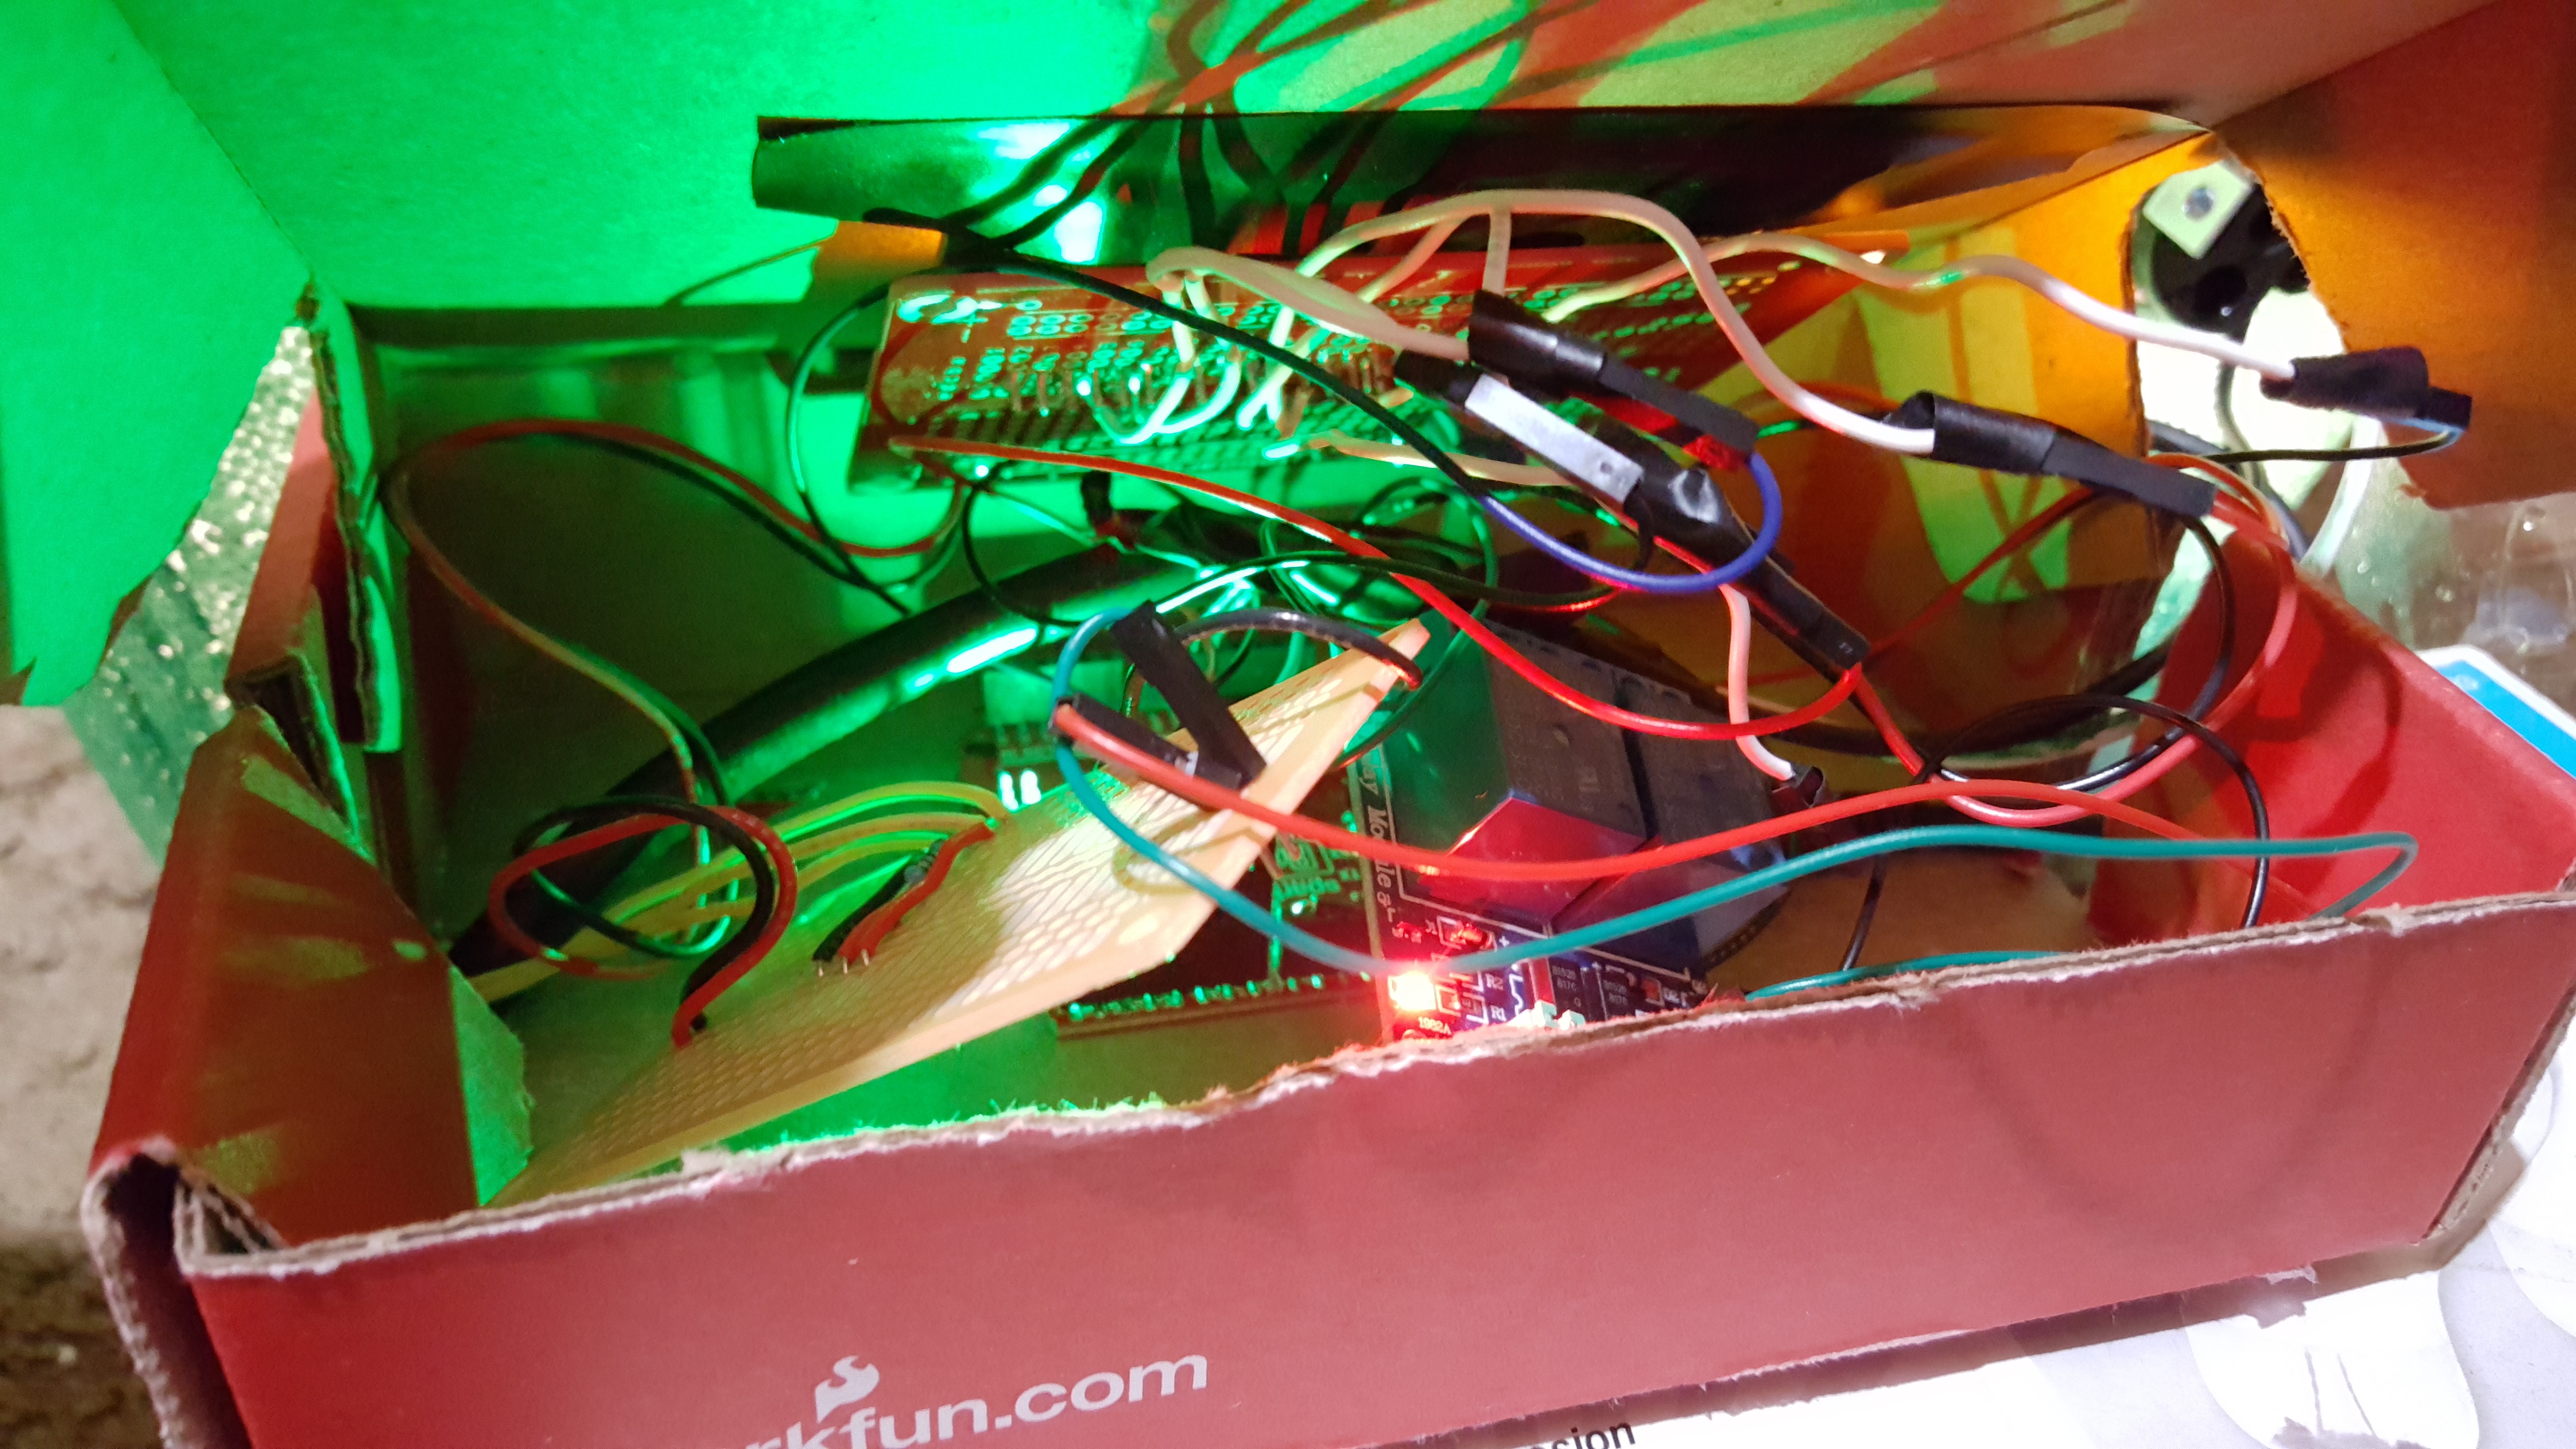
Cut out a Sparkfun delivery box to replicate my lcd setup
Sparkfun box comes in handy for a LCD display case. Recycling the Sparkfun box because I love anything sparkfun!
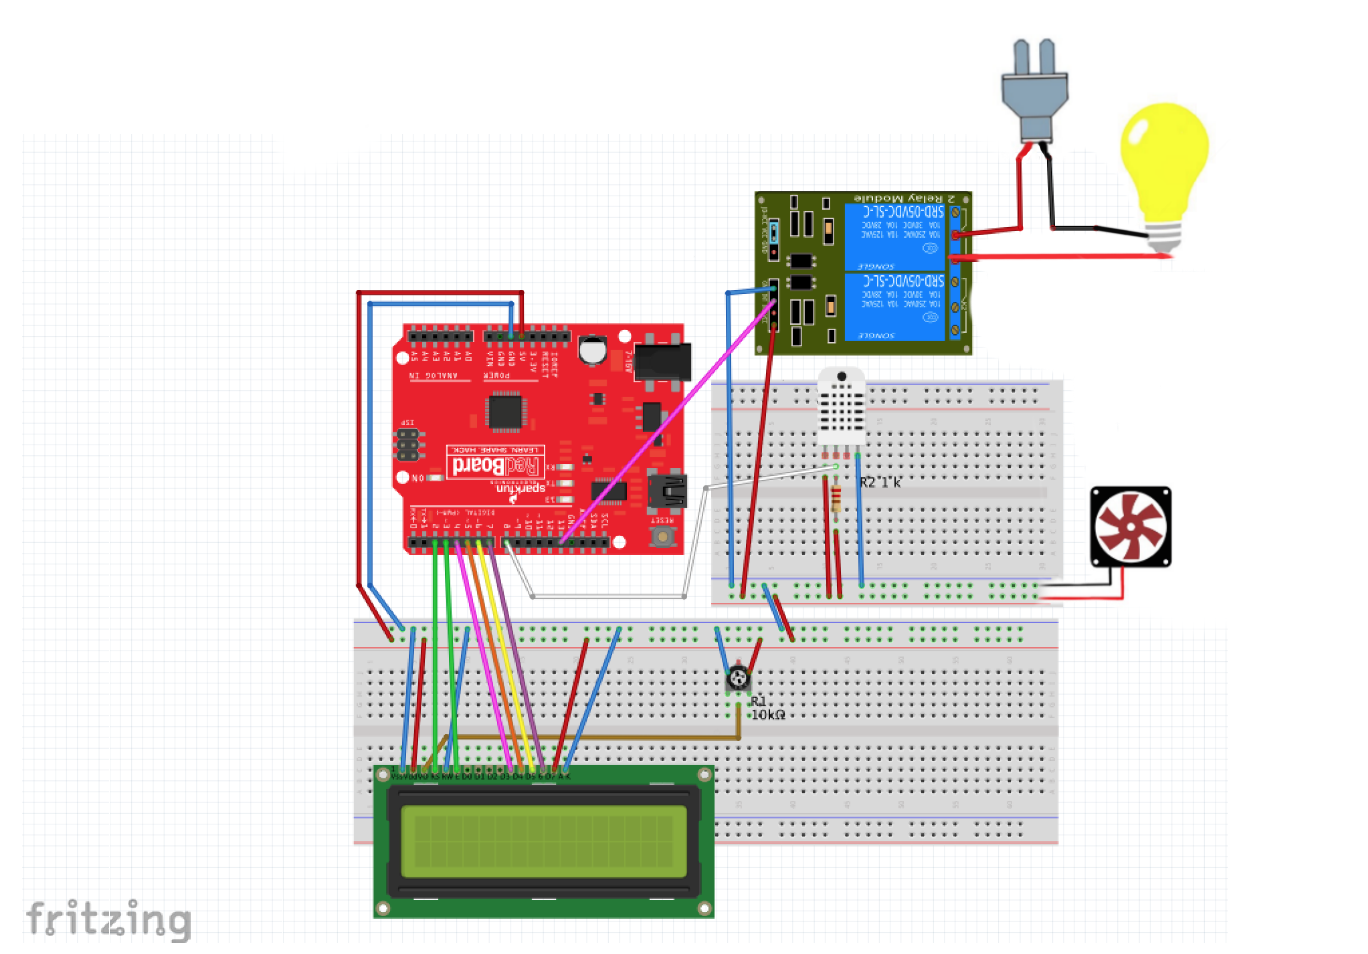
Schematics
QuaCKibator Diagram
Follow the diagram to connect all the components for your QuaCKibator
QuaCKibator Diagram
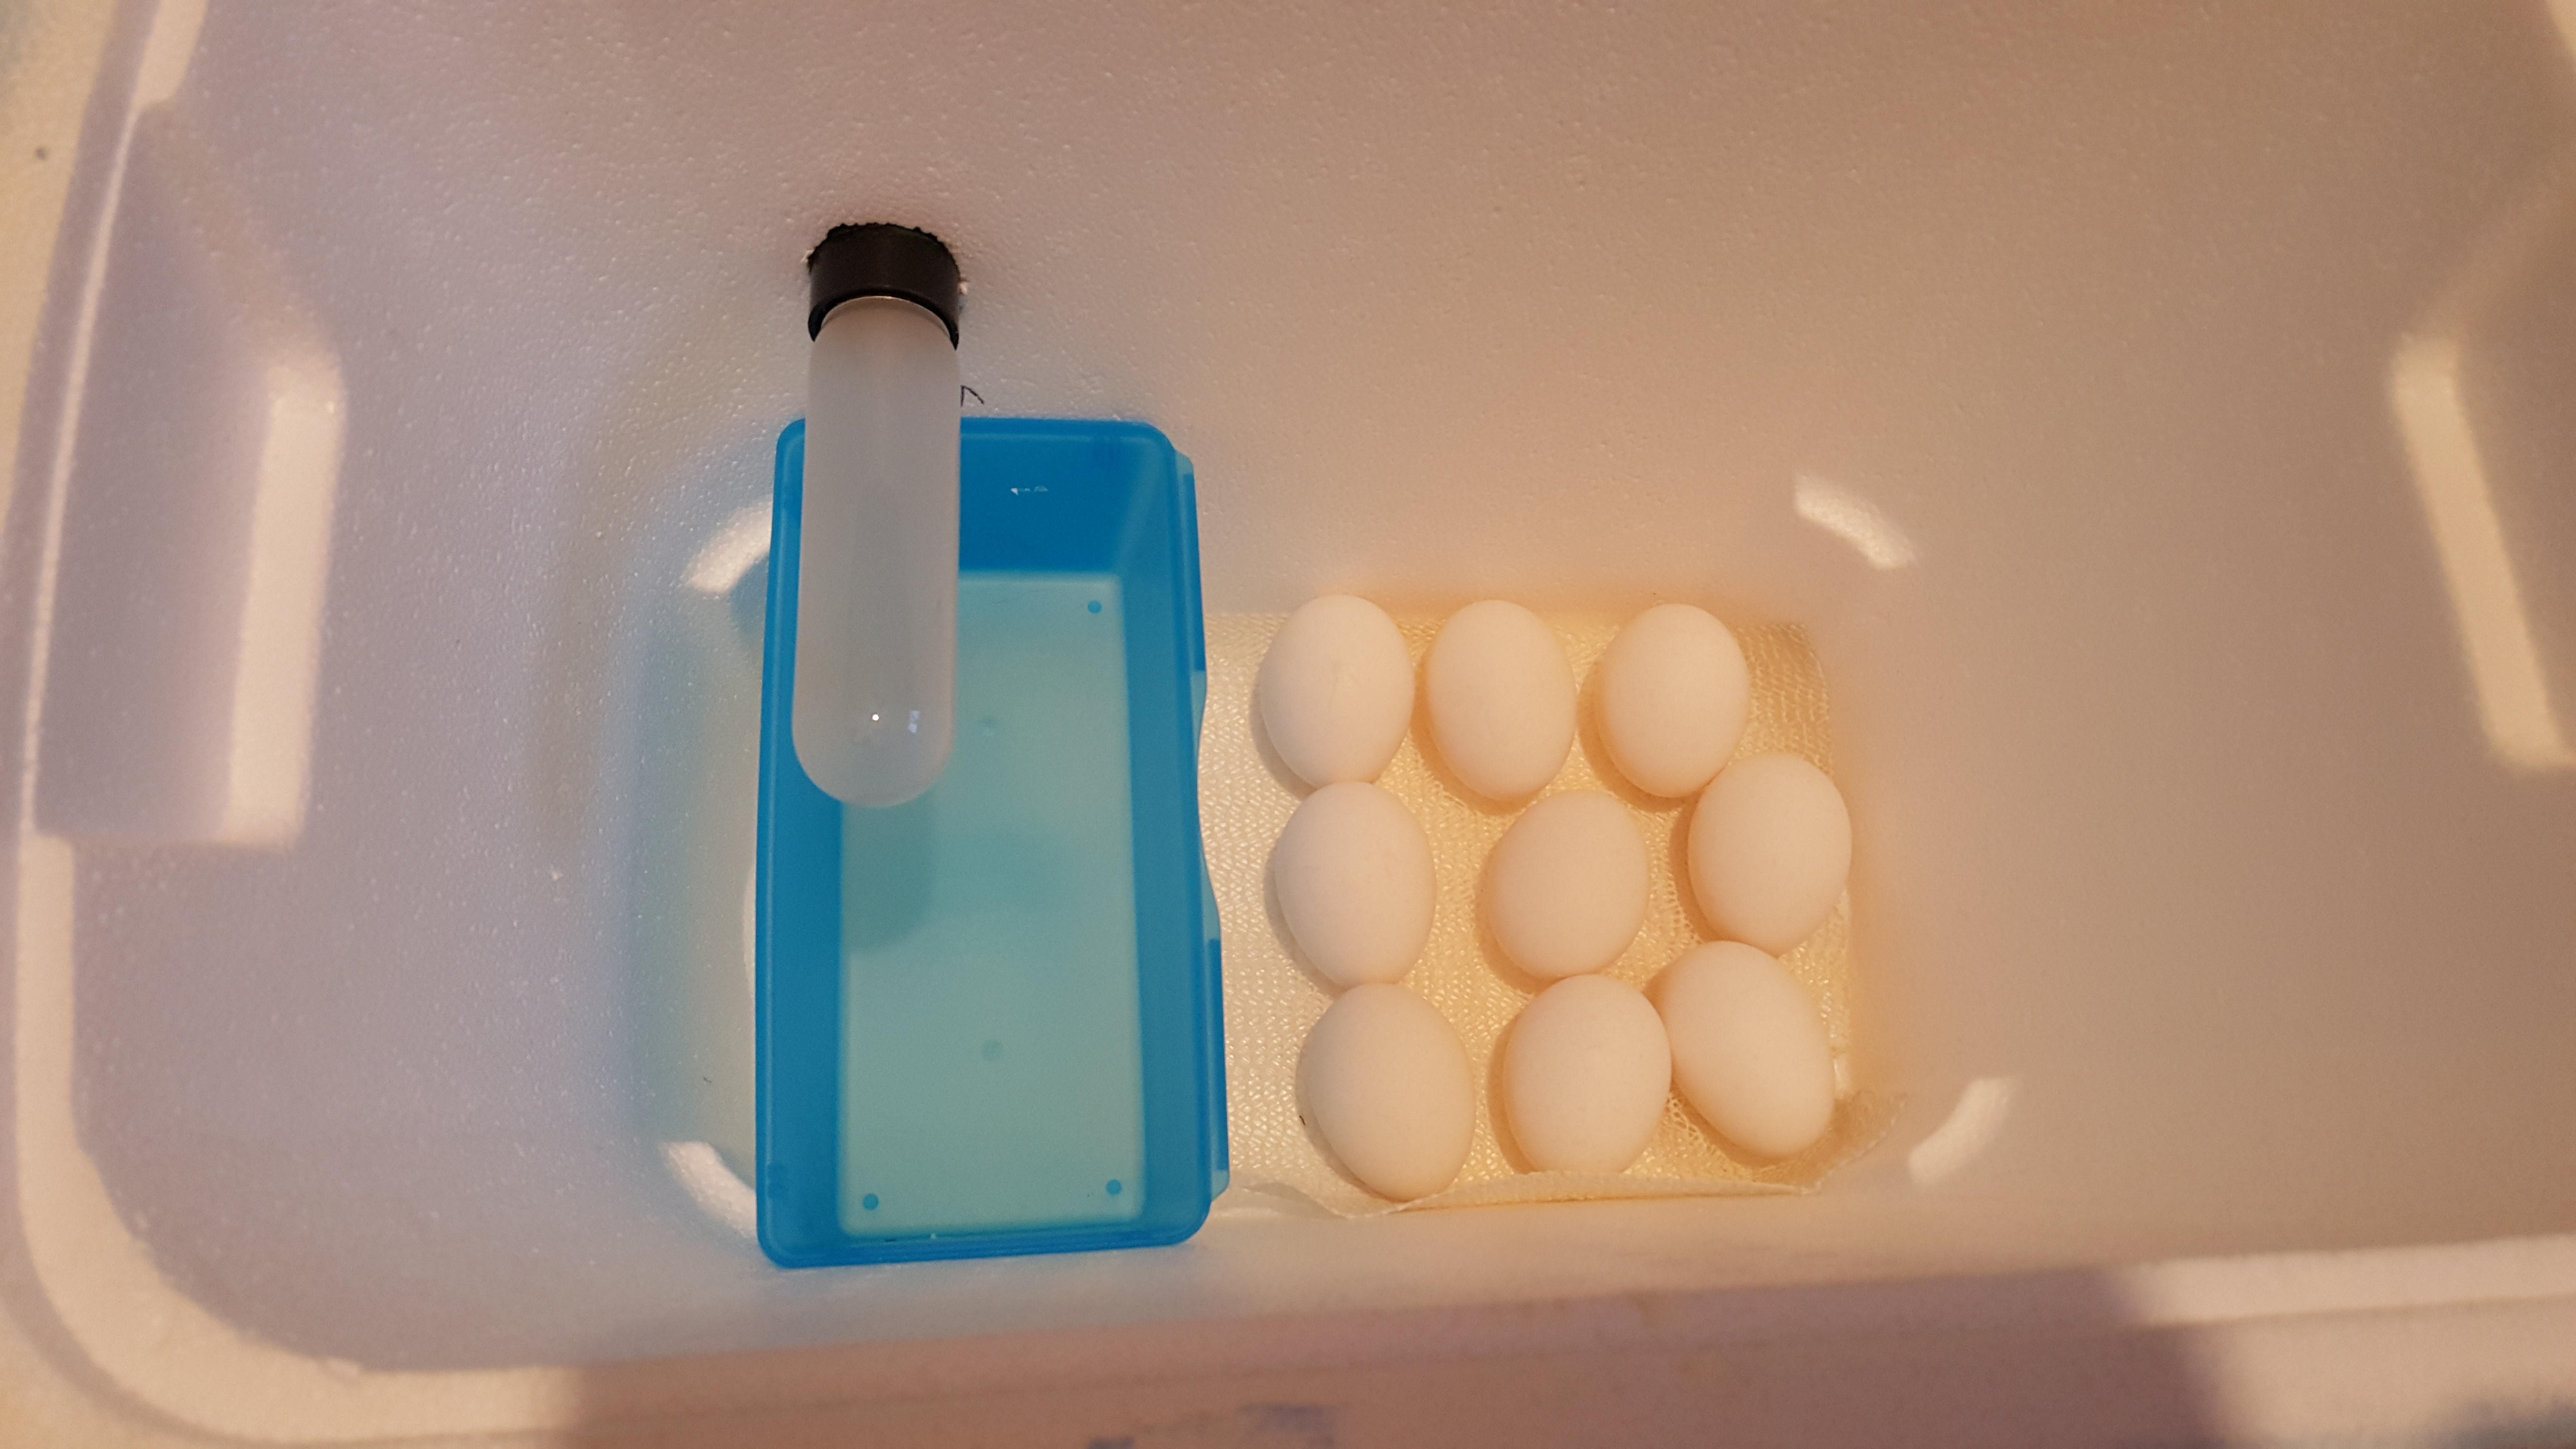
Incubator Setup
Add your duck eggs to the incubator as well as water to reservoir to get to the right humidity. 55% humidity to begin the 28 day incubation period. Although not pictured the DHT 22 should lay across the eggs to get an accurate temperature reading. Which I accomplishing by soldering wires to the DHT22 sensor,cutting a circle out, insert the sensor, replace the cutout and solder the end of the wires as shown in the diagram.
This code is will turn on and off a heat source, light bulb, depending on the value that is read from the DHT22 Sensor.
/*QuaCKibator * DHT22 libraries downloaded from Github-Adafruit * DHT22 code used in this program was origianally written by Lady Ada * * QuaCKibator egg Incubator: * The following program is for an incubator I decided to build. * As of present day Incubators on the market are quite expensive and * lots of times, don't stay at the correct temperature. * This results in a very low hatch rate and loss of money. So I decided to build * one to brush up on my programming skills as well as to hatch * a few duck eggs. I have almost a dozen pet duckies, so why not hatch some more! * Ducks are Awesome =) * * This code is just to get you started it will output the * temperature and humidity to an LCD as well as control your heat * source. Which in this case would be a light bulb. Things that it * will not do: * 1. turn eggs (4x daily) * 2. adjust humidity (60-65%) * these things should be done manually(version 1 of QuaCKibator) * * * Jista Awesome 5 August 2016 * Be Awesome! */#include"DHT.h"#include<LiquidCrystal.h>#define DHTPIN 8 // what digital pin we're connected to#define DHTTYPE DHT22 // DHT 22 (AM2302), AM2321intlightBulb=13;//initialize the library with the numbers of the interface//Pins on the LCD(rs E d4 d5 d6 d7LiquidCrystallcd(2,3,4,5,6,7);// Connect pin 1 (on the left) of the sensor to +5V// NOTE: If using a board with 3.3V logic like an Arduino Due connect pin 1// to 3.3V instead of 5V!// Connect pin 2 of the sensor to whatever your DHTPIN is// Connect pin 4 (on the right) of the sensor to GROUND// Connect a 10K resistor from pin 2 (data) to pin 1 (power) of the sensor//Using a Potentiometer instead of 10k Resistor// Initialize DHT sensor.// Note that older versions of this library took an optional third parameter to// tweak the timings for faster processors. This parameter is no longer needed// as the current DHT reading algorithm adjusts itself to work on faster procs.DHTdht(DHTPIN,DHTTYPE);//LCD Setup of amount of characters per row 16 with 2 columnsvoidsetup(){//Setup the LCD's number of columns and rowslcd.begin(16,2);dht.begin();//DHT22 setup//HeatsourcepinMode(lightBulb,OUTPUT);}voidloop(){//Read humidity takes about 250 millisecondsfloath=dht.readHumidity();//Read temperature as Fahrenheit (isFahrenheit = true)floatf=dht.readTemperature(true);delay(9000);//9 second delay to avoid lightbulb possibly burning out if it were to turn on in 2 second intervals//Compute heat index in Fahrenheit (the default)floathif=dht.computeHeatIndex(f,h);//Setup start location clear screenlcd.clear();lcd.print("Temp: ");lcd.print(f);//Fahrenheitlcd.print(" *F ");lcd.setCursor(0,1);//prints to the next linelcd.print("Humidity: ");lcd.print(h);//humiditylcd.print("% ");//Relay Switch information//Checks to see what currently value stored in "f" and sends a signal to pin 8 which is connected to the relayif(f<=99.5){// Egg IncubationTemperature valuedigitalWrite(lightBulb,LOW);//set pin to low which turns heatsource on which is a light bulb}else{digitalWrite(lightBulb,HIGH);//esle turn lightBulb off}}


_3u05Tpwasz.png?auto=compress%2Cformat&w=40&h=40&fit=fillmax&bg=fff&dpr=2)
Comments