// This sample shows how to do three things:
// 1. Use an RGB LED with analogWrite
// This is well-documented.
// The int [colour] = [#] line just makes it easier to refer to the colours
// repeating the analogWrite(green, 0) is unnecessary - I included it only for ease of readability
// 2. Use a variable for a delay
// I chose to use two (the button press determines which is used)
// When you use a lot of delays, it's nice to declare them once in case you want to change them
// 3. Use a button
// I have no idea /why/ it works this way; it was a challenge to find a simple sample showing how to 'just use a button'
// It works ... but don't skip any of the lines that have 'button' in them
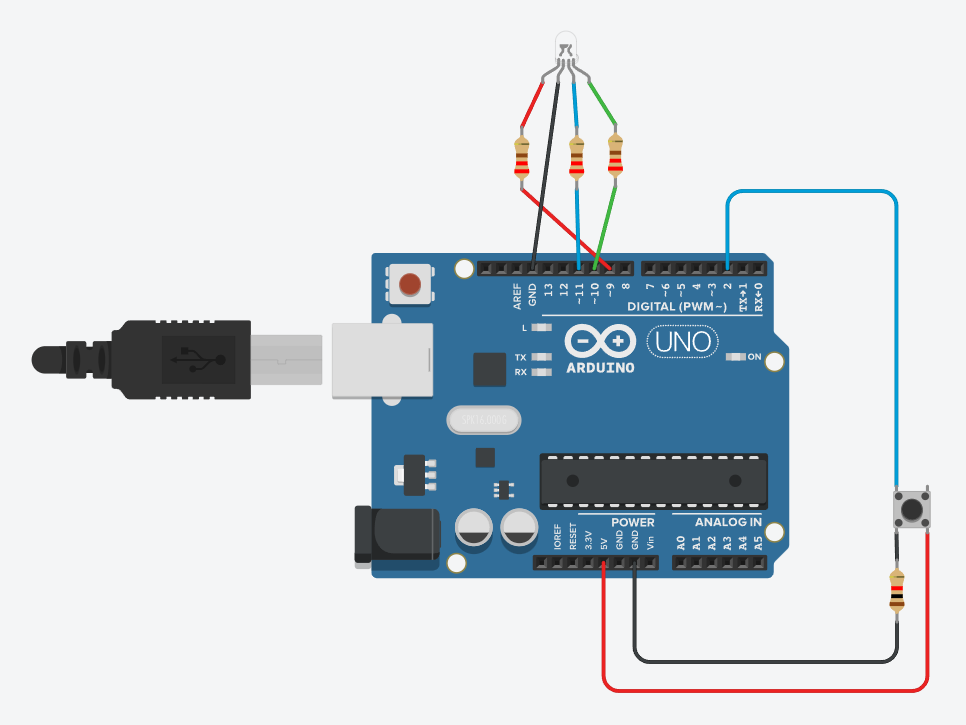
int red = 9; // Define pin 9 as red (to refer to later)
int green = 10; // Define pin 10 as green (to refer to later)
int blue = 11; // Define pin 11 as blue (to refer to later)
int button = 2; // Define pin 2 as button (to refer to later)
int buttonState = 0; // Button is unpressed at start
int time1 = 500; // Unpressed time in MS
int time2 = 250; // Pressed time in MS
void setup()
{
pinMode(red, OUTPUT); // Declare pin 9 as output
pinMode(green, OUTPUT); // Declare pin 10 as output
pinMode(blue, OUTPUT); // Declare pin 11 as output
pinMode(button, INPUT); // Declare pin 2 as input
}
void loop()
{
buttonState = digitalRead(button); // Tells it to 'listen' to the button pin
if(buttonState != HIGH) // This is unpressed
{
analogWrite(red, 255); // Red 100%
analogWrite(green, 0); // Green 0%
analogWrite(blue, 0); // Blue 0%
delay(time1); // Above declared unpressed time
analogWrite(9, 0); // Red 0%
analogWrite(green, 0); // Green 0%
analogWrite(blue, 255); // Blue 100%
delay(time1); // Above declared unpressed time
}
else // This is pressed
{
analogWrite(red, 255); // Red 100%
analogWrite(green, 0); // Green 0%
analogWrite(blue, 0); // Blue 0%
delay(time2); // Above declared pressed time
analogWrite(red, 0); // Red 0%
analogWrite(green, 0); // Green 0%
analogWrite(blue, 255); // Blue 100%
delay(time2); // Above declared pressed time
}
}


_ztBMuBhMHo.jpg?auto=compress%2Cformat&w=48&h=48&fit=fill&bg=ffffff)


Comments