Portable Bench Power Supply (1.25V–10V) — A Full Electronics Lab in Your BackpackHumanix Tech Lab | DIY Tech & Innovation
A compact, battery-backed, adjustable 1.25V–10V bench power supply with USB output, banana jacks, and 2+ hours of battery backup — small enough to fit in a backpack.
Why I Built ThisBench power supplies are bulky, and a fixed 5V USB charger doesn't cut it for testing components at different voltages. This is a truly portable variable-voltage supply that works through a power cut and travels anywhere.
What You Can Do With ItTest components at variable voltages · power Arduino/ESP32/Raspberry Pi in the field · mobile repair workbench · vary motor/fan speed · charge 18650 cells via the banana terminals
Step 1: Building the EnclosureCut a lightweight PVC enclosure — front panel holes for the voltmeter, USB, banana jacks, potentiometer, and switch; back panel for the 12V input, main switch, and ventilation.
Step 2: Battery Pack & Charging Circuit4 × 18650 cells wired in series (4S) — 14.8V nominal, 16.8V full charge. Step-up module trimmed to 16.2V for charging.
[IMAGE: (battery pack in blue heat-shrink wrap, on cutting mat) — assembled 4S pack]
⚠️ Use a 12V SMPS charger only — standard 12V wall adapters won't charge it correctly.
⚠️ Use a 12V SMPS charger only — standard 12V wall adapters won't charge it correctly.
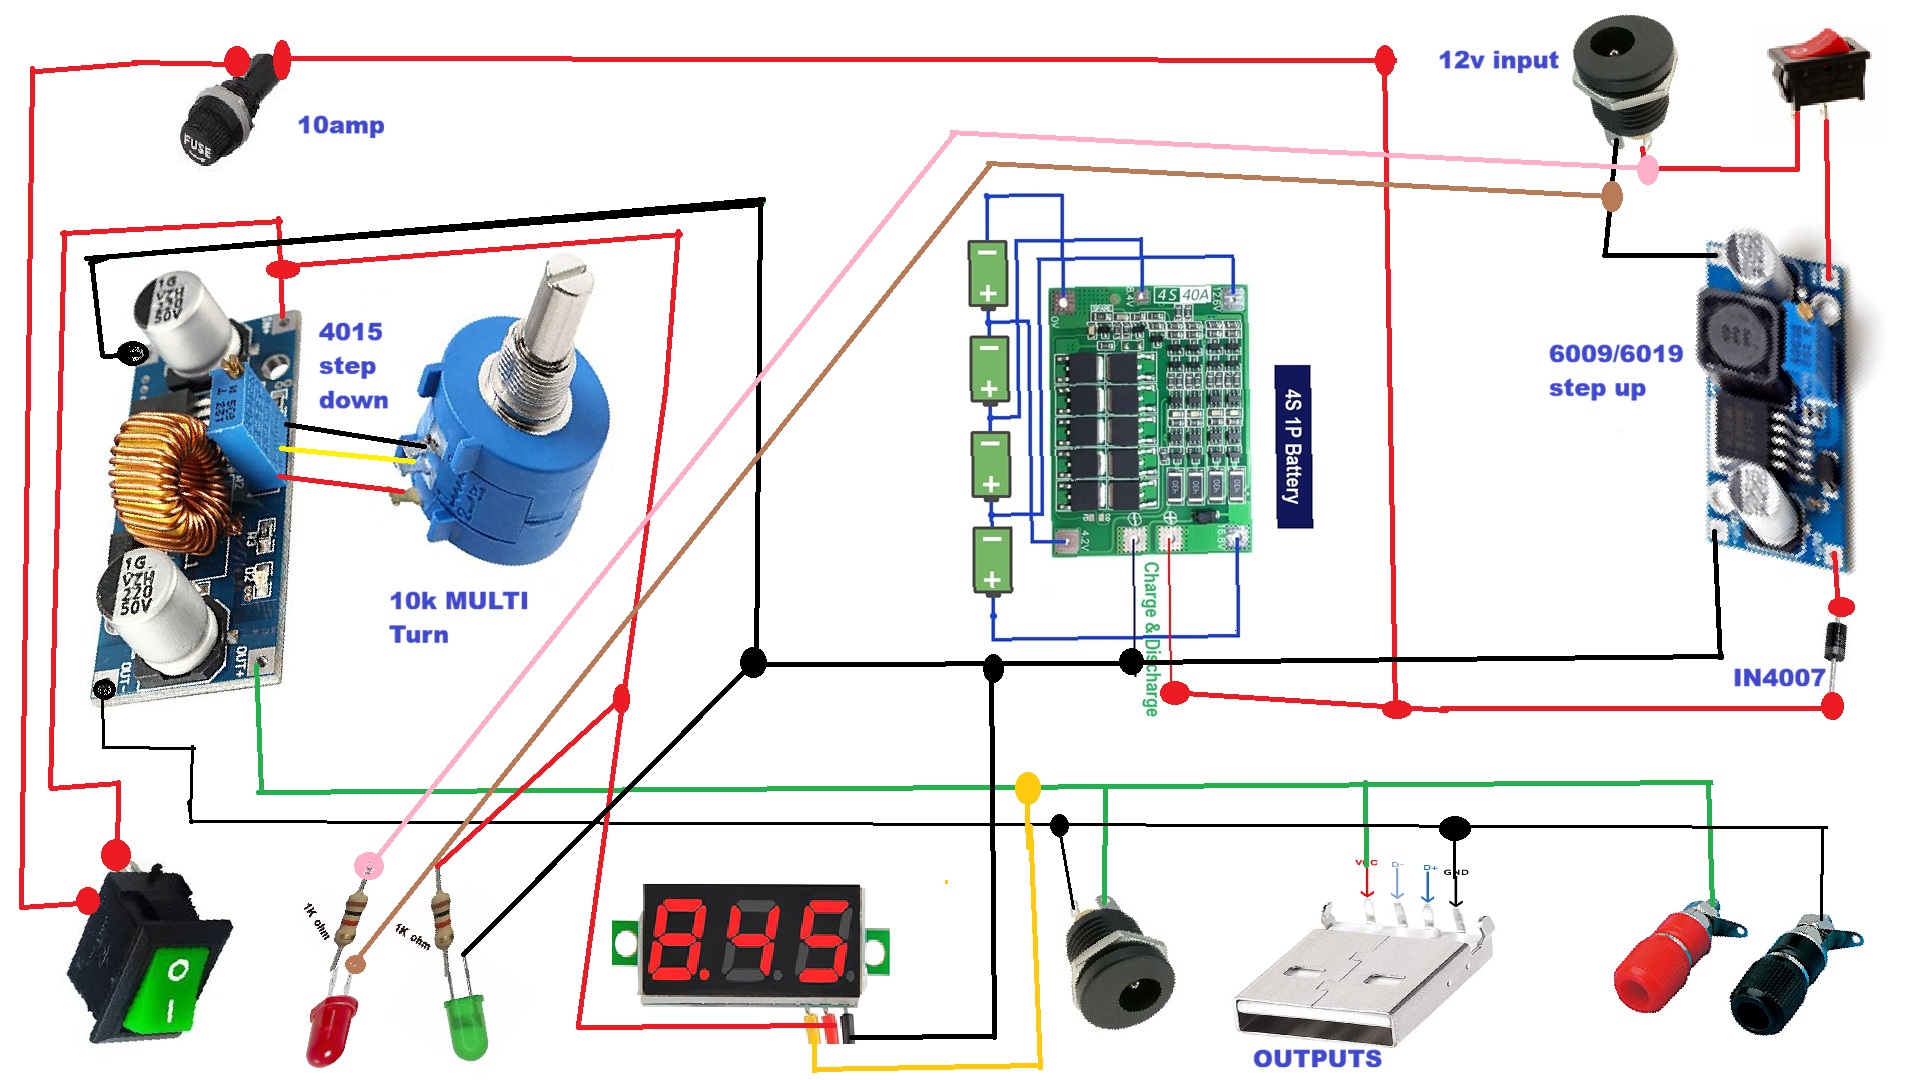
Step 3: Wiring Everything TogetherDC input → fuse → switch → BMS → main rail. Step-up boosts to 16.2V for charging. Step-down feeds the adjustable 1.25V–10V output. USB module taps a fixed 5V.
Step 4: Testing & Results
Battery charging test — voltage set to charge the pack, current tapers correctly near full charge.
COB light test — turns on around 4.5V, stable brightness with no sag.
Speed varies smoothly with voltage — tested with cooling fans and a small DC motor.
Step 5: How It Works12V SMPS → Fuse → Switch → Step-Up (16.2V) → BMS charge input
Battery Pack ↔ BMS (protection & balancing)
BMS output → Step-Down → Variable output (1.25V–10V) → Banana / DC jack
BMS output → USB module → 5V USB output
The BMS handles overcharge, over-discharge, short-circuit protection, and cell balancing automatically.
Future upgrades: current meter, USB-C PD output, 3D-printed enclosure, CC/CV current limiting.
Safety NotesCheck polarity and input voltage before connecting. Avoid short circuits. Don't touch live wires. Use proper insulation throughout.
Follow the BuildThanksThanks for checking out this build! A subscribe or follow helps keep future DIY electronics projects coming — drop a comment with what you'd like to see built next.





Comments