

Hardware components | ||||||
_ztBMuBhMHo.jpg?auto=compress%2Cformat&w=48&h=48&fit=fill&bg=ffffff) |
| × | 1 | |||
| × | 1 | ||||
 |
| × | 1 | |||
| × | 1 | ||||
 |
| × | 1 | |||
 |
| × | 1 | |||
 |
| × | 1 | |||
 |
| × | 1 | |||
 |
| × | 1 | |||
 |
| × | 1 | |||
 |
| × | 1 | |||
 |
| × | 1 | |||
Software apps and online services | ||||||
 |
| |||||
 |
| |||||
So, about a year ago, I have posted a project called "MFRC522 RFID + Relay Module To Turn My PC On & Off. Using RFID Door Lock Code." It was my second Arduino project. On that one, as the title says, I used an MFRC522 RFID Module and a Relay Module as a switch to turn my desktop computer ON or OFF.
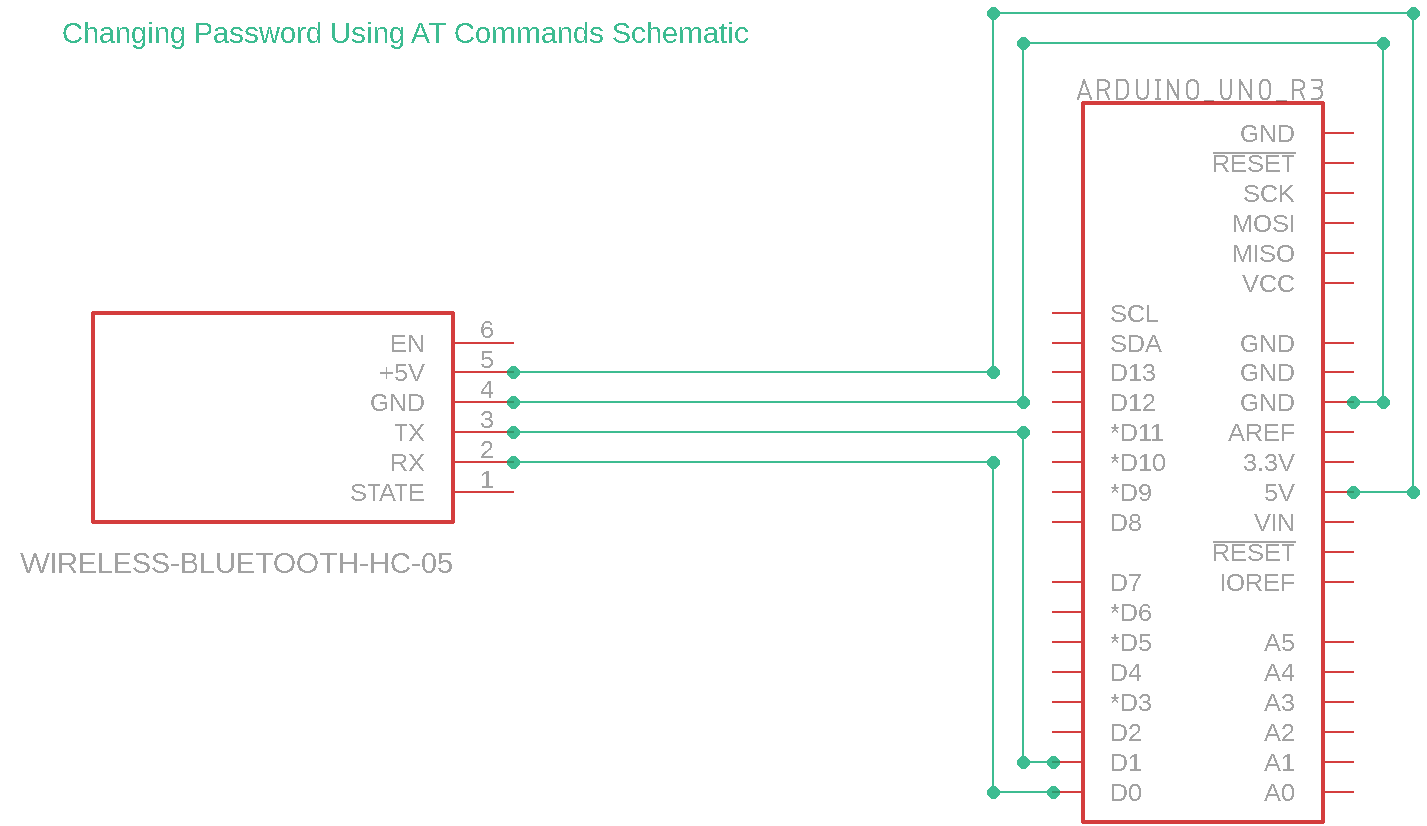
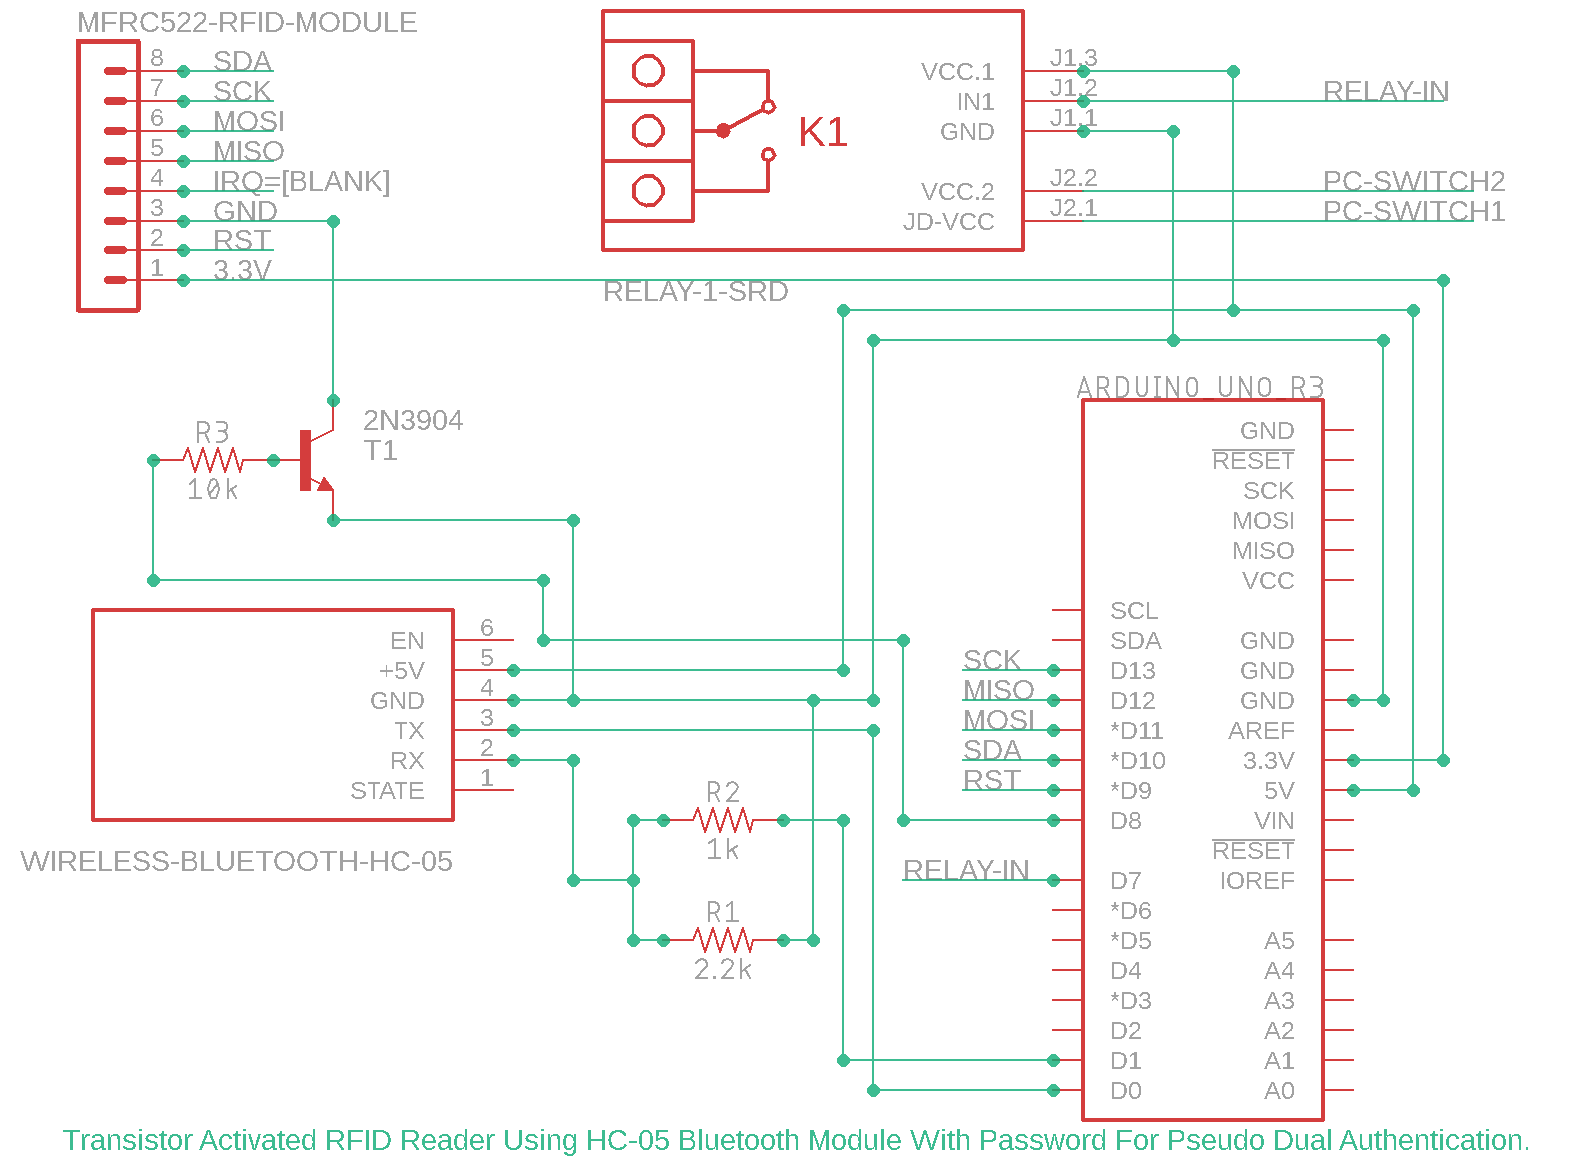
And almost a year later, this project was born out of curiosity. On this one, we will use a couple of things. An Arduino UNO board, an MFRC522 RFID Module, an HC-05 Bluetooth Module, and a 5V 10A Relay Module.
I also built a custom app just for this one using MIT App Inventor. Download it or make your own if you want.
The main purpose of this project is to add another level of security to the RFID module by using the Bluetooth module and a transistor as a switch for the RFID module.
So that, the user can decide when to activate or deactivate the RFID reader's RFID reading function.
By deactivating the module, the RFID's RFID reading function will also be deactivated and no one can be granted access, unless the person who has the "key" or password to the Bluetooth aka. switch chose to do so.
For example, if some baddies cloned your RFID card and tried to access or gain entry to somewhere where your RFID reader is deployed, they can't do anything because the modules' RFID reading capability is disabled.
In contrast, if the RFID module is just constantly active, and your RFID card has been duplicated, anyone can have access to anything that is protected by the RFID module.
Now, I'm not saying that this is the most secured setup, I mean, anything and anyone can be hacked these days.
But, if you're just going to use this at home or on an office, I think it would be enough.
******************************************************************************
LinksMake Your Own App Using MIT App Inventor
MFRC522 RFID Library by Miguel Balboa
******************************************************************************
Social Media Links To Follow (I mean, if you want to):******************************************************************************


Comments