

3D Printing Technology has been changing the world of quick prototyping and engineering rapidly. Every hobbyist or budding engineer dreams of getting into the technology and using it to make their design better and faster. I was just like you and wanted to start 3D printing to bring my imagination into reality. But the best 3D printers are really expensive like the MakerBot Replicator or Ultimaker costing more than 1000$, which becomes impossible for a starter or hobbyist to buy. But there are very cheap kits nowadays to get started. I just started my 3D printing journey with a kit recently, and I will tell you all there are really great options to start, but there are lot of things missing to start with. In this tutorial, I will show how to get a 3D printer, build it, troubleshoot misprint, and enjoy it.
Step 1: 3D Printing TechnologiesBefore starting to make a 3D printer, you should know what types of 3D printers are available and how they work. I will try to give you a short idea about each type here.
- FDM (Fused Deposit Type)
- SLA (Stereo Lithography)
- DLP (Digital Light Processing)
- SLS (Selective Layer Sintering)
- SLM (Selective Layer Melting)
- LOM (Laminated Object Manufacturing)
FDM
FDM technology builds objects layer by layer from the very bottom-up by heating and extruding thermoplastic filament. Firstly, special software “cuts” CAD model into layers and calculates the way the printer’s extruder would build each layer. Along with thermoplastic, a printer can extrude support materials, as well. Then the printer heats thermoplastic until its melting point and extrudes it throughout nozzle onto the base, which can also be called a build platform or a table, along the calculated path. A computer of the 3D printer translates the dimensions of an object into X, Y and Z coordinates and controls that the nozzle and the base follow calculated path during printing. To support the upper layer, the printer may place underneath it a special material that can be dissolved after printing is completed.
Stereolithography (SLA)
The process of printing involves a uniquely designed 3D printing machine called a stereolithography apparatus (SLA), which converts liquid plastic into solid 3D objects. SLA 3D printers work with an excess of liquid plastic that after some time hardens and forms into a solid object. After the plastic hardens, a platform of the printer drops down in the tank a fraction of a millimeter and the laser forms the next layer until printing is completed. Once all layers are printed, the object needs to be rinsed with a solvent and then placed in an ultraviolet oven to finish processing.
Selective Laser Sintering (SLS)
Selective Laser Sintering (SLS) is a technique that uses lasers as a power source to form solid 3D objects. SLS is more widespread among manufactures rather than 3D amateurs at home as this technology requires the use of high-powered lasers, which makes the printer very expensive. This guy is an expert in making such printers as a hobby:
Laminated Object Manufacturing (LOM)
During the LOM process, layers of adhesive-coated paper, plastic or metal laminates are fused together using heat and pressure and then cut to shape with a computer-controlled laser or knife. Post-processing of 3D printed parts includes such steps as machining and drilling. LOM printers use a continuous sheet coated with an adhesive, which is laid down across substrate with a heated roller. The heated roller that is passed over the material sheet on substrate melts its adhesive. Then the laser or knife traces desired dimensions of the part. Also, the laser crosses patches of any excess material in order to help to remove it easily after the printing is done.
All these terms might get you confused, but I will say the cheapest type to get started is FDM. FDMs are popular because of the rep-rap project. Its easy to build one, but for a beginner, it is difficult to source all the parts differently and match it. That's where kits come into play. Now, in a kit you get the basic stuff that you can use to make a 3D Printer. Some popular kits are the listed below:
I guess my reason for choosing Anet was obvious because of the low price, but to be honest, if you have the budget, get the Geekteek. It has a dual extruder, and its nozzle diameter is also less. But the build volume is greater with mine: 220x220x240 mm³.
Step 3: The FrameThe frame comes with a lot of acrylic parts which are 8 mm in width. Start by assembling the frame as shown in the pictures. The acrylic frame joins with M8 screws and is very easy to assemble. The nuts are a little difficult to put inside the acrylic, I used a tweezer to put the nuts inside the slots. My fingers had trouble holding the nuts.
DISCLAIMERThe manufacturer had all the steps documented well, but some minor things were missing which were easy to figure out. I will mention some important check lists to ensure that your printer can work flawlessly, as I faced a lot of problems while building this, being my first 3D Printer, which I want to share with you all. This is applicable to all the printer kits and builds that you would do.
Step 4: Z-Axis Motor AssemblingThe most important part in a CNC are its axes: X, Y and Z. In a Cartesian type of printer like mine, there will be two motors for the Z-axis. Both the Z-axis motors couple to a lead screw with the help of a coupler.
What is a Lead Screw?
A leadscrew (or lead screw), also known as a power screw or translation screw, is a screw used as a linkage in a machine to translate turning motion into linear motion.
What is a Coupler?
It's a thing that connects two things, especially mechanical components or systems.
The Y-axis works on a belt system. The stepper motor is attached to a timing belt which pulls the slider (bed). We will talk about it in the next part. Before that, we will assemble the pulley, motor mount and threaded rod. The threaded rod holds the mount and the pulley together; by changing the thread screw length, we can increase the dimension of the build volume. The threaded screws are 8 mm and therefore, you need M8 nuts and M8 washer to tighten the rod in place.
Step 6: Y-Axis Rail InstallationThe next task is to install the linear slide shaft. These shafts are also 8 mm. The linear shaft doesn't work alone; they need linear bearing to work with. There are four linear bearings (sorry, the picture shows two because I was wrong that time due to the documentation being old). The four linear bearings connect to the bed and also slide on the shaft providing the Y-axis motion. There are end stops at one end of the shaft to provide the home position.
Step 7: Y-Axis Stepper Motor and Timing beltWhat is a Timing Belt?
Timing belts are a positive transfer belt and can track relative movement. These belts have teeth that fit into a matching toothed pulley. When correctly tensioned, they have no slippage, run at constant speed, and are often used to transfer direct motion for indexing or timing purposes
The very next step is to attach the stepper motor the mount with four M3 screws. If you have the timing belt pulley lose, then it would need to be tightened and fastened before proceeding further. Now using the timing belt, mount the belt through the pulleys and fix it to the Metal H bed mount. Take care to provide accurate tension on the belts, or else the stepper motor will skip steps and make your prints even worse. Keep it in a high tensioned state to get the best possible result.
Step 8: X-Axis Rails and Timing BeltNow, when the Y-axis is completed, its time to work on the X-axis. We first install the X-axis linear slide and linear bearing, and mount. It's tricky to align; the best way to align it to rotate the lead screws, so it goes on the top or the bottom to make the X-axis perfectly align. Once the alignment is right, secure the motor in its place with the M3 screws to the X-axis mount. Then place the timing belt and check that the tension is high before proceeding.
Step 9: Extruder Motor, Hot End and CoolingAfter completing all the axes, it's time to setup the extruder.
What is an Extruder?
We should probably start with what an extruder is. In fancy terms, it is a positive displacement machine designed to apply shear forces to raw ingredients in order to process them into finished goods (whew!). More simply, it is a machine designed to take material and push it through a barrel with a screw. The idea of “extrusion”, though, is to take material and push it out of a container. This would be similar to pushing toothpaste out of a tube. Now that we’ve got that covered, let’s see what this thing can do. Thermistor: The temperature of the extruder is an important reading, always double check whether your thermistor is intact or not. If the thermistor is not intact, use kaplon tape to fix it with the hot head.
Step 10: LCD MountingEvery 3D printer has an LCD to display all the information while the printing is going on. Some LCD modules come with rotary encoders, while some come with buttons like mine. Both systems have some pros and cons. The LCD mounts on the top with some M3 nuts and bolts. The LCD module is similar to the Arduino LCD shield, but this connects to the board with ISP header instead.
Step 11: Connections and PowerMotherboard
The main board is the Anet Motherboard which runs on atmega128, has five motor controllers, and hot end and heat bed connections through screw terminals. The terminal can be upgraded to handle more current. A higher current means more temperature on the heated bed, and means you have the possibility to work with high-temperature polymer.
Power
The whole 3D printer is powered by a 250W Watt 12 V PSU. The connections are simple; you need to attach a power cable and the connection to the motherboard.
Organizing cables
The cables, if left free, will get in the way of the motions and then tear away, so they need to be enclosed and organized properly. The manufacturer takes care of this very well; you are provided with cable enclosures and zip ties so that you can organize them properly.
Step 12: SlicingWhat is Slicing?
A so-called slicer takes a 3D drawing (most often in .STL format) and translates this model into individual layers. It then generates the machine code that the printer will use for printing.
3D printers can be either controlled through a small on-board control screen or through a (USB) interface with a computer or through both. User interface/control software allows a user to send a machine code file from the computer to the 3D printer, change some parameters on run time (e.g. speed, flow and temperature), and move the print head manually around the x/y/z axis.
Software
There are a lot of software programs. Reptier Host and Cura are popular, though, I had worked with Reptier Host and didn't like it. The results I got from it were not that good to me. I switched to Cura and the results were better than previous.
Step 13: Troubleshooting PrintPrint Material
You can use a lot of materials with this 3D printer:
- PLA
- PTEG
- ABS
- WOOD
- Flexible
- Nylon
- Carbon fiber
Now I am telling you, if you are building a 3D printer for the first time, you have high chances of not getting a good print; there are lots of fail prints. You might face this problem sometimes due to software or hardware. I will encourage you to spend some time debugging the issue. Mostly, hardware issues can be belt tension, while in software, it can be layer height, layer thickness, extruder temperature, etc. I am providing you a link that I used to debug my settings, though, I also got a lot of help from my friend.
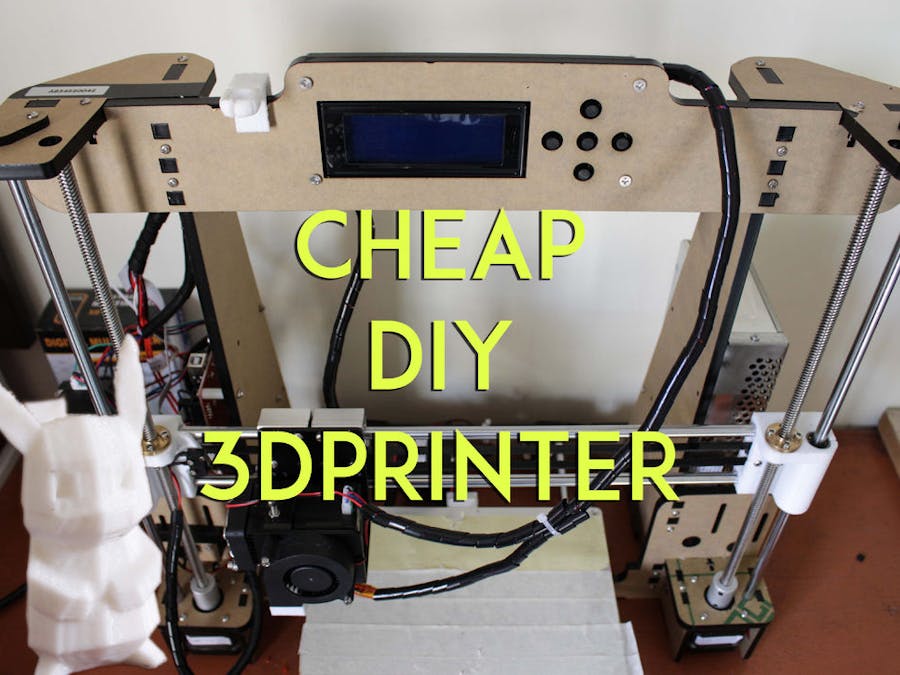
Step 14: ConclusionWith a printer under 200$, you can still be able to print with decent quality. It takes some time to understand, but it is really worth the time and money for the power of what you can do with it.
Future plan
The next thing I am planning to do is to build an enclosure to keep it away from dust and keep the temperature constant as it helps to produce good prints. Second thing is that I want to try printing some other material like PETG (ABS is good, but fumes are toxic).
If you want you can follow me on my Facebook page or you might wanna subscribe to my YouTube channel.


Comments