

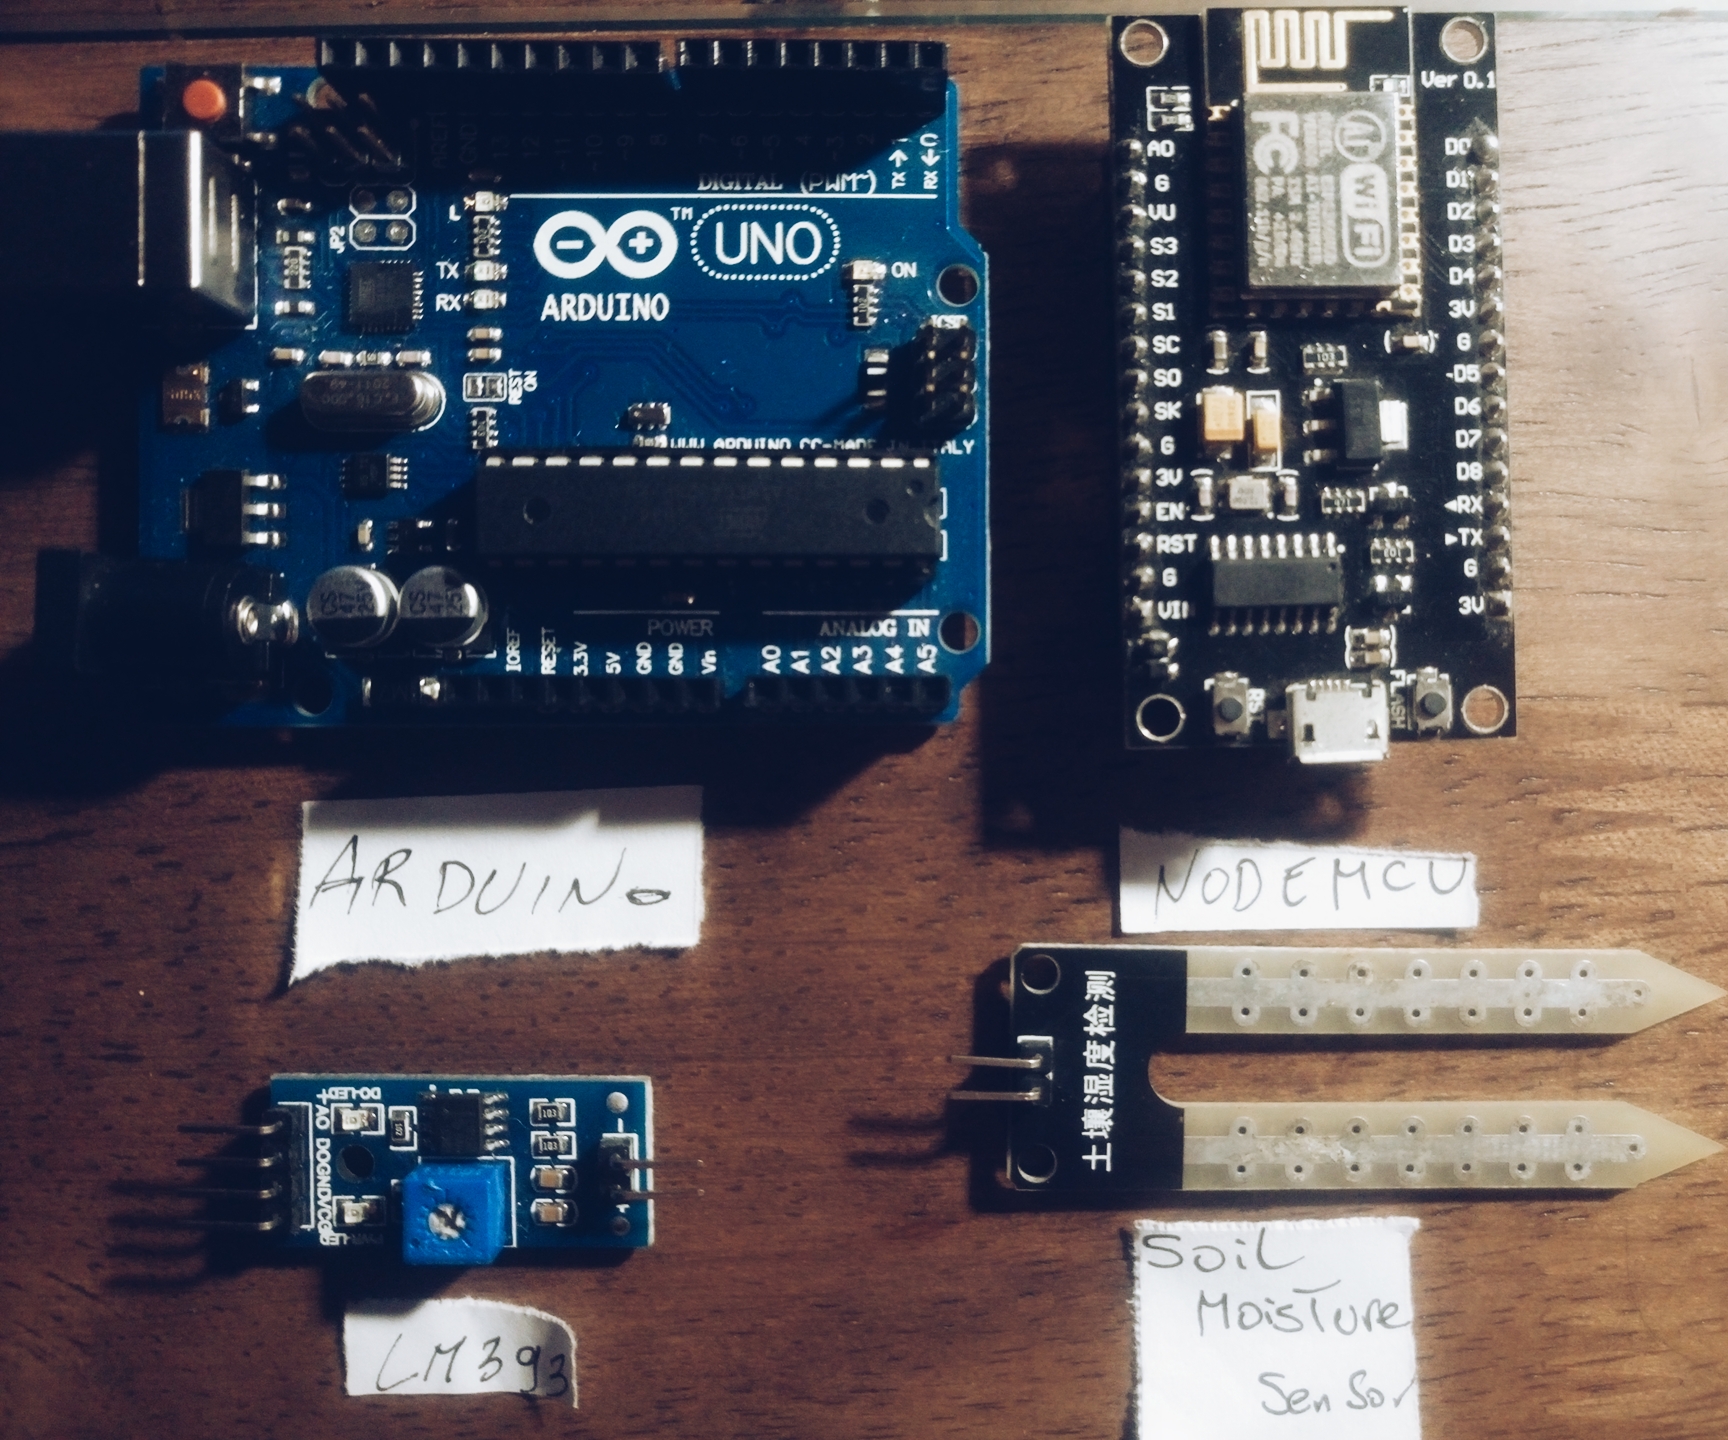
Hardware components | ||||||
_ztBMuBhMHo.jpg?auto=compress%2Cformat&w=48&h=48&fit=fill&bg=ffffff) |
| × | 1 | |||
 |
| × | 1 | |||
 |
| × | 1 | |||
Software apps and online services | ||||||
 |
| |||||
Hand tools and fabrication machines | ||||||
 |
| |||||
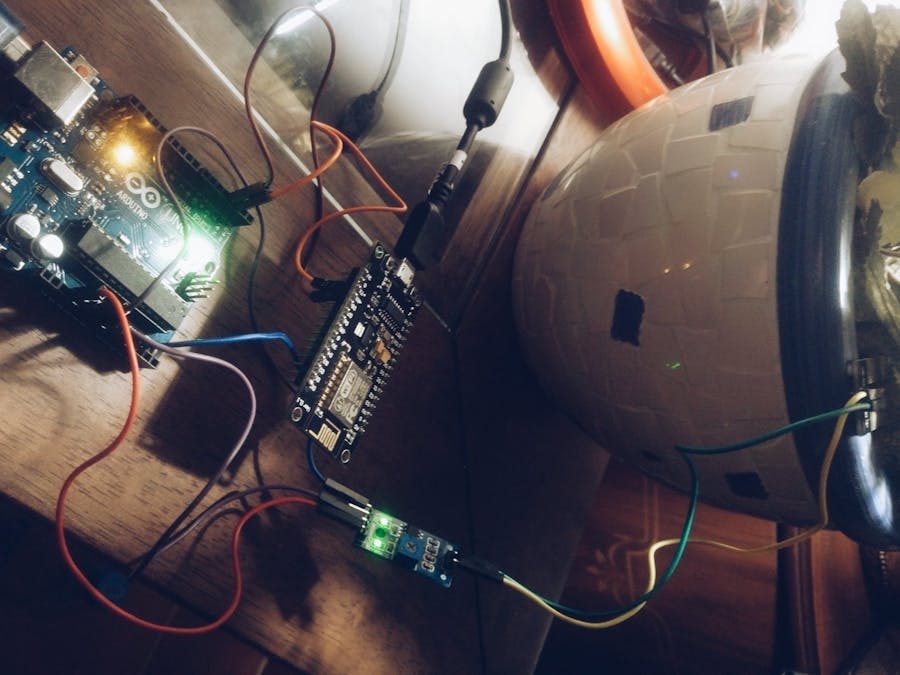
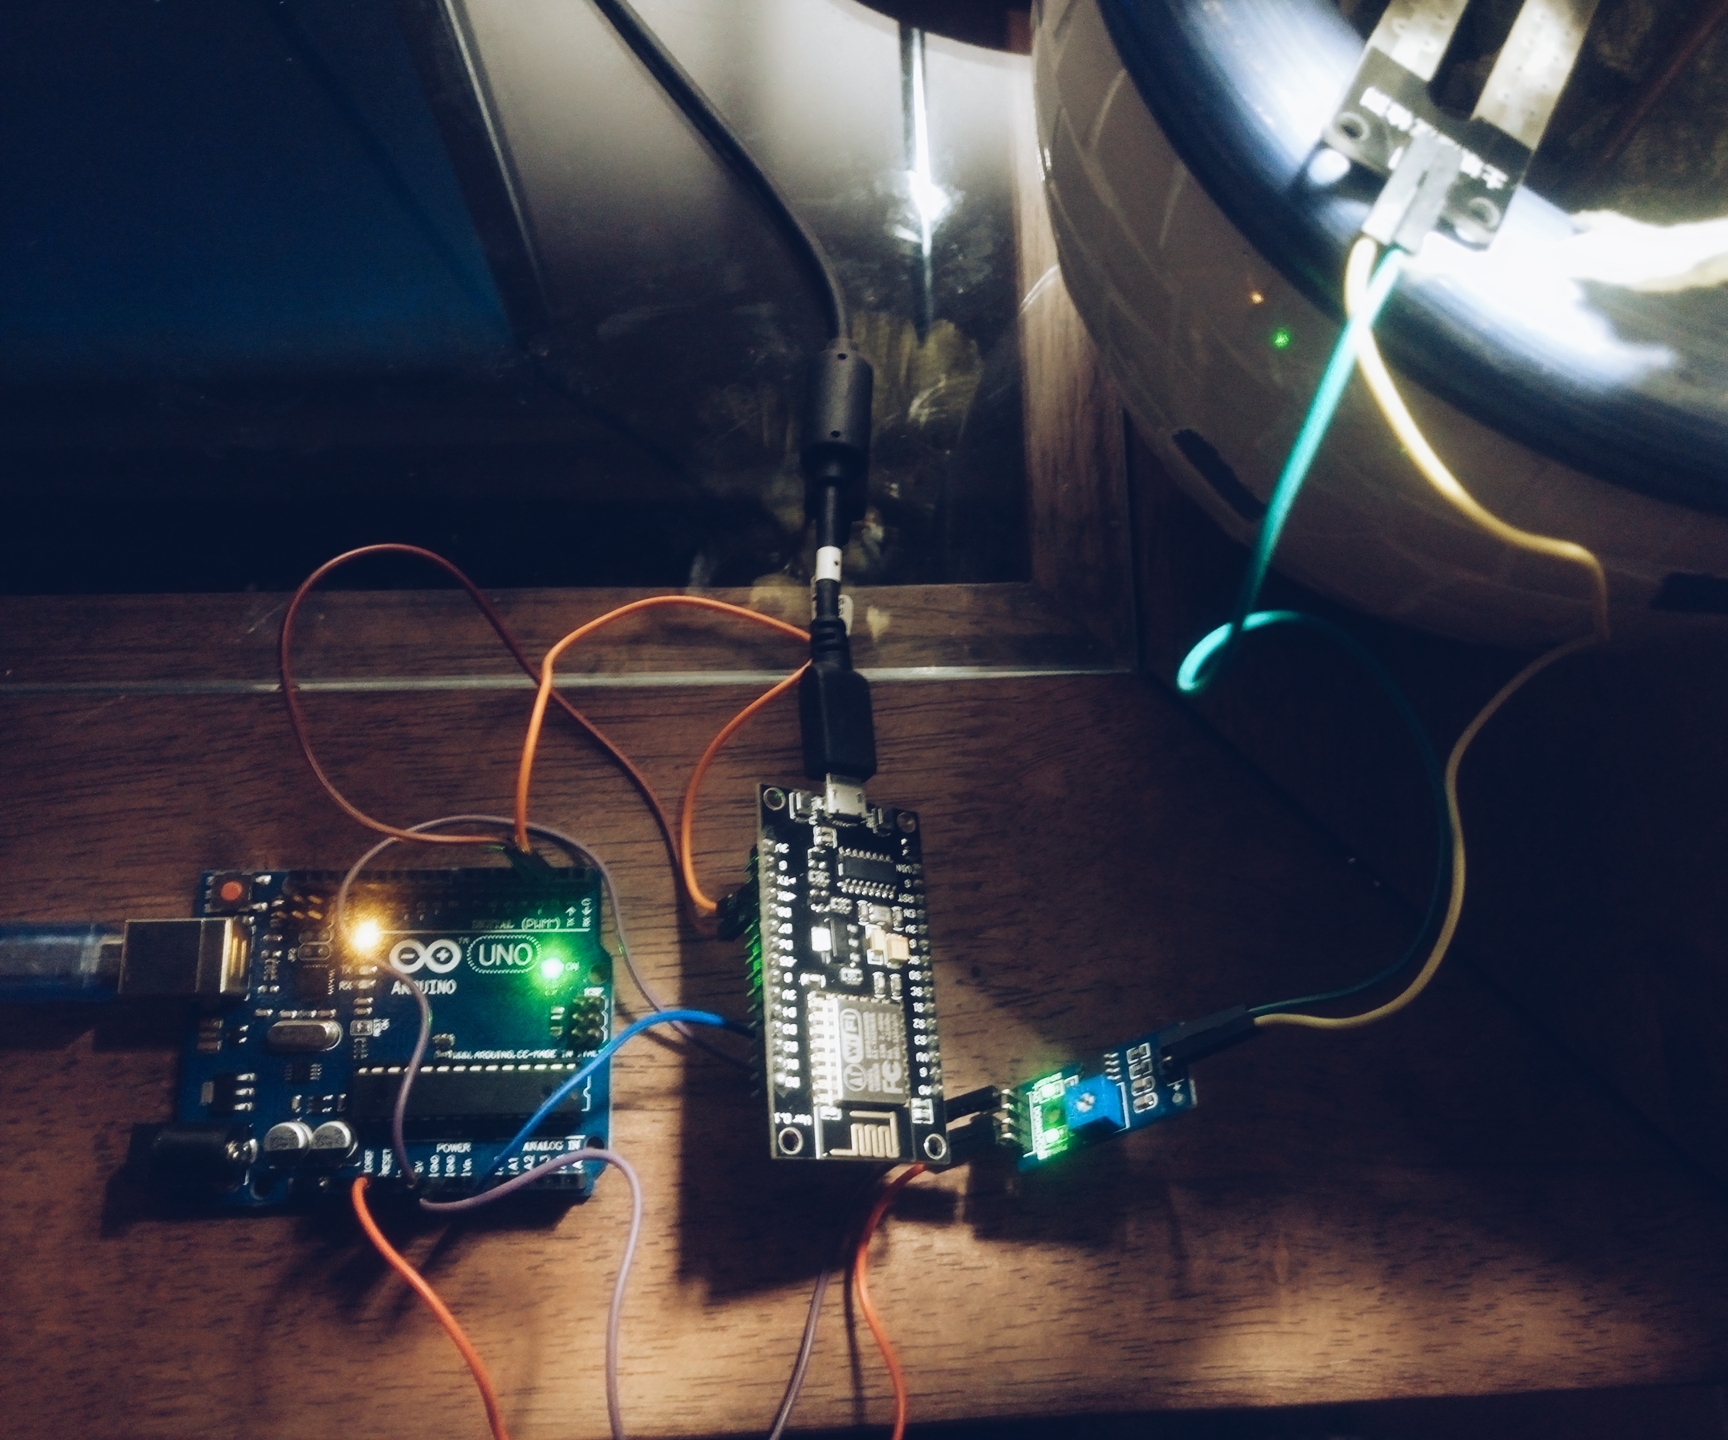
lately we've been hearing about smart irrigation, one of the things that pop up to our minds is the soil moisture detecting for that you will need a soil moisture sensor.
Then if you want to send the data to a server for example, you will need a gateway which is ESP8266 ( NodeMCU) communicating with the microcontroller ( Arduino )

Connections
Between Arduino & LM393 :
Arduino 5V- LM393 VCC
Arduino GND - LM393 GND
Arduino A0 - LM393 A0 ( analog pins)
Between LM393 & Soil Moisture Sensor :
LM393( +) - Soil Moisture Sensor( +)
LM393 (-) - Soil Moisture (-)
Betweeen NodeMcu & Arduino :
NodeMcu Gnd - Arduino Gnd
NodeMcu TX - Arduino Rx
NodeMcu RX - Arduino TX
Arduino 5V- LM393 VCC
Arduino GND - LM393 GND
Arduino A0 - LM393 A0 ( analog pins)
Between LM393 & Soil Moisture Sensor :
LM393( +) - Soil Moisture Sensor( +)
LM393 (-) - Soil Moisture (-)
Betweeen NodeMcu & Arduino :
NodeMcu Gnd - Arduino Gnd
NodeMcu TX - Arduino Rx
NodeMcu RX - Arduino TX


Comments