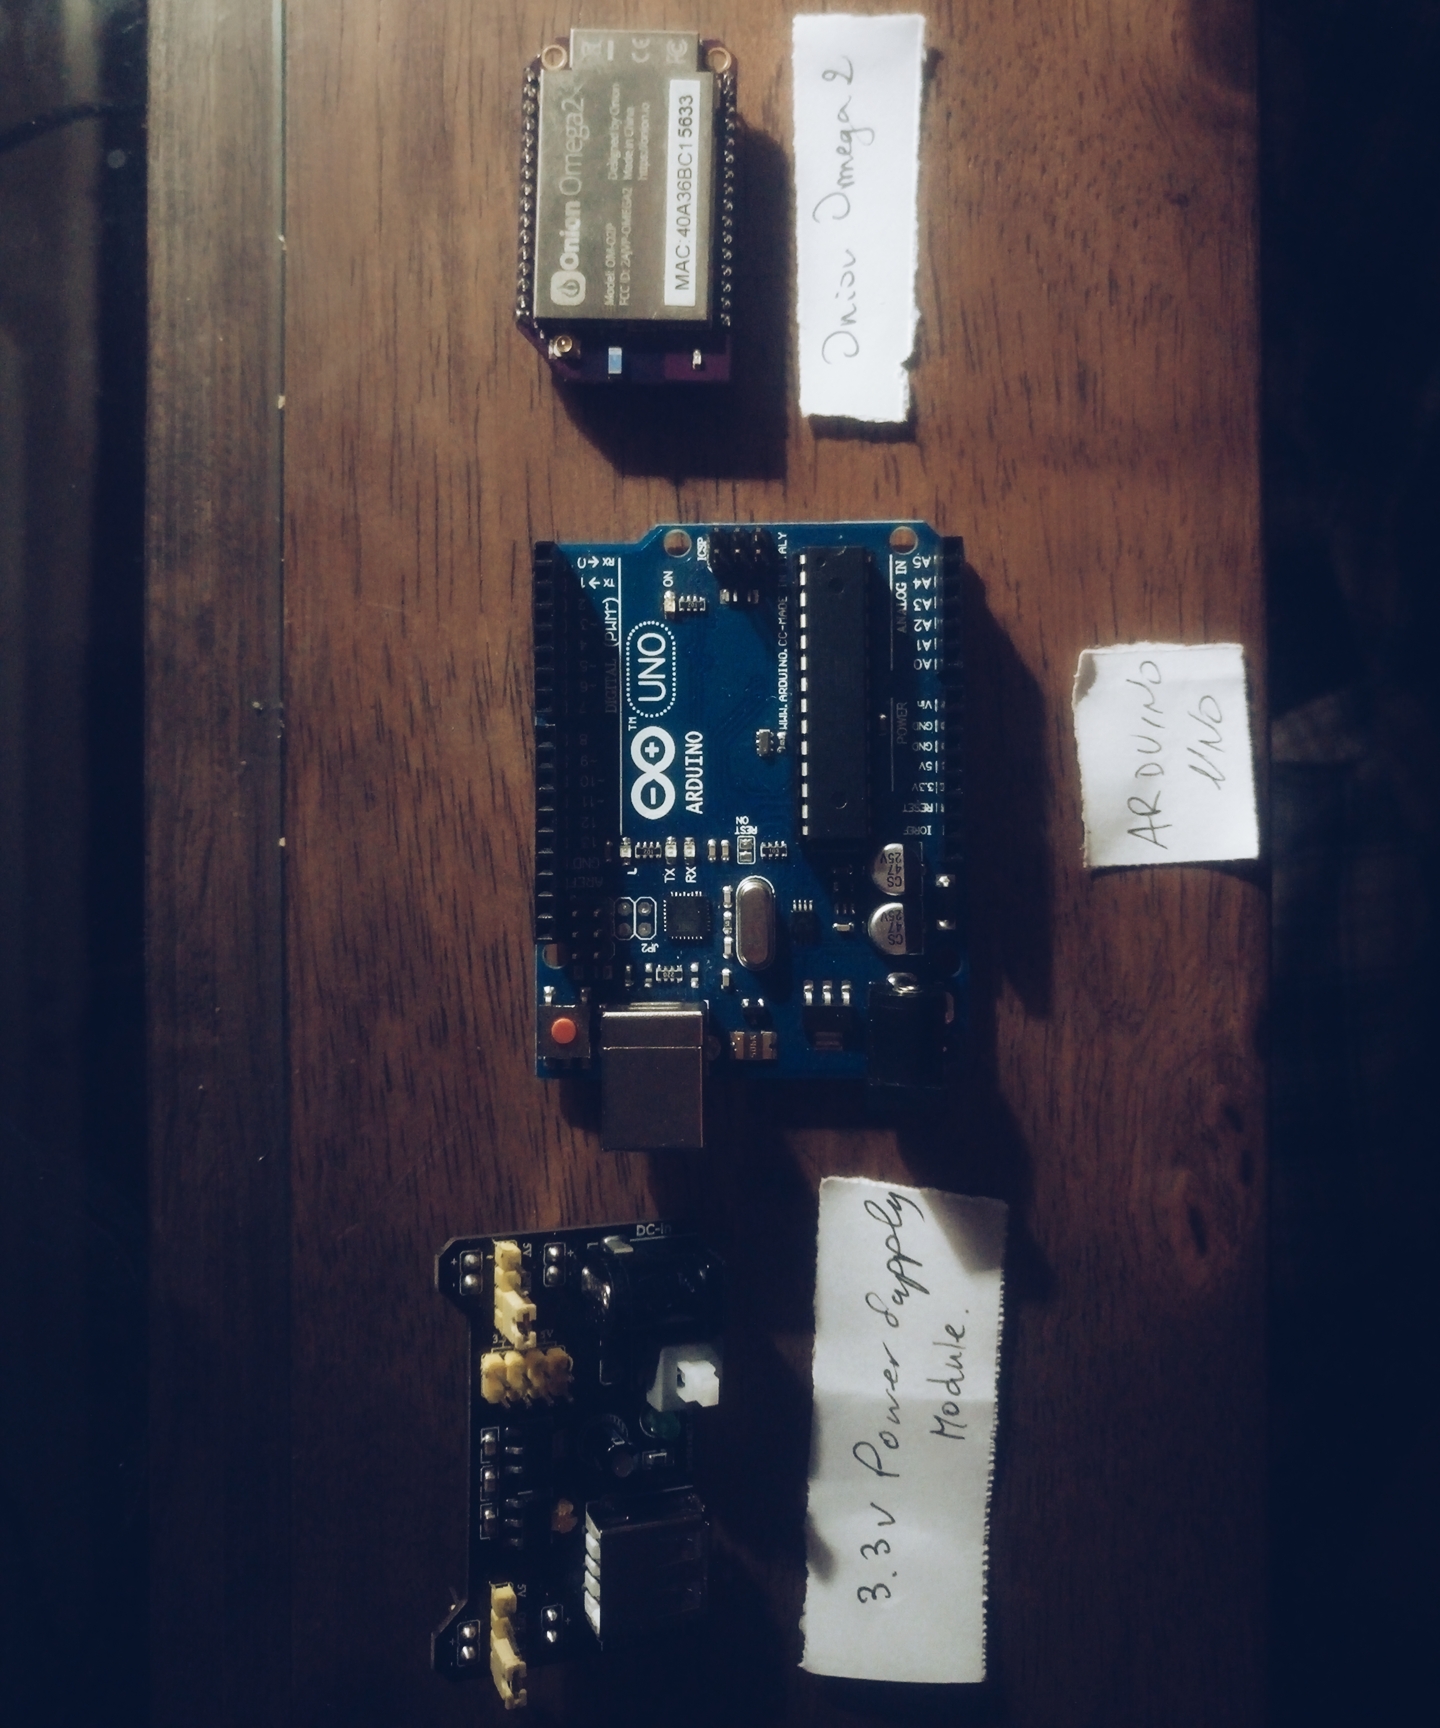
Fouad
Published

Interfacing Arduino Uno & Onion Omega 2

Interfacing Arduino and Onion Omega2 IoT platform will make creating connected devices easier!

IntermediateFull instructions provided1,267
Interfacing Arduino Uno & Onion Omega 2

Things used in this project

Hardware components

Arduino UNO
Arduino UNO
×1
Omega2
Onion Corporation Omega2
×1
SparkFun Breadboard Power Supply 5V/3.3V
×1

Software apps and online services

Arduino IDE
Arduino IDE
Visual Studio Code Extension for Arduino
Microsoft Visual Studio Code Extension for Arduino

Hand tools and fabrication machines
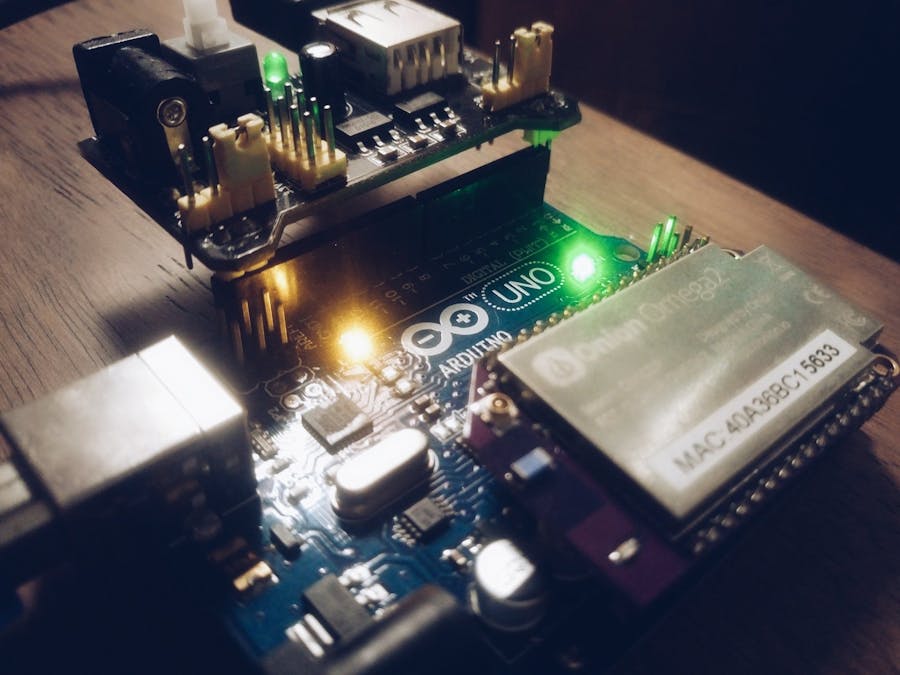
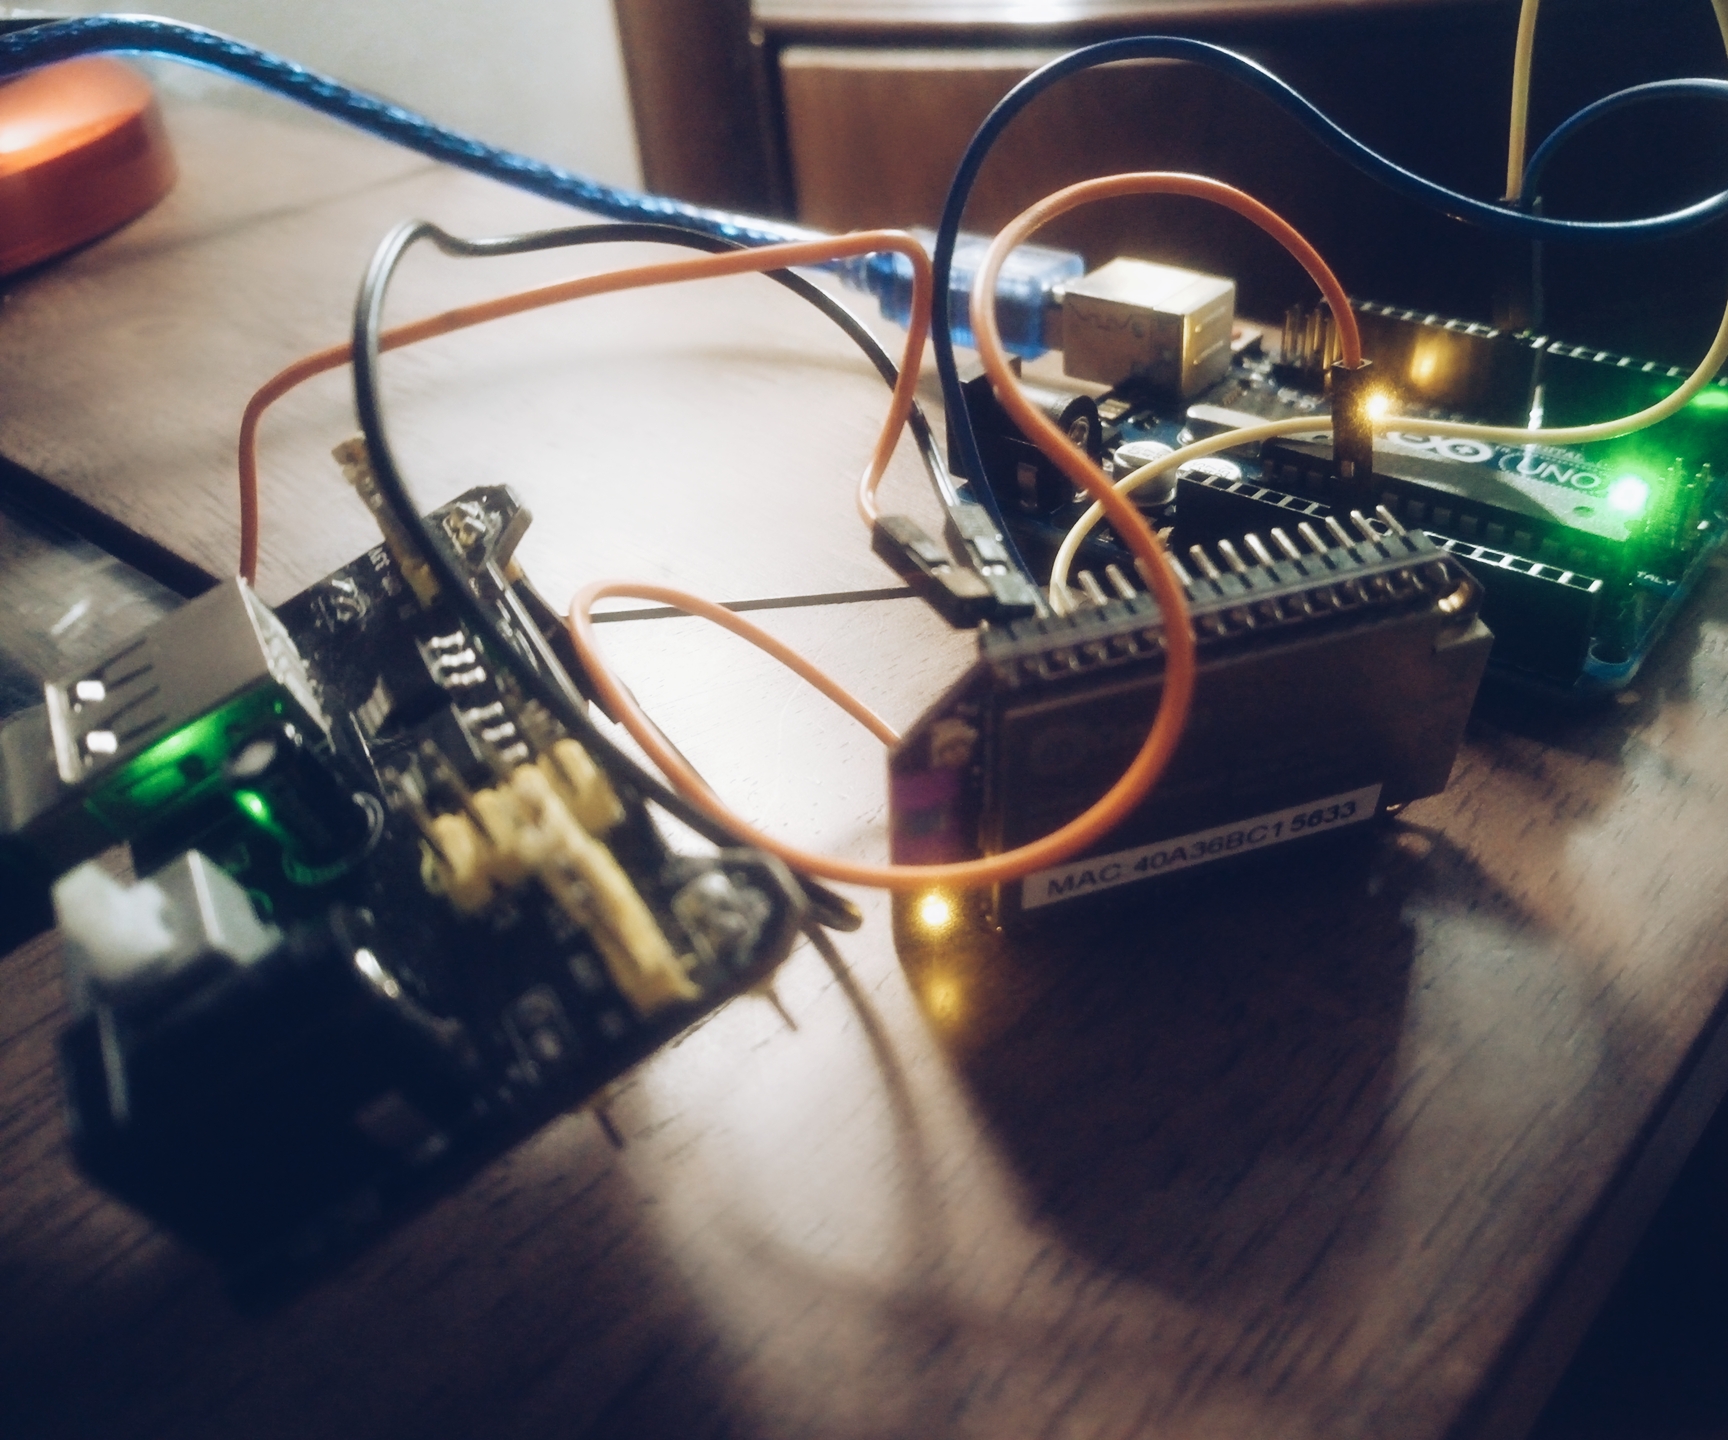
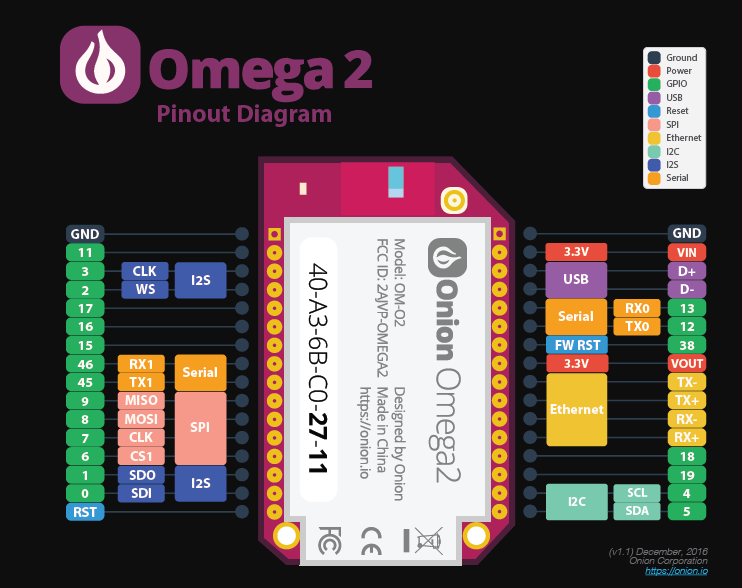
Premium Female/Female Jumper Wires, 40 x 3" (75mm)
Premium Female/Male 'Extension' Jumper Wires, 40 x 3" (75mm)

Story

Read more

Custom parts and enclosures

Components Required

Schematics

Assembling Hardware

3.3V supply (+) - 3.3v input Onion omega
3.3v supply (-) - GND onion omega
Gnd Arduino - GND onion omega
Tx arduino - Rx onion omega
Rx arduino - Tx onion omega

Datasheet Onion Omega

Code

Flashing the Arduino

Arduino
First we need to flash the arduino with a sketch that is programmed to communicate (read and/or write data) using serial communication on pins TX/RX .

We will use the Arduino serial library to send data back and forth. Here’s a very simple example sketch that will make the arduino continously send out “arduino”
void setup() {
  Serial.begin(9600);
}

void loop() {
  Serial.println("arduino");
  delay(100);
}

Arduinoreadfromomega.ino

Arduino
Here is an example arduino program that will make the arduino continuously read from the Omega , Only after it reads the string “ArduinOnion”, it will send out the string “Received” to the Omega:
String readSerial;

void setup() {
  // start serial for output at baud rate 9600
  Serial.begin(9600);
}

void loop() {
  delay(100);
  // wait until there's serial data available
  if (Serial.available() > 0) {
    readSerial = Serial.readString();

    // check is the received data is "ArduinOnion"
    if (readSerial == "ArduinOnion") {
      Serial.print("Received");       // send the string "Received" to the Omega
      readSerial = "";
    }
  }
}

PythOnion

Python
Here is some example Python code that will make the Omega continuously send “ArduinOnion” until it reads the response “Received” from the micro-controller. In order for this to work correctly, your micro-controller will have to be flashed with the example Serial sketch I've introduced above.
                        import serial

                        response = ""
                while (response != "Received"):
                  
                        # Setup serial
  ser = serial.Serial(port = '/dev/ttyS1', baudrate = 9600, timeout = 2)

                     # Write string on UART1
                     ser.write("ArduinOnion")

                   # Read 8 byte response
                     response = ser.read(8)
                     ser.cancel_read()
                     print repr(response)

            print "Received ArduinOnion from the microcontroller!"

Credits

Fouad

Fouad

1 project • 9 followers

Comments