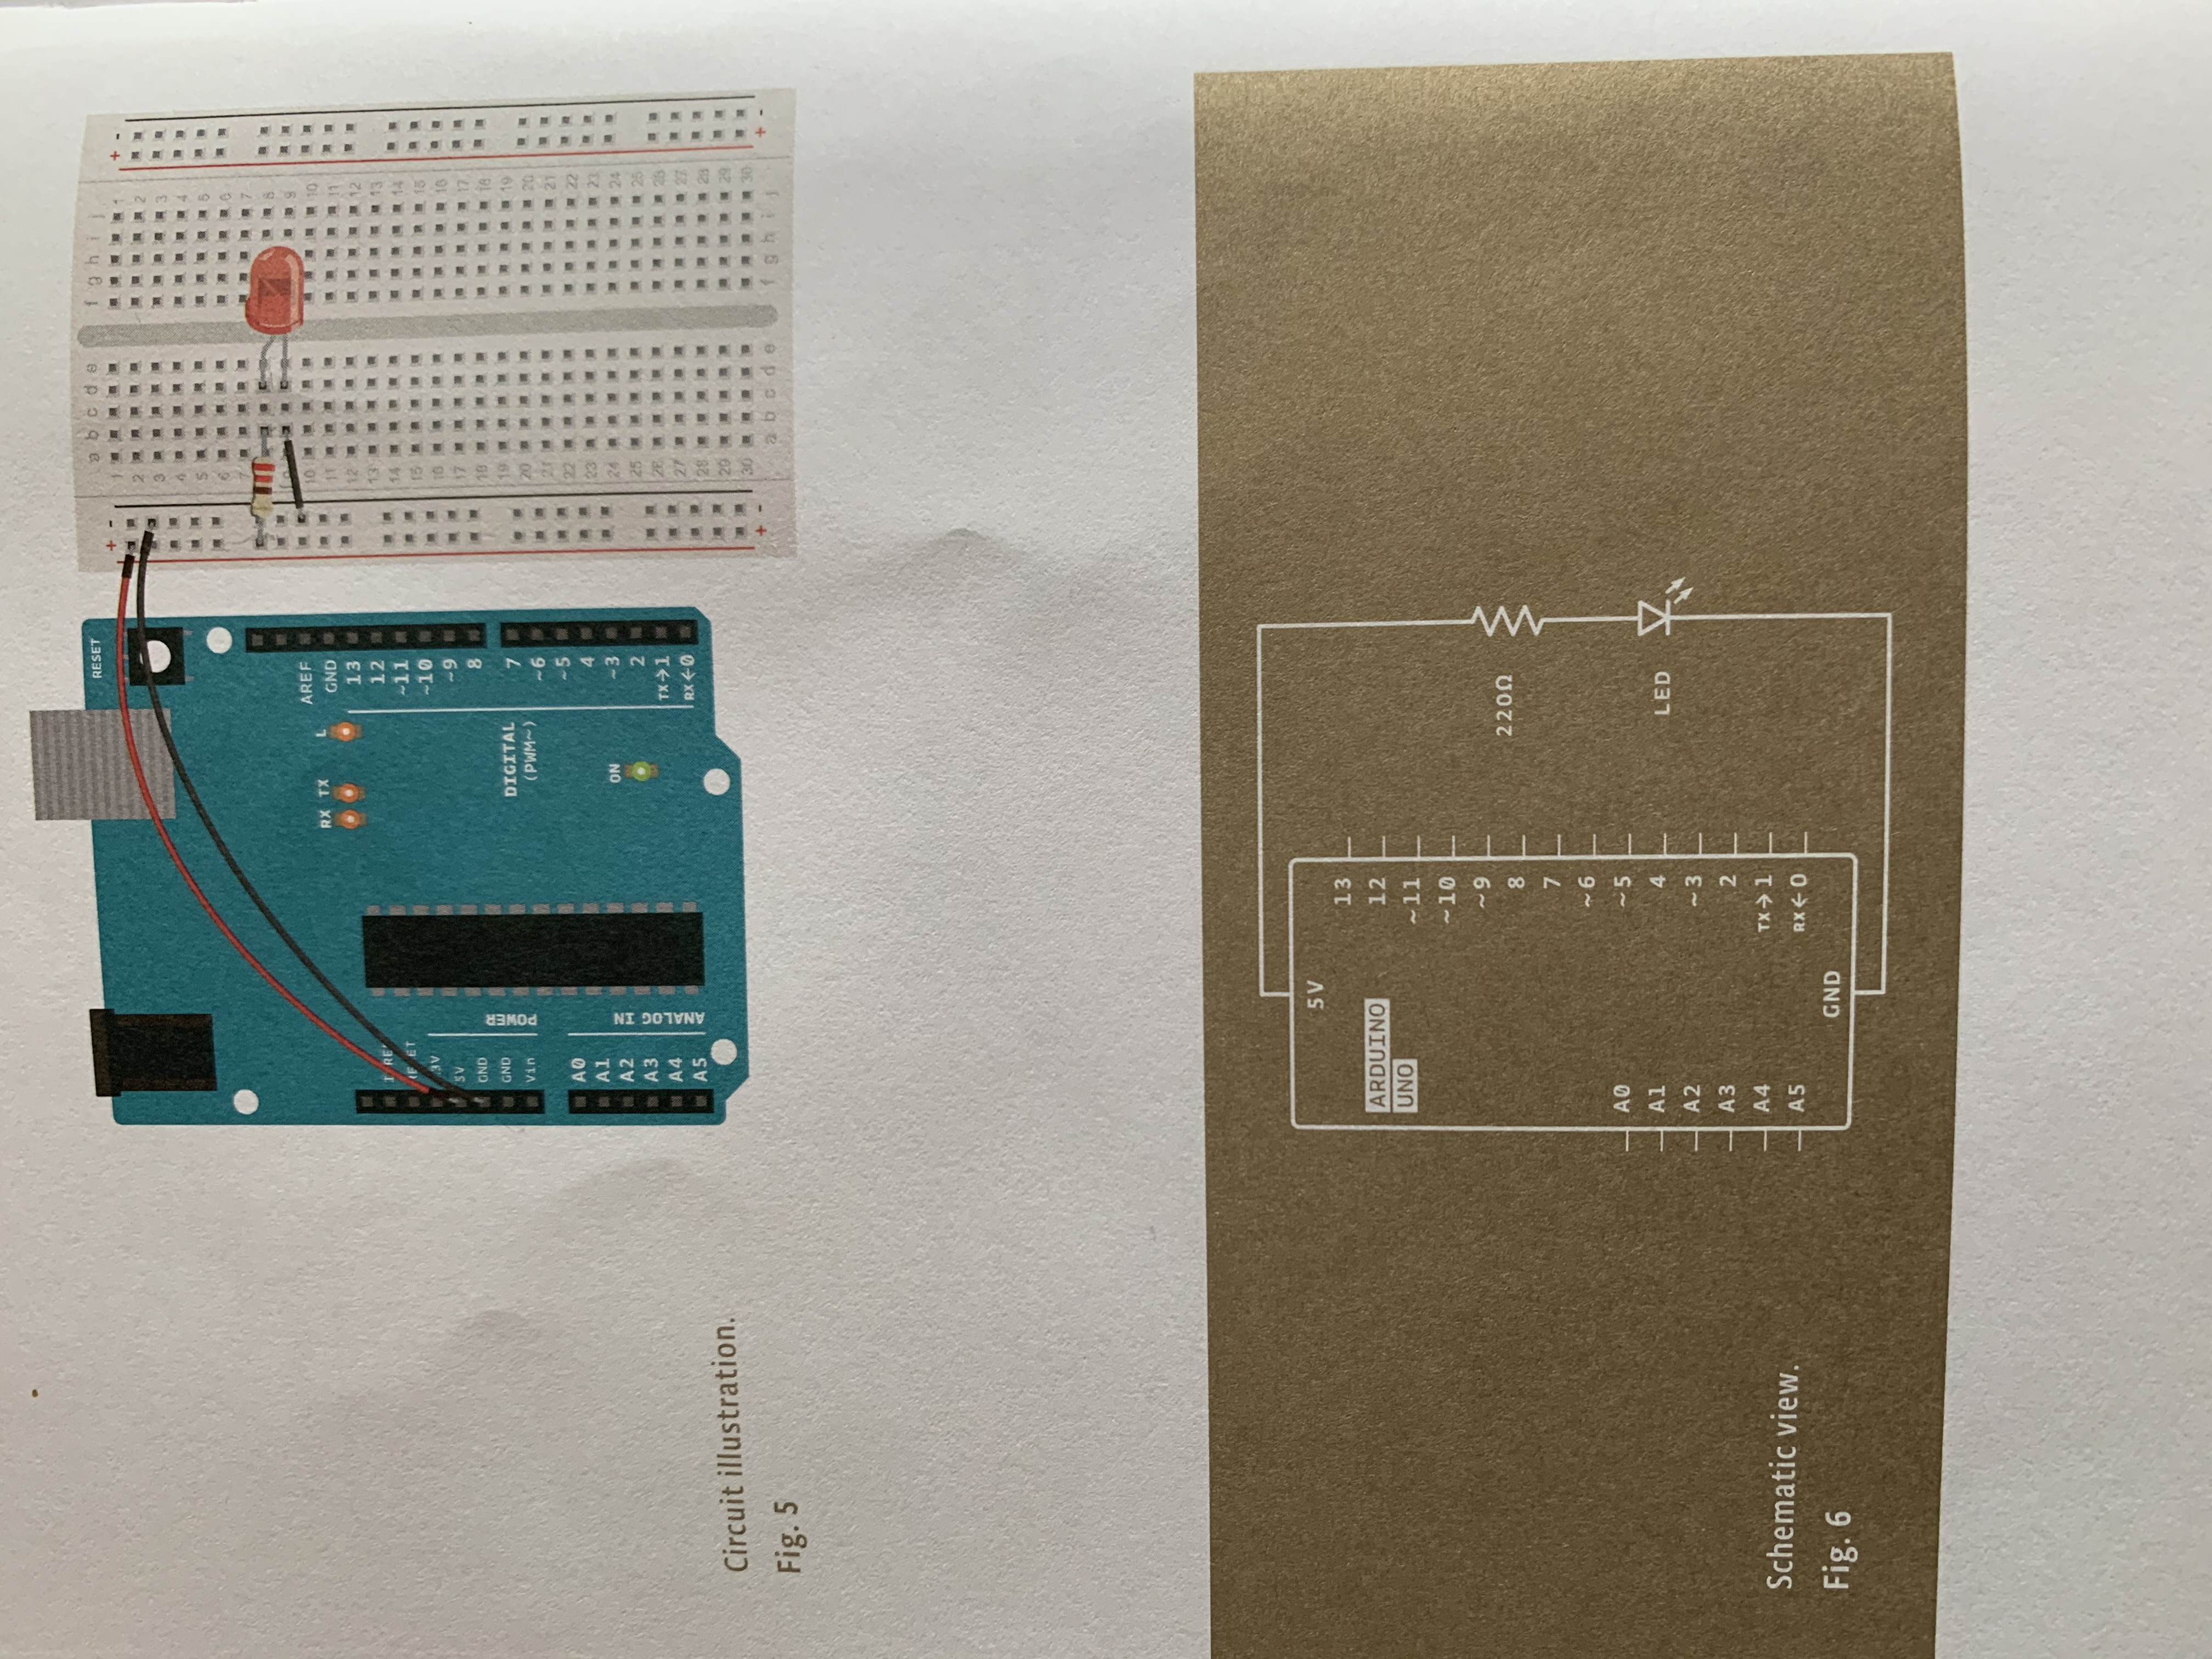
This is how to build a simple circuit on Arduino. All components were used from the Arduino starter kit.
The first step is to take your positive wire and connect it from the 5 volts power supply to the positive tramline. Then insert one leg of a 220 ohms resistor to the positive tramline. Connect the other leg of the resistor to any pin on the breadboard. Let's say you put the other leg of the resistor on 3B. ( Line 3 Column B) The you take the long led of the LED (anode) on line 3. Now the LED has electricity. Connect the short leg (cathode) to the line below. So in this case it would be line 4. Next insert a small negative wire from line 4 to the negative tramline. Lastly, put a longer negative wire from the tramline to the ground pin on the Uno board. Refer to the picture below if you need assistance. If you want some extra practice then refer to the video.
The video has a few different circuits but it is still simple. Use it if you want more practice





Comments