


This RFID project is designed to help you understand the fundamental workings behind the automated attendance systems that we already see everywhere. What makes this project stand out is how inexpensive it can be, while not at the expense of any learning potential. I hope this project sparks in your mind new applications for this tech in spaces where it is not already in use.
What Does The Project Accomplish?- We automate check-ins and check-outs
- An LCD screen displays real-time feedback
- Data is safely stored offline through EEPROM
- A real-time clock is integrated to keep logs accurate
- The entire thing is customizable with basic Arduino code
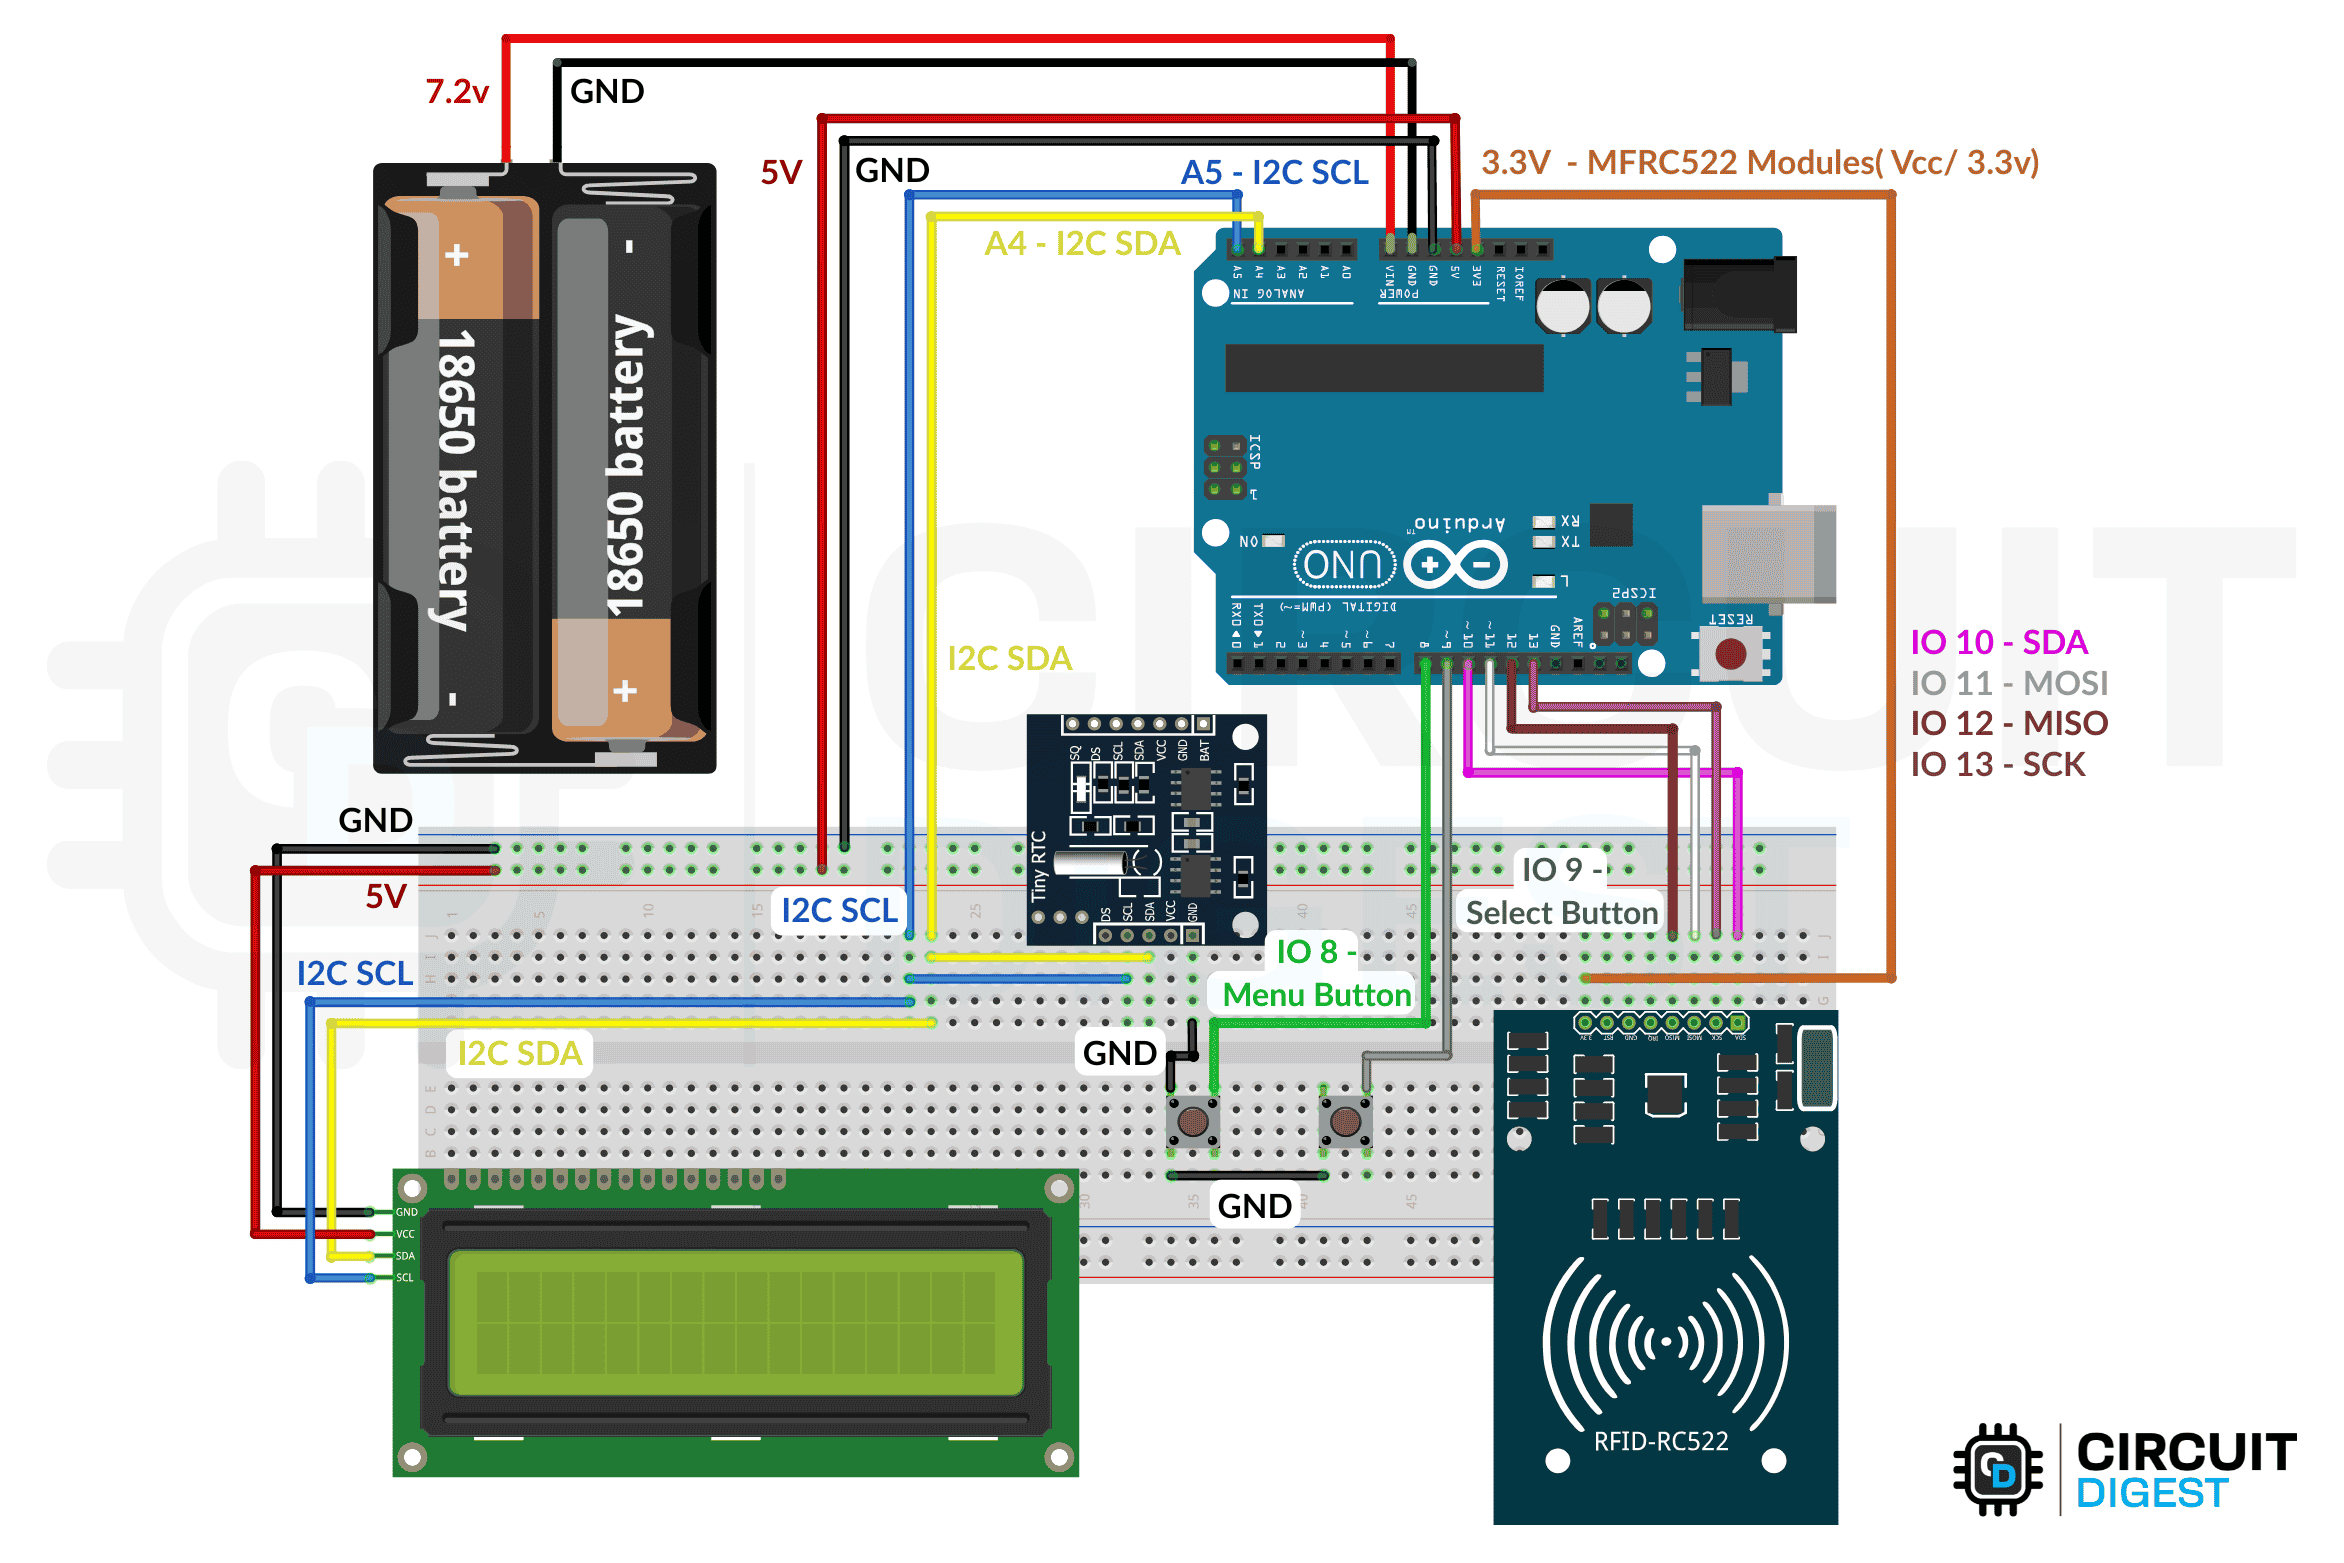
- Connect Arduino 5V/GND to breadboard rails.
- Wire RFID: VCC to 3.3V, GND, RST to D7, SDA to D10, MOSI to D11, MISO to D12, SCK to D13.
- Wire LCD & RTC: VCC to 5V, GND, SDA to A4, SCL to A5.
- Buttons: One pin to GND, other to D8 (Menu), D9 (Select).
- Verify wiring, power via USB/adapter.
- Test with code to check LCD, RFID, buttons.
This Arduino-based RFID attendance system uses an MFRC522 reader, DS1307 RTC, EEPROM, and a 16x2 I2C LCD to automate check-ins and check-outs. The code starts by including libraries, defining pin connections, and initializing components like the RFID module, clock, and display. During setup, it checks the RTC, loads stored data from memory, and shows a startup message with the current count of people inside.
The main loop handles five core tasks: reading button input, processing serial commands, updating the LCD, scanning RFID cards for entry or exit, and scrolling long names or IDs. Users can navigate menus to view logs, clear records, check system status, or set the time. Attendance logs are saved in EEPROM, and the LCD provides real-time feedback, making the system fully functional and ready for use.
Demo- When the system is powered on, it shows “RFID Attendance, ” loads data from the EEPROM, and displays the time and attendance count.
- When a card is scanned, it reads the name/ID, logs the check-in or check-out, updates the count, and shows the result for 3 seconds.
Cases:
- Check-in: Displays “CHECKED IN” and increments the count by 1
- Check-out: Displays “CHECKED OUT” and decrements the count by 1
- Invalid card: Displays “ACCESS DENIED”
And just like that, we are done building an attendance tracking solution using Arduino Uno. This tutorial is only the base upon which numerous applications are waiting for you to build. You will find the circuit diagram and complete project code in their respective sections.If you would prefer a more comprehensive guide, you can visit the step-by-step, heavily detailed version of the RFID-based attendance system using Arduino Uno project.


Comments