



Hardware components | ||||||
 |
| × | 1 | |||
 |
| × | 1 | |||
 |
| × | 1 | |||
Software apps and online services | ||||||
 |
| |||||
Hand tools and fabrication machines | ||||||
| ||||||
Source: Adapted for Hackster.io from my original work published on CircuitDigest. This version has been reorganized and rewritten specifically for the Hackster community with updated structure.Project Overview
Object detection is one of the most widely used computer vision techniques in robotics, automation, surveillance, and smart monitoring systems. Unlike image classification, which assigns a single label to an entire image, object detection identifies every recognizable object within a scene and estimates its position.
In this project, the Raspberry Pi captures images using a USB camera. Each image is securely transmitted to a cloud inference service, where an object detection model analyzes the scene. The processed results are returned to the Raspberry Pi and displayed in the terminal, including the detected object names, confidence values, and the total number of detections.
This approach allows developers to experiment with computer vision without running a large neural network directly on the Raspberry Pi.
By completing this project, you will learn how to:
- Capture images using a USB webcam connected to Raspberry Pi.
- Configure Python for image acquisition.
- Send image data to a cloud inference endpoint.
- Read and interpret detection results returned as JSON.
- Display detected object names and confidence scores.
- Understand where cloud inference is useful compared to running models locally.
The complete workflow consists of four simple stages.
Step 1 — Capture an ImageA USB camera connected to the Raspberry Pi captures a frame either manually or at predefined intervals.
Step 2 — Upload the FrameThe captured image is encoded into JPEG format and transmitted through an HTTPS request to a cloud inference endpoint.
Step 3 — AI ProcessingThe server analyses the uploaded image using a pre-trained object detection model. Each detected object is assigned:
- Object label
- Confidence score
- Bounding box coordinates
After processing, the Raspberry Pi receives a JSON response containing all detections. The program extracts the relevant information and prints the results directly in the terminal.
For this project, you will need:
- Raspberry Pi 4 (or newer)
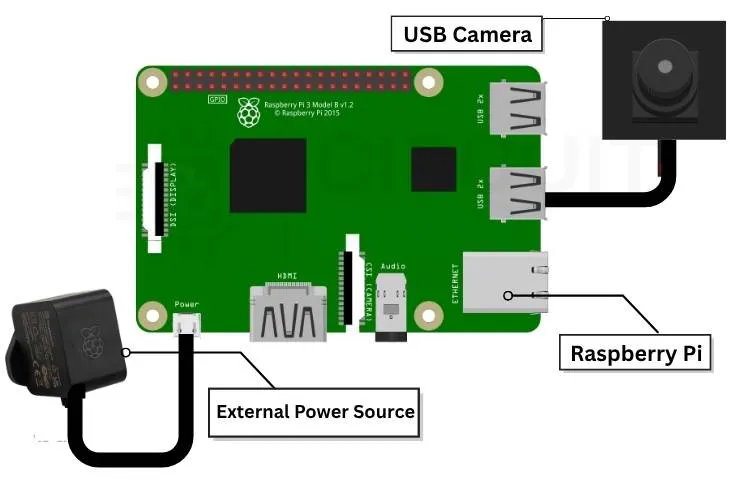
- USB Webcam
- microSD Card with Raspberry Pi OS
- Stable Internet Connection
- Raspberry Pi Power Supply
Install the following software before running the project:
- Raspberry Pi OS
- Python 3
- OpenCV
- Requests Library
- Thonny IDE (optional)
- SSH or VNC Viewer (optional for remote access)
Before running the application, install Raspberry Pi OS onto a microSD card using Raspberry Pi Imager. During installation, you can configure Wi-Fi credentials, hostname, username, password, and enable SSH if remote access is required.
Once the operating system is installed, insert the microSD card into the Raspberry Pi, connect the USB camera, power the board, and verify that both the operating system and camera are detected correctly.
You can interact with the Raspberry Pi using one of the following methods:
Local DesktopConnect a monitor, keyboard, and mouse directly to the Raspberry Pi.
SSHControl the Raspberry Pi remotely from another computer using the terminal.
VNCUse VNC Viewer to access the complete Raspberry Pi desktop remotely.
The complete detection process follows this sequence:
USB Camera
      │
      ▼
Raspberry Pi
      │
Capture Image
      │
      ▼
HTTPS Request
      │
      ▼
Cloud Object Detection
      │
      ▼
Detection Results
      │
      ▼
Terminal Output
USB Camera
      │
      ▼
Raspberry Pi
      │
Capture Image
      │
      ▼
HTTPS Request
      │
      ▼
Cloud Object Detection
      │
      ▼
Detection Results
      │
      ▼
Terminal Output
If you'd like to explore similar applications, you can refer to these collections of Raspberry Pi projects for beginners and IoT projects.


Comments