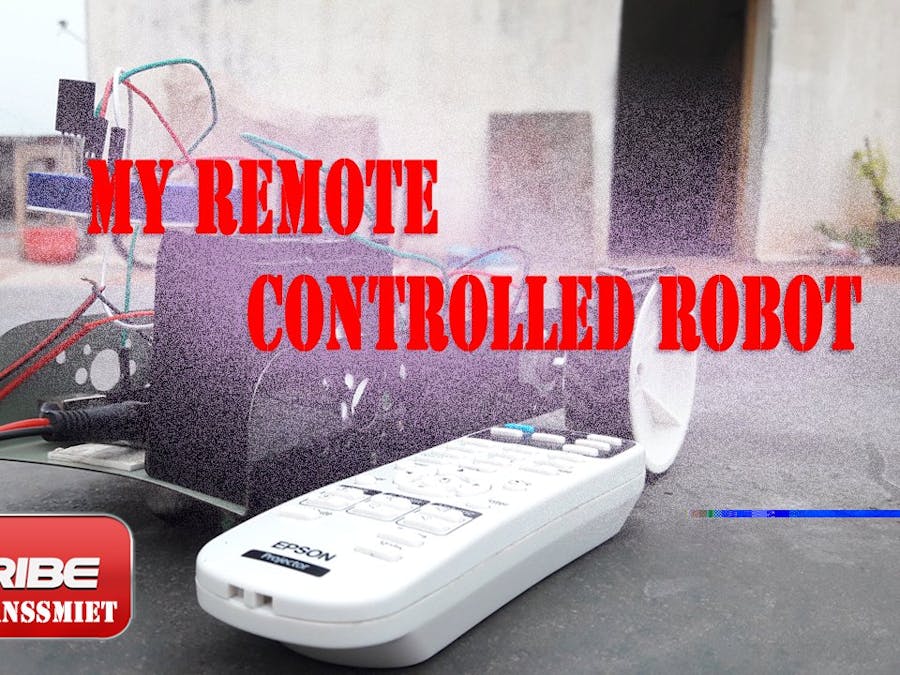
Hello everyone, This is my first post on this community. I hope my project will be helpful for all.
To do the project , we have the following two experiments to be completed,
1. IR Decoding
2. IR Robot Main Program
I IR DECODING
My project is all about IR communication where a transmitter and a receiver is used. A Remote acts as an IR Transmitter and an IC acts as a receiver. IR rays are one among the electromagnetic waves which is invisible to human naked eye. The IR Receiver IC used here is TSOP1738 can be operated upto 38MHZ.
The Remote has different frequencies for each button. As we have to control the movement of the robot, we can decode the frequencies for Forward, Backward, Left, Right movement. At First to decode the frequencies, try connecting your TSOP1738 IC and Ardunio uno through following connection.
=>>Connect OUTPUT to PIN 11 on Arduino uno
=>>Connect VCC to VCC on Arduino uno
=>>Connect GROUND to GND on Arduino uno
The Decoding program on Arduino IDE is given below.
#include <boarddefs.h>
#include <IRremote.h>
#include <IRremoteInt.h>
#include <ir_Lego_PF_BitStreamEncoder.h>
int RECV_PIN = 11;
IRrecv irrecv(RECV_PIN);
decode_results results;
void setup()
{
 Serial.begin(9600);
 irrecv.enableIRIn(); // Start the receiver
}
void loop() {
 if (irrecv.decode(&results)) {
   Serial.println(results.value, HEX);
   irrecv.resume(); // Receive the next value
 }
}
Now the program willl be explained in detail step by step.
1. Initially, the Header files for IR Remote are to be included, i.e,
#include <boarddefs.h>
#include <IRremote.h>
#include <IRremoteInt.h>
#include <ir_Lego_PF_BitStreamEncoder.h>
2. The next step is to declare the IR receiver output pin. Hence declare the IR receiver pin on pin 11, i.e,
int RECV_PIN=11;
3. The next step is to set the BAUD RATE to 9600, i.e,
Serial.begin(9600);
4. Place a conditional statement for obtaining the decoded frequency values, i.e,
if (irrecv.decode(&results))
{
Serial.println(results.value, HEX);
irrecv.resume();
}
5. The last step is to upload the program to Arduino and open the serial monitor on the Right top corner.
6.Now press a button on your remote, simultaneously you get a decoded HEX CODE on the serial monitor.
7. From the HEX codes obtained, select a particular codes for forward, backward,left and right movements.
0xC1AA0DF2 - Forward button
0xC1AA4DB2 - Backward button
0xC1AACD32 - Left Button
0xC1AA8D72 - Right Button
0xC1AA11EE - Stop Button
II IR ROBOT MAIN PROGRAM
Now the Automation or Robot control is done by connecting
1. A High volt dc motor
2. A 12 volt Rechargable battery
3. An Arduino uno board
4. A Motor driver.
The Connections are given as follows,
Now the High volt Dc motor is interfaced with Arduino uno microcontroller using a Dual H bridge motor driver module(L293D).
Motor 1 ------> PIN 2,PIN 3
Motor 2------> PIN 4,PIN 5
Atlast a 12 volt Rechargable Dc supply is given to the motor driver.
The decoded frequencies from before experiment are then inserted into the following main program for the doing a perfect automation.
#include <boarddefs.h>
#include <IRremote.h>
#include <IRremoteInt.h>
#include <ir_Lego_PF_BitStreamEncoder.h>
int receiver = 11;           // Signal Pin of IR receiver to Arduino Digital Pin 11
IRrecv irrecv(receiver);     // create instance of 'irrecv'
decode_results results;      // create instance of 'decode_results'
void setup()
{
 Serial.begin(9600);
 Serial.println("IR Receiver Button Decode");
 irrecv.enableIRIn(); // Start the receiver
 pinMode(2,OUTPUT);
 pinMode(3,OUTPUT);
 pinMode(4,OUTPUT);
 pinMode(5,OUTPUT);
}
void loop()
{
 if (irrecv.decode(&results))                 // have we received an IR signal?
 {
   switch(results.value)                      //case starts
 {
 case 0xC1AA0DF2:                                                //MOVEMENT -FORWARD
                 digitalWrite(2,HIGH);
                 digitalWrite(3,LOW);
                 digitalWrite(4,HIGH);
                 digitalWrite(5,LOW);
                 break;
 case 0xC1AA4DB2:                                                 //MOVEMENT- BACKWARD
                 digitalWrite(2,LOW);
                 digitalWrite(3,HIGH);
                 digitalWrite(4,LOW);
                 digitalWrite(5,HIGH);
                 break;
 case 0xC1AACD32:                                                 //MOVEMENT- LEFT
                 digitalWrite(2,LOW);
                 digitalWrite(3,HIGH);
                 digitalWrite(4,HIGH);
                 digitalWrite(5,LOW);
                 break;
 case 0xC1AA8D72:                                                 //MOVEMENT- RIGHT
                 digitalWrite(2,HIGH);
                 digitalWrite(3,LOW);
                 digitalWrite(4,LOW);
                 digitalWrite(5,HIGH);
                 break;
 case 0xC1AA11EE:                                                 //MOVEMENT- stop
                 digitalWrite(2,LOW);
                 digitalWrite(3,LOW);
                 digitalWrite(4,LOW);
                 digitalWrite(5,LOW);
                 break;
 default:                                           //incase you pressed other buttons
                 Serial.println(" other button   ");
 }                                                  // case ends
 delay(100);                                        // to not get immediate repeat
 irrecv.resume();                                   // receive the next value
 }
}
The main program is explained step by step below,
1. Include the same IR Header files as done for decoding experiment.
2. Declare the IR output to PIN 11.
3. An Instance for Receiving & Decoding is created, i.e,
IRrecv irrecv(receiver);
decode_results results;
4. As usual, the BAUD RATE is set to 9600, i.e,
Serial.begin(9600);
5. Setup the Motor output to the PIN 2, PIN 3, PIN 4, PIN 5.
6. In loop function, To check if we have received the IR signal by
if (irrecv.decode(&results))
7. use Switch case to perform any particular operation at a time. The syntax for switch case is...
8. place the corresponding HEX frequency Code in each cases and control your robot's movement.
9. A delay is given inorder for the Relaxation and then resume the IR decoding.
delay(1000);
irrecv.resume();
10. Compile and Upload the program to the Microcontroller and check the result using the Remote.
After uploaded the main program code into Arduino uno, PRESS the Remote Button for which the frequency is decoded, so that the specified operation is executed.
Try this concept for connecting your home appliances like BULB, FAN, TUBELIGHT and enjoy watching them work.
The Schematics and code are available for Download. Please don't just copy the code, Instead understand them before downloading it.
Thank you!!!!!! for watching and For any Doubts please leave your comments.


_ztBMuBhMHo.jpg?auto=compress%2Cformat&w=48&h=48&fit=fill&bg=ffffff)

_hEk2vzYmp7.png)


Comments