

Hardware components | ||||||
 |
| × | 1 | |||
| × | 1 | ||||
| × | 1 | ||||
| × | 1 | ||||
Software apps and online services | ||||||
| ||||||
| ||||||
 |
| |||||
Hand tools and fabrication machines | ||||||
| ||||||
Hopefully this comes in useful for you.
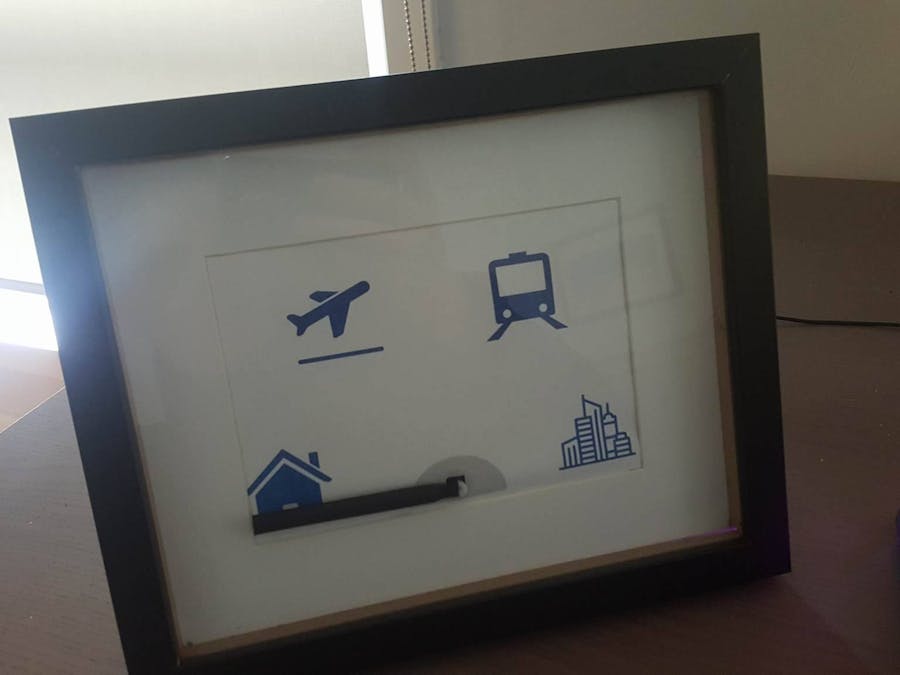
I created a photo frame that points to my location for my family members to see where I am during the week while at work or out and about.
The flow is as follows:
1. I carry my phone
2. The IFTTT app on my phone detects when I enter or leave an area
3. The IFTTT recipes (https://ifttt.com/myrecipes/personal) then send a number e.g. 20 or 50 or 180 to the Particle photon Function.
4. The particle photon function takes the 'position number' .e.g 10. Then triggers the servo to go to position 10.
And voila! You have a servo that points to where you are.
The flow in image format:
Tip: You'll have a different recipe for each location, each recipe will have a different 'input' defined for the servo position.
What I needed to do:Physical setup:
1. Photo frame (try and use one with a wooden back so you can cut a hole for the servo to fit through)
2. Heat shrink to put on the end of the servo pointer then shrink it to attach it to the end of the part. I just used a hairdryer and put the hot end of the hairdryer onto it to let is shrink around the servo.
3. Servo - Get a small enough servo to fit in the frame
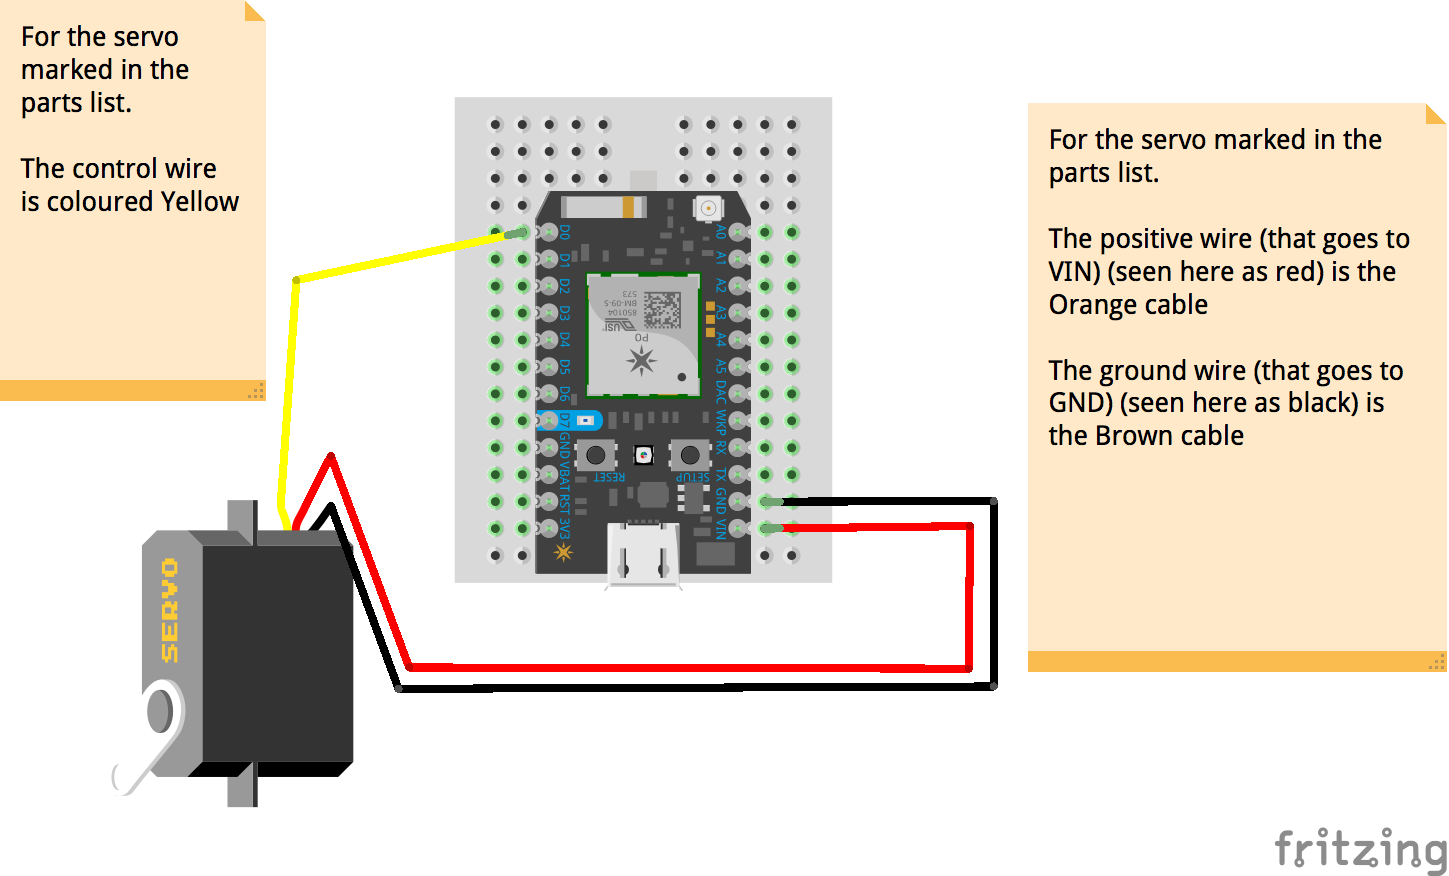
4. Get wires/breadboard to connect it all together
5. Print a diagram to put in the frame. Print out some icons onto a piece of paper. You can find some cool icons here > www.flaticon.com
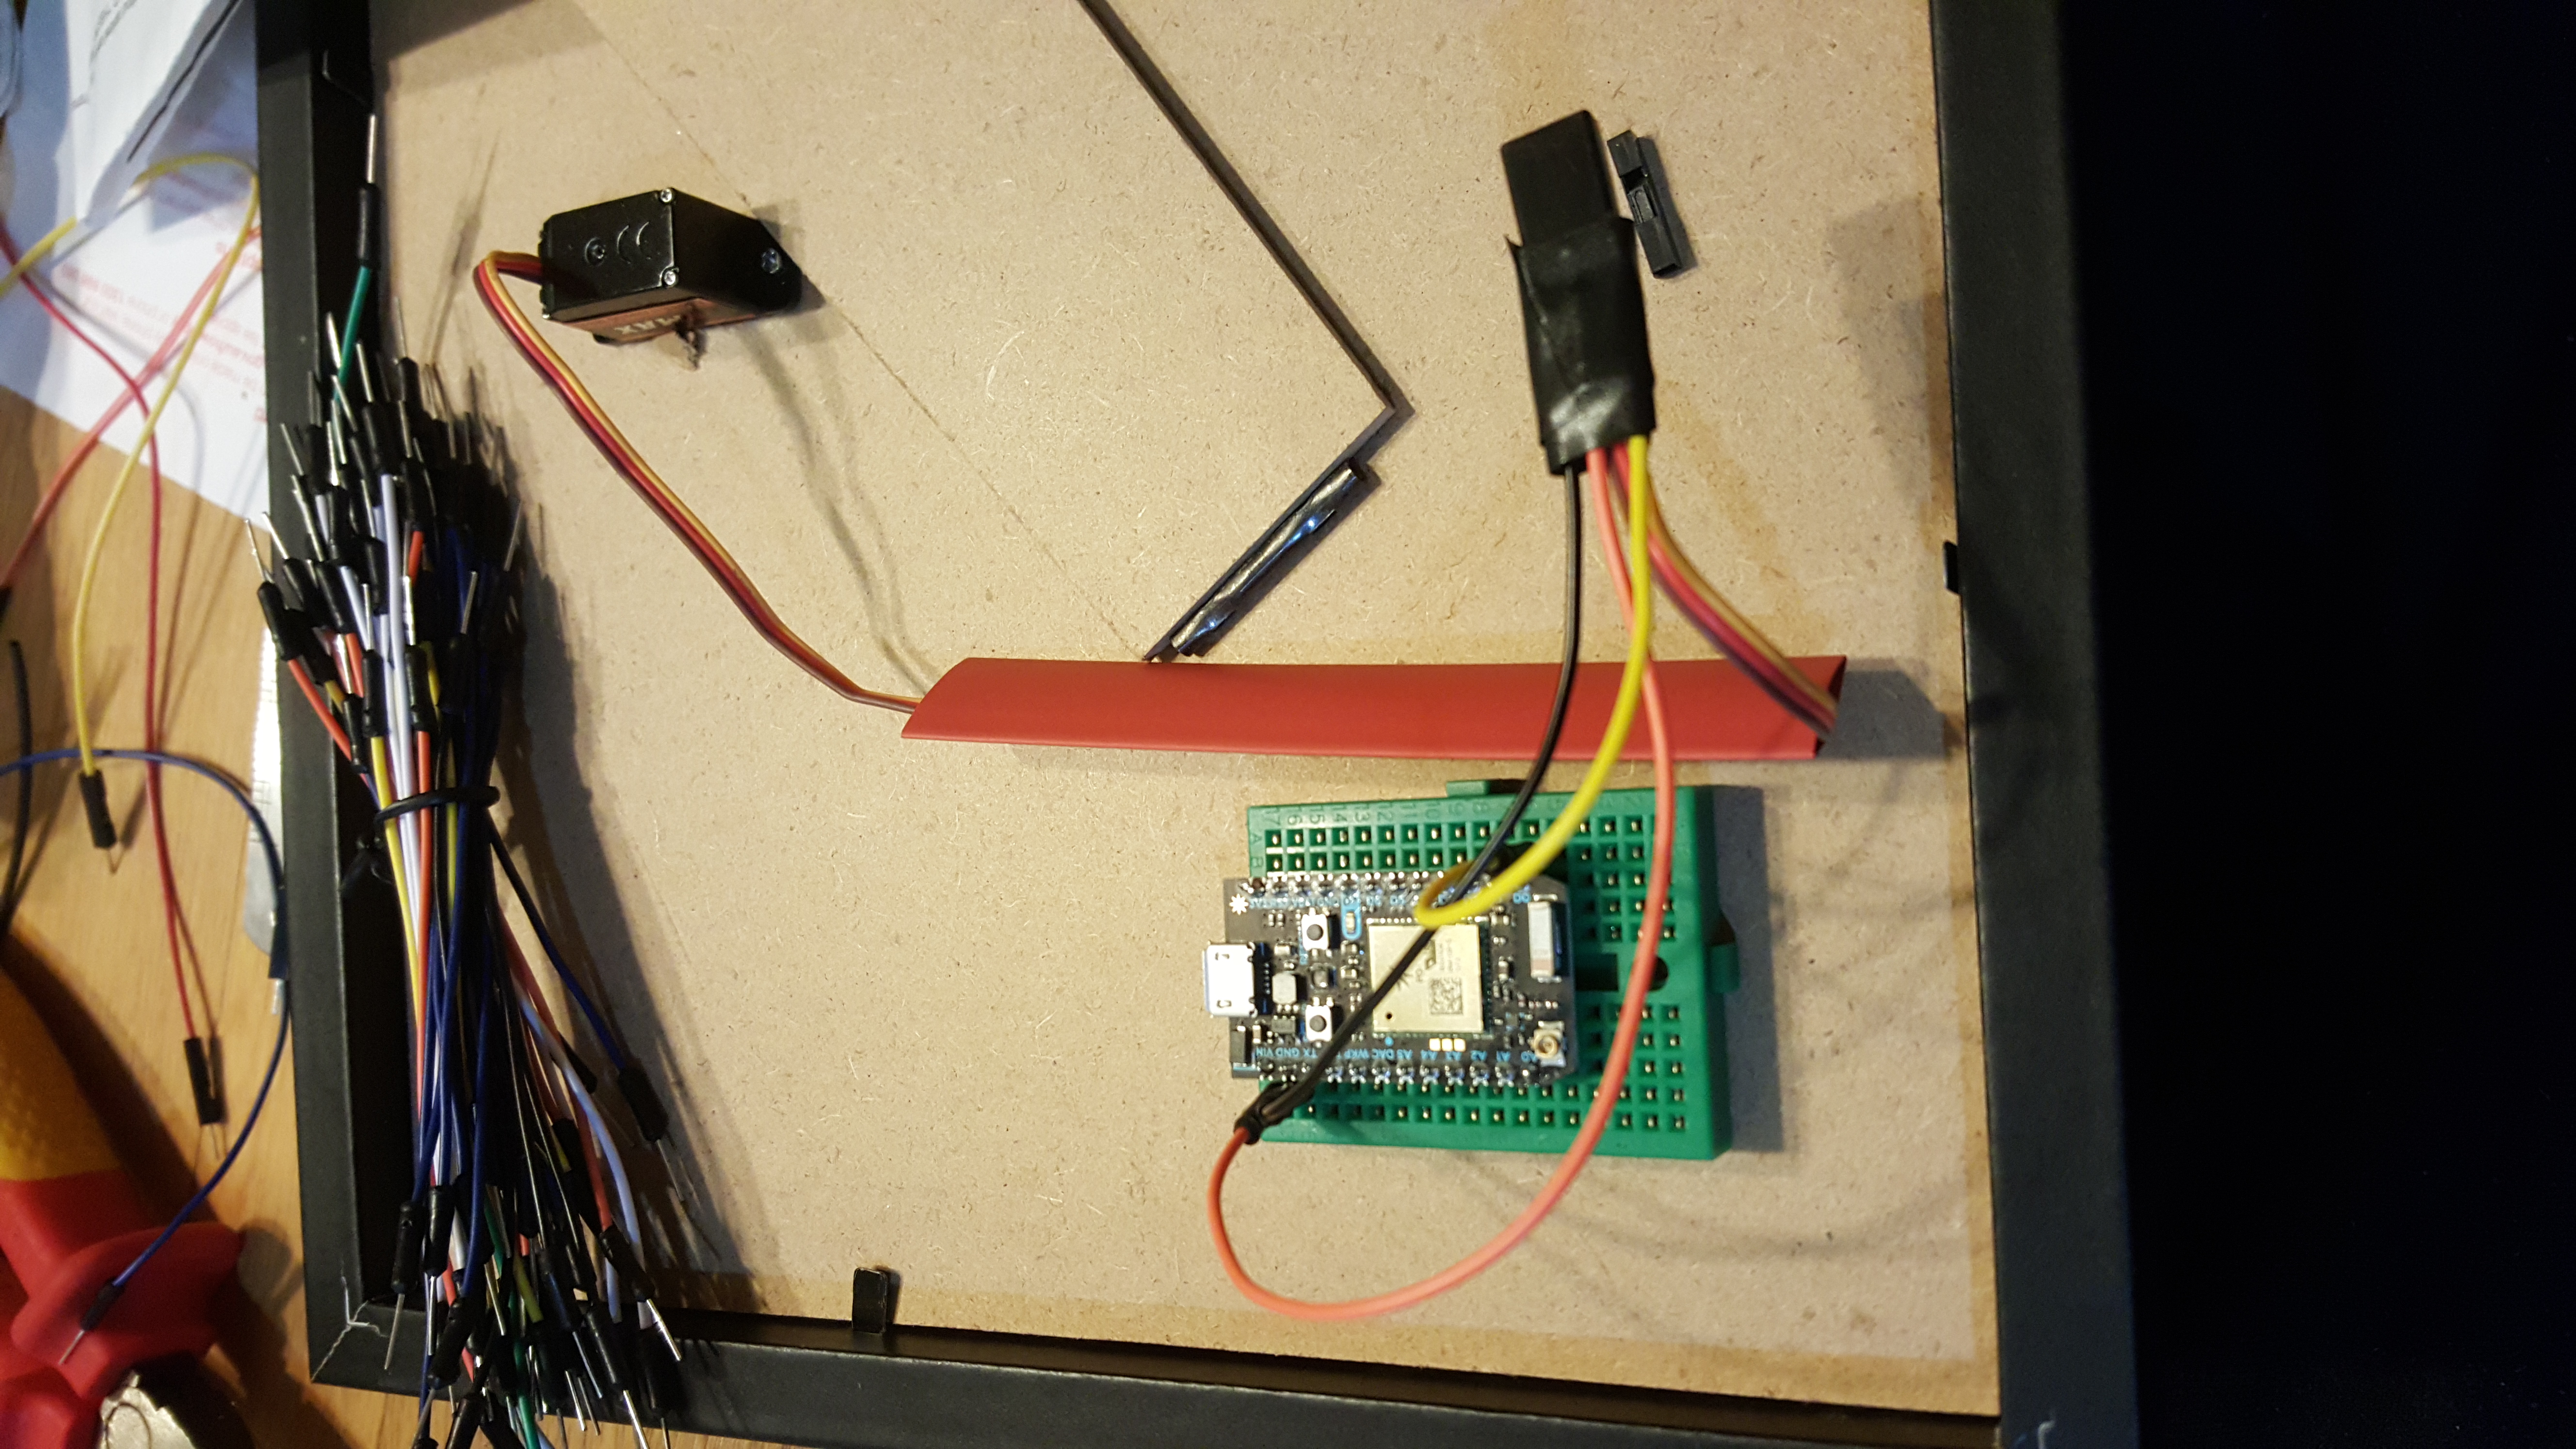
6. Attach the Photon to the back
7. Get a long USB cable to plug it in.
Software setup:
1. Get a Particle Photon and configure the code.
2. Spend ages orientating the servo and marking down the exact numbers needed to point to the right diagram. This will likely be trial and error.
3. Set up some recipes in IFTTT:
In IFTTT - you need to 'Call a function' then select your particle photon, then in the input field.. Only enter a number between 0-180.
Note: For some reason my servo makes odd noises when i enter a number below 5... It may be damaged or who knows.. So make sure you check your ranges to see what works for your servo.
Some photos:
IFTTT Function inputs:
You'll need to create multiple recipes for each location.
Change the 'input' to point to a difference place/icon.
How to improve this:
1. Find a full enclosure for the Particle photon - if you know of one, please let me know with a link and I'll update the article and also buy a few!
2. Use an I/O out board to screw in the wires rather than have them loose or bother with soldering... at the time of writing I couldn't get one of these in time.. but want to:
https://www.controleverything.com/content/I2C-Master?sku=PSCREW
3. Clean up the wires to hide them and make the USB plug an input type with longer cable
4. Try and find a servo that was quieter - the current one is a tad noisy
5. Add an LED output instead of the plane icon so it read out the current City/Suburb I was in based on my phones location.


Comments