// Robo India Tutorial
// Digital Output on LED
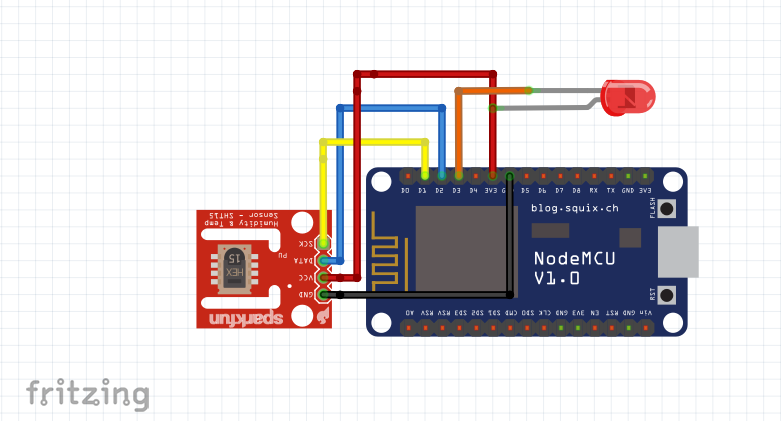
// Hardware: NodeMCU Blynk Board
#define BLYNK_PRINT Serial
#include <ESP8266WiFi.h>
#include <BlynkSimpleEsp8266.h>
#include <SimpleTimer.h>
#include <Arduino.h>
#include <Wire.h>
#include "Adafruit_SHT31.h"
Adafruit_SHT31 sht31 = Adafruit_SHT31();
SimpleTimer timer;
char auth[] = "YourAuthToken"; // You should get Auth Token in the Blynk App.
char ssid[] = "YourNetworkName"; // Your WiFi credentials.
char pass[] = "YourPassword"; // Set password to "" for open networks.
void setup()
{
Serial.begin(9600);// Debug console
Blynk.begin(auth, ssid, pass);
if (! sht31.begin(0x44))
{ // Set to 0x45 for alternate i2c addr
Serial.println("Couldn't find SHT31");
while (1) delay(1);
}
timer.setInterval(2000, sendUptime);
}
void sendUptime()
{
float t = sht31.readTemperature();
float h = sht31.readHumidity();
//Serial.print("Temp *C = "); Serial.println(t);
//Serial.print("Hum. % = "); Serial.println(h);
Blynk.virtualWrite(V0, t);
Blynk.virtualWrite(V1, h);
}
void loop()
{
Blynk.run();
timer.run();
}


Comments