

Hardware components | ||||||
 |
| × | 1 | |||
 |
| × | 1 | |||
 |
| × | 1 | |||
| × | 1 | ||||
Software apps and online services | ||||||
 |
| |||||
About this project
Read moreI built this project using XinaBox ☒CHIPS and Arduino IDE. It is a 5 min project , that allows you to read temperature data received from the ☒SW01 on the serial monitor.
IntroductionMy objective was simple - find the simplest way to receive temperature data. I chose to use the ☒CHIPS because they are user friendly. They also eliminate the need for soldering and serious circuit design. Using Arduino IDE I could simply program the ☒CHIPS to show me the temperature data on the serial monitor.
Step 1: Downloading the Libraries- Go to Github.xinabox
- Download xCore ZIP
- Install it into Arduino IDE by going to "Sketch", "Include Library", then "Add .ZIP Library". As seen below.
Figure 1: Installing xCore library
- Download xSW01 ZIP
- Add the library the same way as you did for the xCore.
- Connect the IP01 and CC01 using an ☒BUS Connector. Make sure the ☒CHIPS' names are orientated correctly.
Figure 2: Connected IP01 and CC01
- Insert into an available USB port.
- Download or copy and paste the code from the "CODE" heading into your Arduino IDE. Alternatively you could create your own code using the relevant principles to achieve the same objective.
- To ensure there are no errors compile the code.
- After successful compilation(no errors found) you may upload the code to your ☒CHIPS. Ensure the switches are facing "A" and "DCE" respectively before uploading.
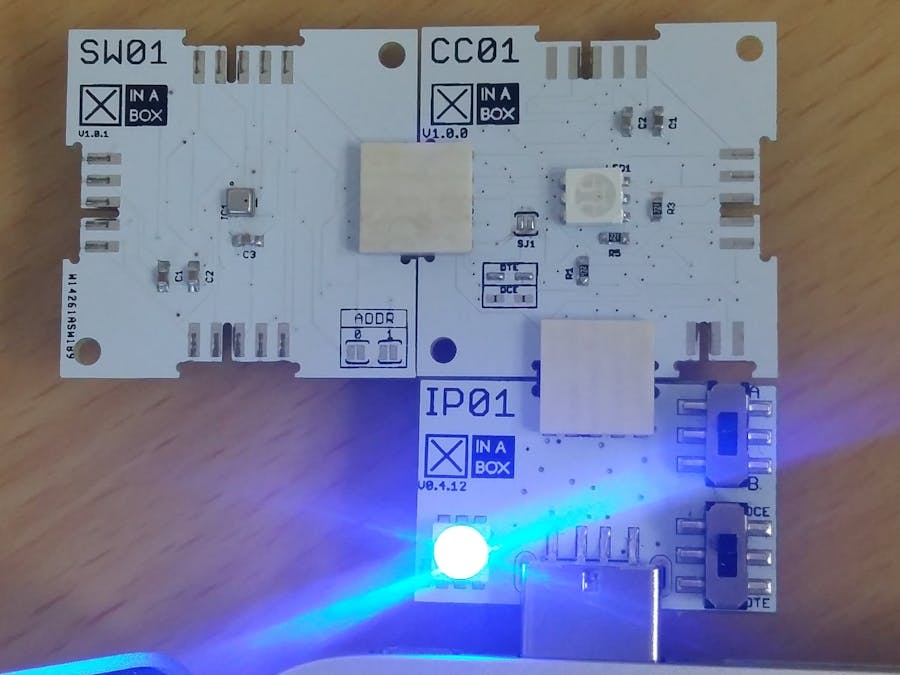
- Once the upload is successful, remove the IP01 from the USB port. Attach the SW01 with another ☒BUS Connector to the CC01.
Figure 3: Connected IP01,CC01 and SW01.
- Insert the board back into the same USB port.
- Open the serial monitor in the top, right-hand corner of the screen. It should look like the image below after a few moments.
Figure 4: Serial Monitor displaying temperature data
- You can now view the temperature data on the serial monitor

13 projects • 8 followers
A student exploring the world of coding and IoT from a beginners' perspective


Comments