

Hardware components | ||||||
_ztBMuBhMHo.jpg?auto=compress%2Cformat&w=48&h=48&fit=fill&bg=ffffff) |
| × | 1 | |||
 |
| × | 25 | |||
 |
| × | 1 | |||
 |
| × | 1 | |||
 |
| × | 1 | |||
 |
| × | 1 | |||
| × | 1 | ||||
| × | 1 | ||||
| × | 1 | ||||
Hand tools and fabrication machines | ||||||
 |
| |||||
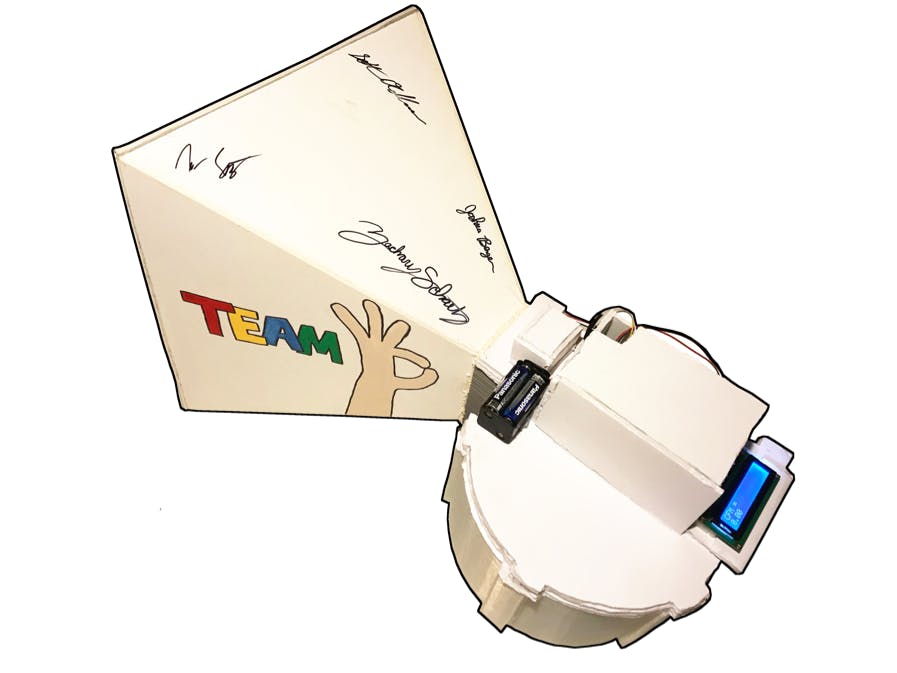
We were tasked with creating an airflow flowmeter that could be used in a residential setting. Unfortunately, in today’s HVAC industry, the only airflow sensing devices on the market are for systems that are designed for industrial applications. The devices currently used to calculate the airflow rate in industrial-sized registers are either too big for residential registers or are not able to calculate the airflow rate due to the smaller airflow outputs of a residential HVAC system.
How It WorksTo generate a signal from the airflow, we used a cup anemometer to catch the air. We made custom 3D-printed blades using Autodesk Inventor to optimize the fan blades performance in catching the air. We also 3D-printed an enclosure to place the anemometer in.
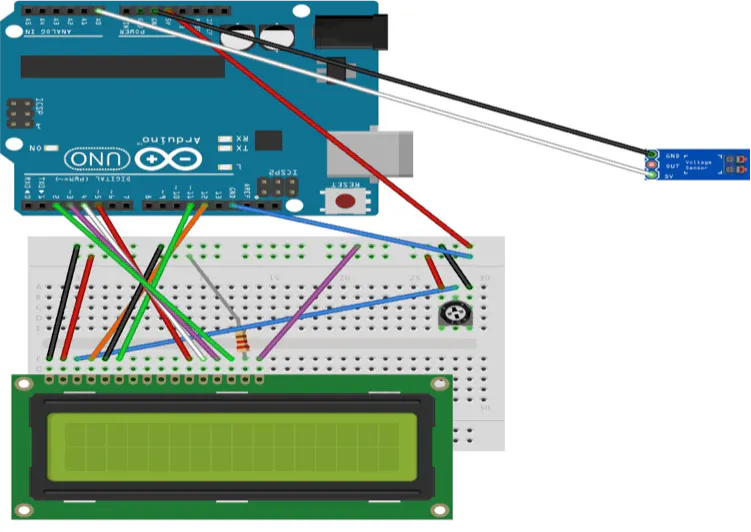
To read the signal that the anemometer outputted, a voltage sensor was chosen. The signal from the sensor also needed to be amplified in order to have a more accurate reading on the voltage sensor. The amplifier takes the output voltage from the anemometer and amplifies it by a factor of 10. This factor can be increased or decreased anywhere between 1.5 and 1000 times based on the input voltage.
An Arduino Uno was used to read the analog signal from the voltage sensor and control what was presented on the LCD screen. For this specific problem we wanted the wind speed in CFM so we displayed it as so on the screen.
The BuildElectronics
The first step in construction is to start with the anemometer. Below are some photos of the device.
Look at the image labeled "Anemometer Top View". The point where the blades connect to the anemometer is a L-shaped and very thin. This will not hold up very well to high speeds so here is where we designed new blades. What we wanted where thicker blades and a more sturdy handle design. The purpose of the larger blades was to reduce the cross-sectional air gap between the blade and the housing unit (where the fan will sit), which in turn would increase the amount of air caught by the scoop and voltage produced by the motor. Below are photos of where the blades attach to the anemometer.
You may be thinking, will this make much of a difference? That is a great question. To answer that we conducted some stress analysis tests in Autodesk Inventor to see have much sturdier the new design is. The picture below shows the results.
We can see than the new blades are much more effective at high speeds. The STL files for the blades are attached in the files section. DO NOT ATTACH THE NEW BLADES YET.
Next we need to place the modified anemometer into the housing unit. The STL files for the housing unit are in the files section. With no blades in the anemometer, slide the anemometer up through the hole at the bottom of the housing. Gorilla the bottom of the anemometer to two thin wood circles (from Hobby Lobby). Drill 4 small holes through the circles and through the ABS plastic housing. One hole will be to thread the wire through, the other three will be for screws. The picture below shows how it will look.
Next we need to wire anemometer to the amplifier. Below is a picture of the amplifier.
*Note all wires attached to amplifier are male to male
Take two male to male wires, the colors do not matter, but I will call them by the colors we used in our project. Solder a red wire to the +S circle on the right. Solder the other end to the red wire coming from the anemometer. Solder a black wire to the -S circle on the right. Solder the other end to the yellow wire coming from the anemometer. Also adding electrical tape works well to keep them in place.
Next we need to wire the amplifier to a battery supply. Solder a yellow wire to the GND on the right side. Solder the other end to the black wire coming from a battery pack connector. Solder a white wire to the Vln circle on the right side. Solder the other end to the red wire coming from a battery pack connector.
Next we need to wire the amplifier to the voltage sensor. Solder a blue wire to the GND on the amplifier the other end to VCC on the voltage sensor. Solder a green wire to the Vout on the amplifier the other end to GND on the voltage sensor.
Now we will wire the voltage sensor to the Arduino and finish the wiring. The wiring diagram in the schematics section shows how to wire this part.
Finish Touches
The hardest parts are done! Now that everything is wired up we can set the electronics on the flowmeter. Use a piece of foam board to be the ceiling for the top of the fan housing. We used gorilla glue to keep it in place. You can then place the electronics on the foam board and use more foam board to enclose the electronics. In the pictures below you can see how the foam was used to enclose the electronics.
Also, holes were cut in the foam to allow the Arduino and the amplifier access to their respective 9V battery power supply sources. This can be seen in the picture below.
Next we will build the funnel. We used PVC material for the boards of the funnel. There were 4 boards shaped like trapezoids. To connect the boards to each other we used gorilla glue and caulking. The same method was used to connect the funnel to the fan housing. At the large end of the funnel, weather stripping was placed around the perimeter. This was done to create a seal for when the funnel is pressed up to a vent. The cross section of the large end of the funnel is 14'' by 14''. The picture below shows a front view of the funnel.
Calibration
Once everything was built we calibrated our flowmeter. We tested it with a device that knew the exact airflow. Our first code displayed the voltage read by the sensor on LCD screen. We then used that data collected to create equations to make the LCD screen display CFM. The data below shows how we calibrated it.
On the graph you can see two curves, the intial airflow and the actual airflow. They are different because when we are funneling down the air, the speed will slightly decrease. Here we will use the best fit equation for the actual airflow,
y = 1.1409x^2 + 44.958x, in our arduino code. The code will be broken into three parts, areas with wind speeds of zero, small to medium wind speeds, and large wind speeds. You could the best fit equation above to model the entire wind speed of the flow, but we found a better equation to model the small to medium range. The ranges will be depicted by the following equations:
Large CFM:
y = 1.1409x^2 + 44.958x
Medium to Low CFM
y = 40x +20
Zero CFM:
y = 0
You can find the code in the later section.
Once you have uploaded the code to the Arduino you have finished the flowmeter!
Calibration it Yourself (Optional)
So let’s say you want to calibrate it yourself. Maybe you want your airflow measured in m/s or mph. Here we will walk you through the steps to calibrate it.
Step 1: Find a way to find the actual flow rate first.
The cheapest way to do this is to buy an anemometer from the store. Here is one that would work. Anemometer
Step 2: Place the anemometer in front of a fan that has different speed settings. The fan could be one like this shown in the picture below.
Step 3: Record the wind speed the anemometer at each different setting.
Step 4: You have to have the flowmeter read the output voltage of the fan. To do this, upload the code titled “Voltage Sensor Code” to the Arduino.
Step 5: Now that you have the flowmeter reading voltage, record the voltage at each different fan speed setting.
Step 6: Use Excel to create a scatter plot of “Wind Speed vs. Voltage”.
Step 7: Use the trendline feature to find an equation to that accurately models the “Wind Speed vs. Voltage”.
Step 8: If you feel that your trendline is not very linear, you can find separate equation for the lower and upper portions of the graph.
Step 9: Now you can substitute your equations for my equations in the “Flowmeter Code”. Once you upload the code to the Arduino you are set!


Comments