
Hardware components | ||||||
_ztBMuBhMHo.jpg?auto=compress%2Cformat&w=48&h=48&fit=fill&bg=ffffff) |
| × | 1 | |||
 |
| × | 1 | |||
| × | 1 | ||||
| × | 1 | ||||
 |
| × | 1 | |||
Software apps and online services | ||||||
 |
| |||||
 |
| |||||
Introduction
Making
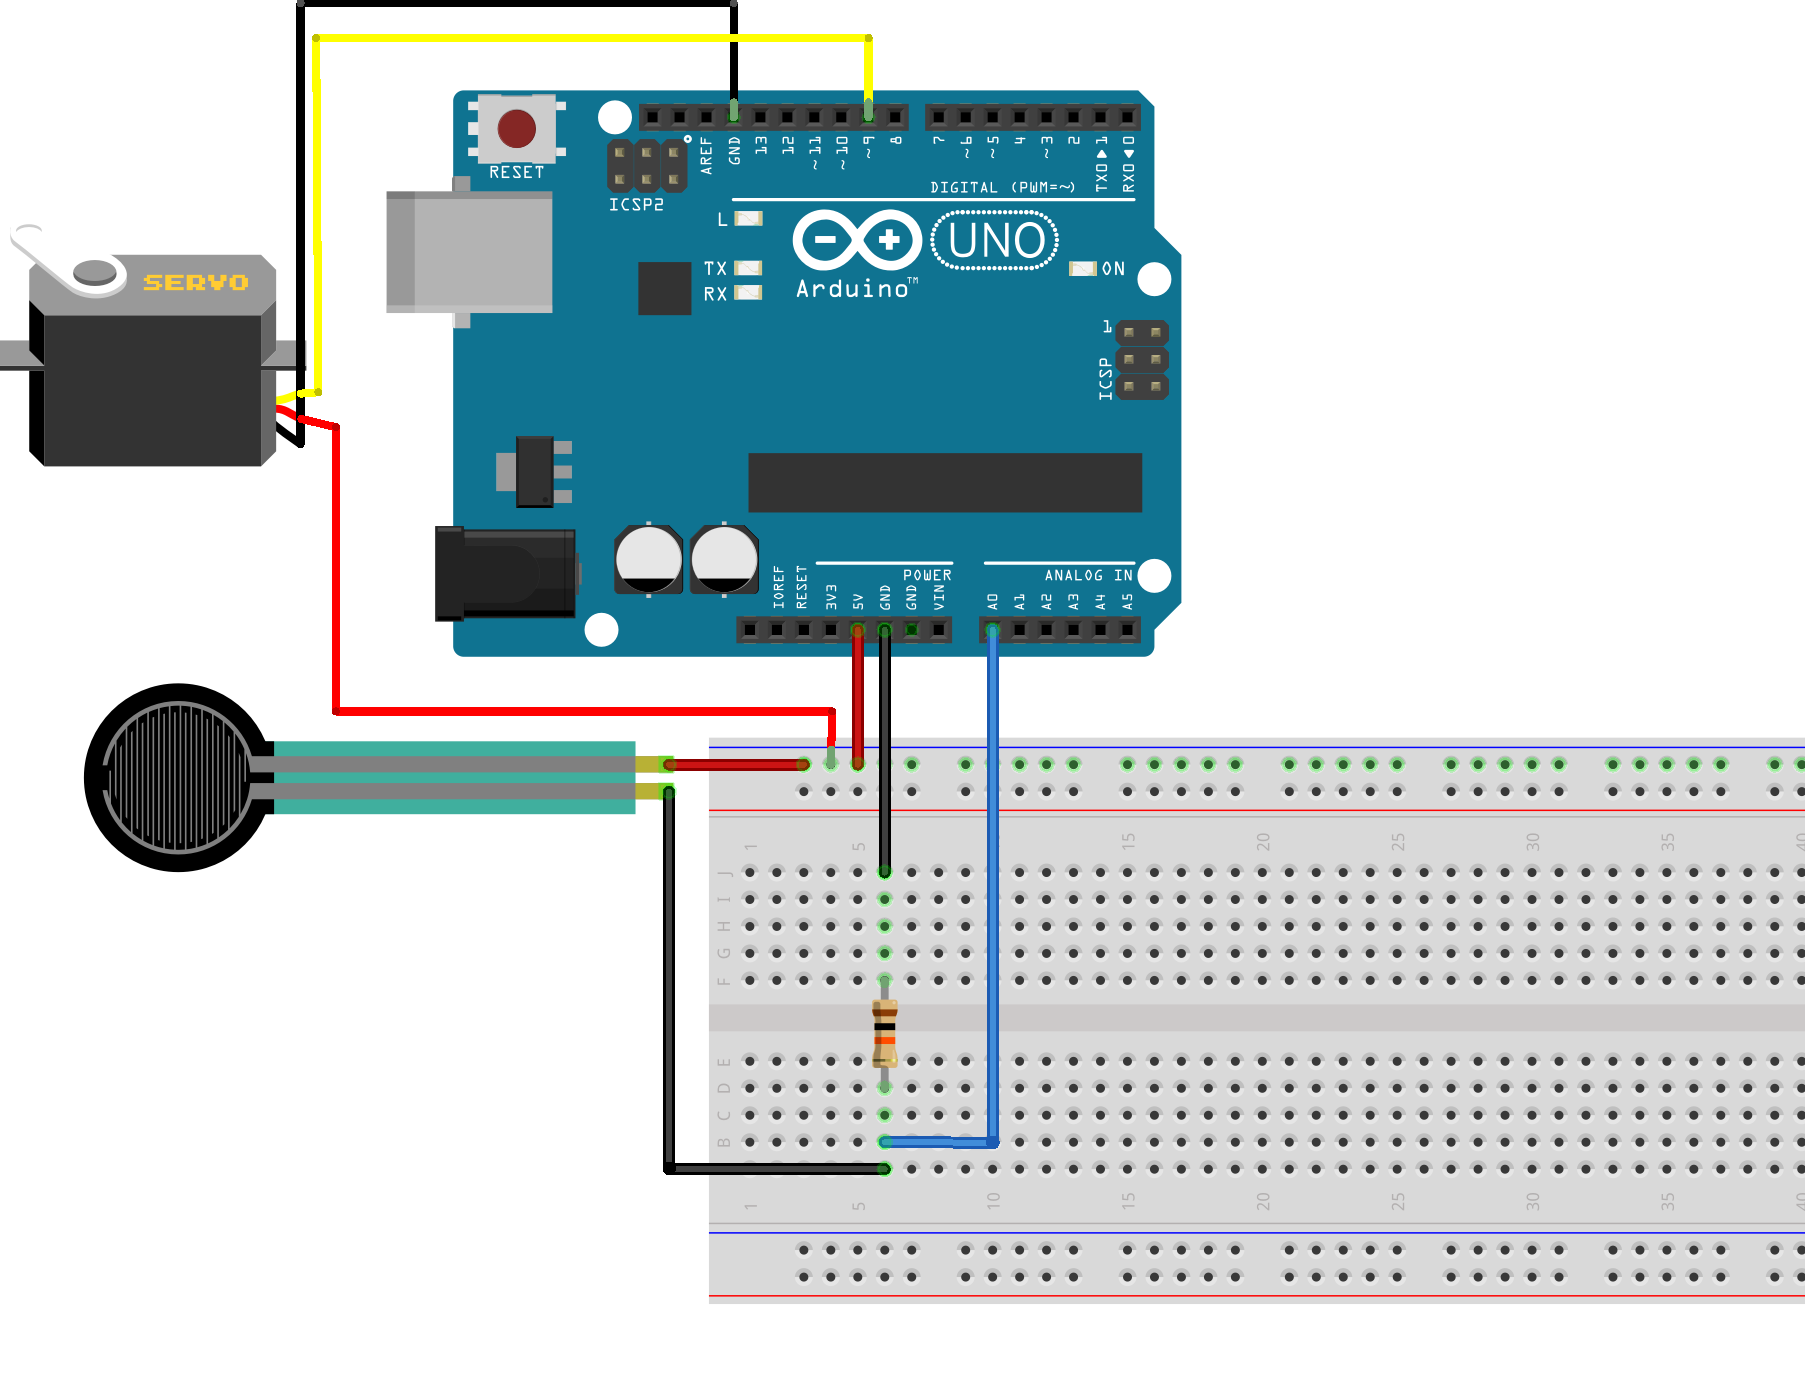
Read moreA force resistive sensor changes its resistance based on the physical pressure or weight placed on it. We are using them in conjunction with an Arduino to rotate a servo according to the amount of pressure. It uses the following formula to calculate the output voltage:
Vo = Vcc ( R/(R+FSR) )
Make all the connections and upload the code to the Arduino. After applying force to the sensor you will notice the values in the serial monitor.

Thanks to Viscous.co 3D printing pakistan.

Comments