


Hardware components | ||||||
 |
| × | 1 | |||
 |
| × | 1 | |||
 |
| × | 1 | |||
Software apps and online services | ||||||
 |
| |||||
| ||||||
 |
| |||||
| ||||||
This project aims to address the challenge of unauthorized human entry into restricted areas, which can disrupt ecosystems, endanger wildlife, and compromise sensitive zones. by leveraging technology, the system detects and alerts authorities when humans breach these protected areas.
By detection and prevention of these unauthorized human intrusion is helpful in fighting against:
Wildlife Conservation:
- Unauthorized human entry can disturb wildlife habitats, disrupt breeding patterns, and lead to stress among animals. By preventing such intrusions, we protect the natural environment and allow wildlife to thrive undisturbed.
- Conservation efforts often focus on specific species, such as endangered tigers, elephants, or rare bird species. Keeping humans out of sensitive zones ensures that these animals have safe spaces to live and reproduce.
Ecosystem Preservation:
- Ecosystems are intricate networks where each component plays a vital role. Unauthorized human activities (such as logging, poaching, or littering) can harm the delicate balance.
- By detecting and preventing intrusions, we safeguard the health of ecosystems. This includes maintaining biodiversity, nutrient cycling, and ecological interactions.
Preventing Poaching and Illegal Trade:
- Many protected areas are home to valuable and endangered species. Poachers often target these animals for their skins, tusks, or other body parts.
- Early detection of human presence allows authorities to respond swiftly, apprehend poachers, and prevent illegal trade in wildlife products.
Preserving Sensitive Zones:
- Some areas are ecologically sensitive due to unique geological features, rare plant species, or fragile ecosystems. Unauthorized entry can irreversibly damage these zones.
- By alerting authorities, we protect these sensitive areas from human impact, ensuring their long-term survival.
Preserving Cultural Heritage:
- Some protected areas contain ancient rock art, archaeological sites, or cultural landmarks. Unauthorized entry can damage or destroy these treasures.
- By alerting authorities, we protect our shared cultural heritage for future generations.
Image from Seeed
The Grove Vision AI V2 is an MCU-based vision AI module powered by the Himax WiseEye2 HX6538 processor. Let’s explore its features and applications:
Features:
- Powerful AI Processing Capabilities:Utilizes the WiseEye2 processor with a dual-core Arm Cortex-M55 and integrated Arm Ethos-U55 neural network unit.
- Versatile AI Model Support:Easily deploy off-the-shelf or custom AI models from SenseCraft AI, including MobilenetV1, MobilenetV2, Efficientnet-lite, Yolov5, and Yolov8. Supports TensorFlow and PyTorch frameworks.
- Rich Peripheral Devices:Includes a PDM microphone, SD card slot, Type-C interface, and Grove connector.
- High Compatibility:Compatible with XIAO series, Arduino, Raspberry Pi, and ESP development boards.
- Fully Open Source:All codes, design files, and schematics are available for modification and use.
Applications:
- Industrial Automation:Quality inspection, predictive maintenance, voice control, etc.
- Smart Cities:Device monitoring, energy management, etc.
- Transportation:Status monitoring, location tracking, etc.
- Smart Agriculture:Environmental monitoring, crop health assessment, etc.
- Mobile IoT Devices:Wearable devices, handheld devices, etc.
Whether you’re building smart security systems or enhancing industrial processes, this module empowers your AI vision projects! 🌟
Let's Start the Build:Step 1 - Connect the camera module with the Vision AI V2.
Step 2 - Connect the Vision module to the PC via a Type C cable
Step 3 - (Use this model)
Step 3 - Select Deploy Model and Connect the vision module to the sense craft via web serial.
Step 4 - Once the model is uploaded, you can see the preview to verify if working.
Step 5 - Connect the Xiao ESP32C3 to pc via type C cable and upload the below sketch to the Xiao ESP32C3:
Note: Before uploading the code, download and install this library to the Arduino IDE.
//gh0stgl1tch
#include <Seeed_Arduino_SSCMA.h>
SSCMA AI;
void setup()
{
AI.begin();
Serial.begin(115200);
}
void loop()
{
if (!AI.invoke(1, false, true))
{
Serial.println("invoke success");
Serial.print("perf: prepocess=");
Serial.print(AI.perf().prepocess);
Serial.print(", inference=");
Serial.print(AI.perf().inference);
Serial.print(", postpocess=");
Serial.println(AI.perf().postprocess);
int numHumans = 0;
for (int i = 0; i < AI.boxes().size(); i++)
{
if (AI.boxes()[i].target == 0) // 0 means 1 person, 1 means 2 people, etc.
{
numHumans += AI.boxes()[i].target + 1;
}
}
Serial.print("Number of humans detected: ");
Serial.println(numHumans);
if (numHumans > 0) // only print image data if at least one person is detected
{
if (AI.last_image().length() > 0)
{
Serial.print("Last image:");
Serial.println(AI.last_image());
}
}
}
}
You can see this kind of response from the serial monitor.
In this, target is 0 means it is detecting a person.
Step 6 - I then deployed this model on the Grove Vision AI Module v2 + Xiao ESP32C3. I checked if boxes are created and detected. If so, I printed "Number of humans detected"
Step 7 -then I use the Grove Lora E5 Module to send the data to Helium as mentioned in this Seeed tutorial: https://wiki.seeedstudio.com/Connecting-to-Helium/
To send the data to Helium using the Grove LoRa E5 Module, you'll need to:
1. Connect the Grove LoRa E5 Module to your Grove Vision AI Module v2 + Xiao ESP32C3:
Make sure the LoRa module is properly connected to your board. You can refer to the Grove LoRa E5 Module wiki for connection details.
2. Install the necessary libraries:
You'll need to install the LoRa_E5 library for the Grove LoRa E5 Module. You can do this by adding the following line to your Arduino sketch:
#include <LoRa_E5.h>
#include <LoRa_E5.h>
3. Initialize the LoRa module:
In your setup() function, add the following code to initialize the LoRa module:
void setup() {
    // ... (other setup code)

    // Initialize LoRa module
    LoRa_E5 lora = LoRa_E5();
    lora.init();
}
void setup() {
    // ... (other setup code)

    // Initialize LoRa module
    LoRa_E5 lora = LoRa_E5();
    lora.init();
}
4. Send data to Helium using LoRaWAN:
In your loop() function, after detecting humans and counting them, you can send the data to Helium using LoRaWAN. Here's an example:
void loop() {
    // ... (other code)

    if (numHumans > 0) {
        // Create a payload to send to Helium
        String payload = "Humans detected: " + String(numHumans);

        // Send the payload using LoRaWAN
        LoRa_E5 lora = LoRa_E5();
        lora.send(payload);
    }
}
void loop() {
    // ... (other code)

    if (numHumans > 0) {
        // Create a payload to send to Helium
        String payload = "Humans detected: " + String(numHumans);

        // Send the payload using LoRaWAN
        LoRa_E5 lora = LoRa_E5();
        lora.send(payload);
    }
}
In this example, we create a payload string with the number of humans detected and send it using the lora.send() function.
5. Configure the LoRa module for Helium:
You'll need to configure the LoRa module to connect to Helium's network. You can do this by setting the device EUI, application EUI, and application key. You can find these values in your Helium console.
Add the following code to your setup() function:
void setup() {
    // ... (other setup code)

    // Configure LoRa module for Helium
    LoRa_E5 lora = LoRa_E5();
    lora.setDeviceEUI("your_device_eui");
    lora.setAppEUI("your_app_eui");
    lora.setAppKey("your_app_key");
}
void setup() {
    // ... (other setup code)

    // Configure LoRa module for Helium
    LoRa_E5 lora = LoRa_E5();
    lora.setDeviceEUI("your_device_eui");
    lora.setAppEUI("your_app_eui");
    lora.setAppKey("your_app_key");
}
Replace your_device_eui, your_app_eui, and your_app_key with your actual Helium credentials.
That's it! With these steps, you should be able to send the number of humans detected to Helium using the Grove LoRa E5 Module.
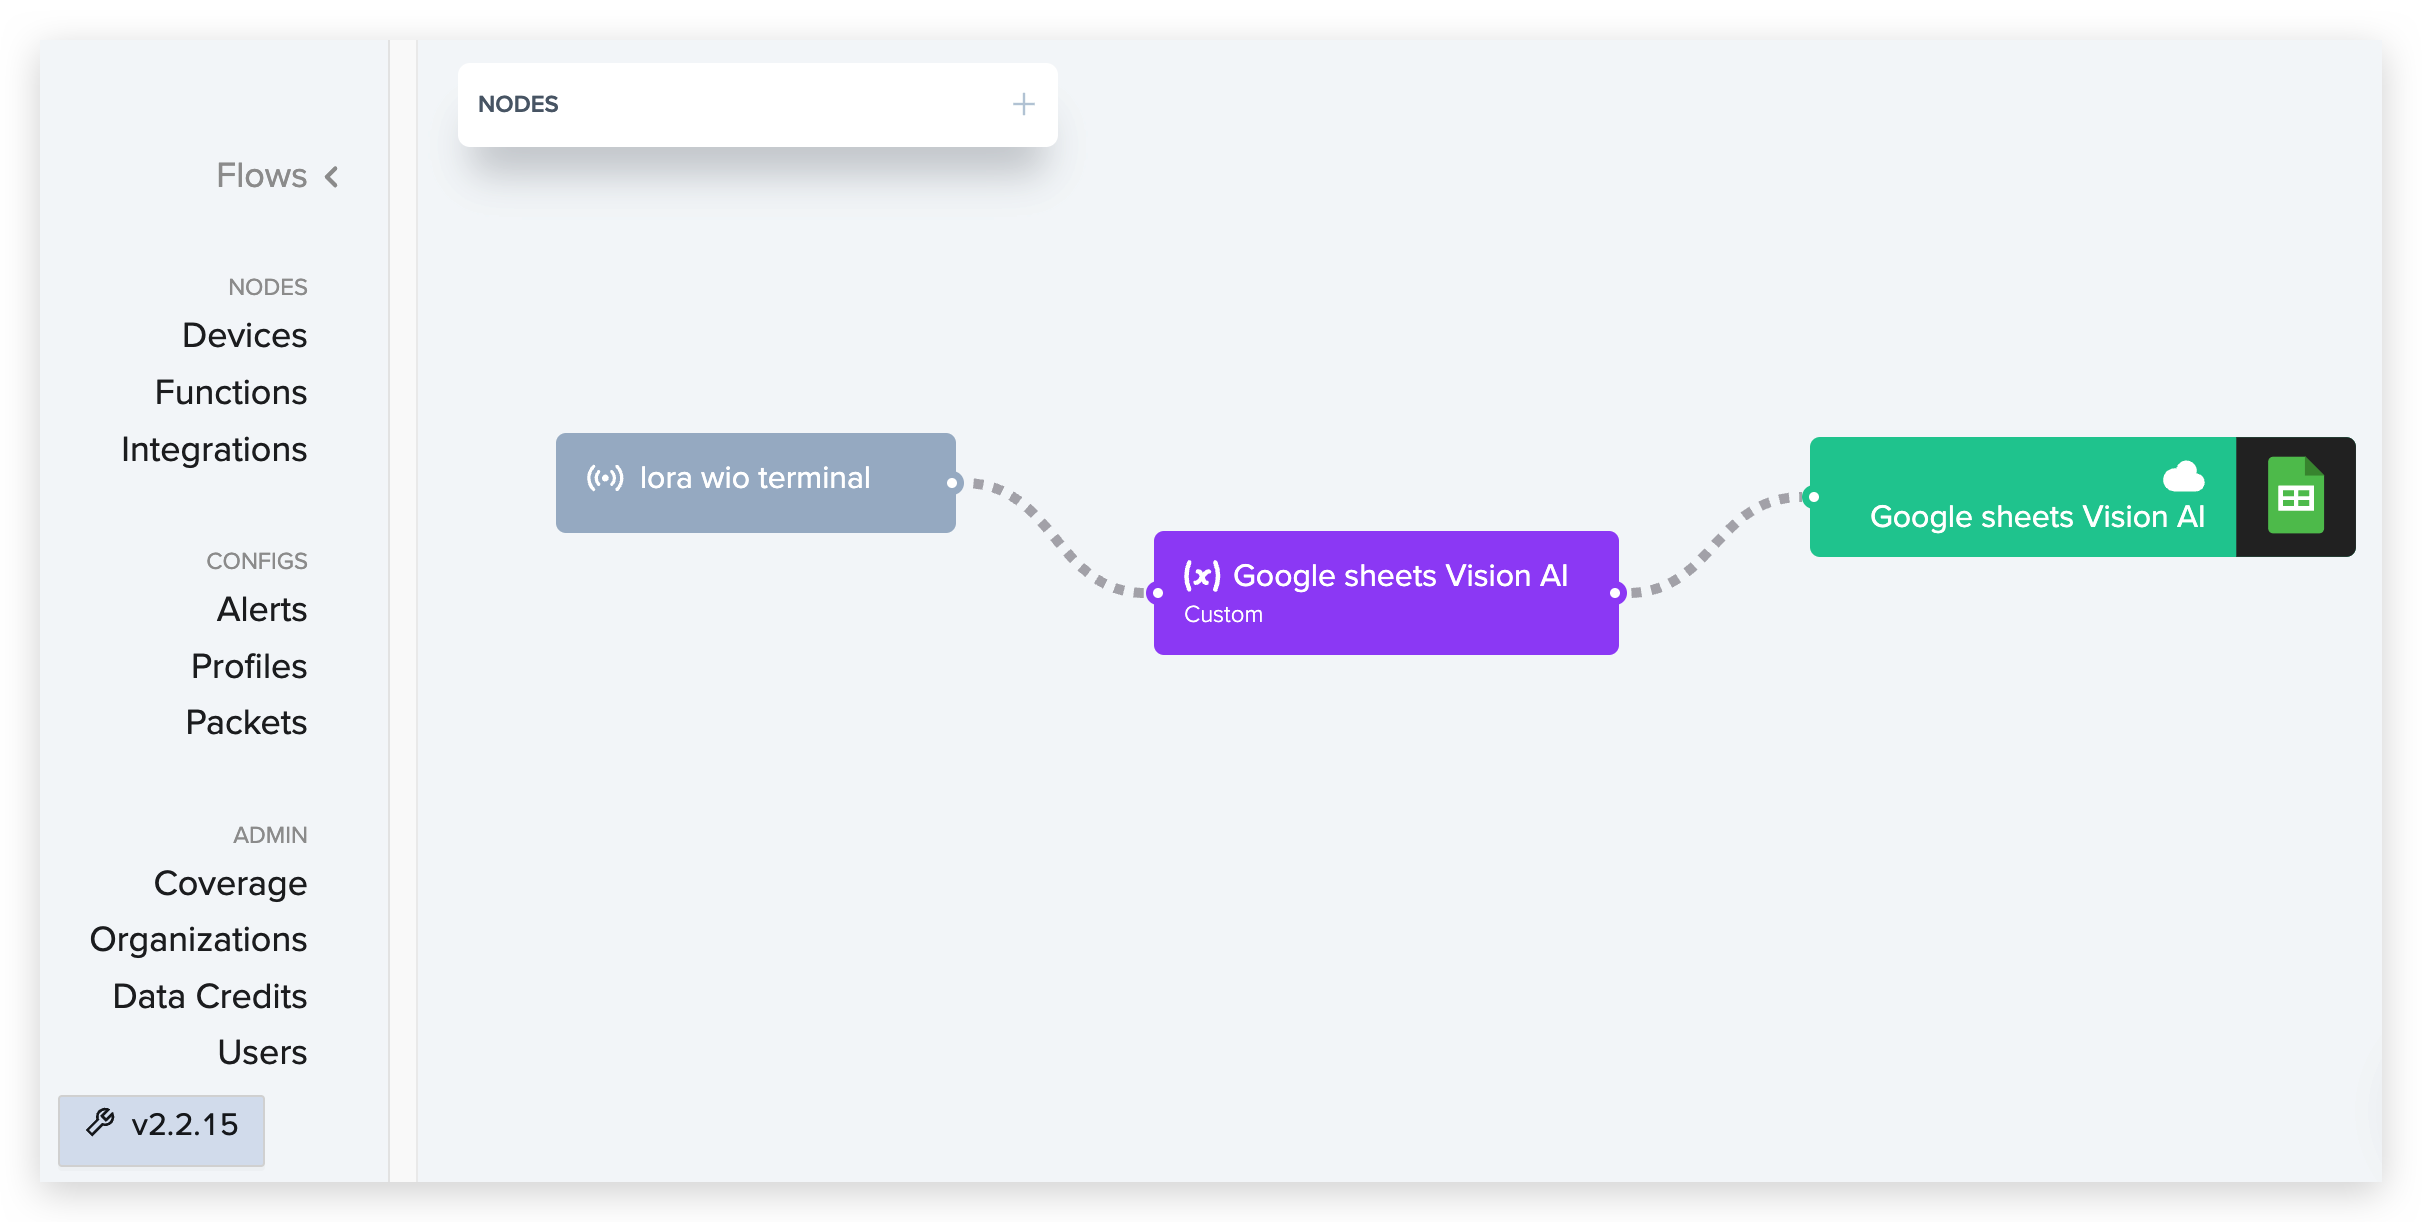
To Integrate to google sheets,
Follow this tutorial to connect the google sheets: https://wiki.seeedstudio.com/Integrate_into_Google_Sheets_via_Helium/
decoder function example for google sheets:
function Decoder(bytes, port) {
    var decoded = {};

    function transformers(bytes){
      value = bytes[0] * 256 + bytes[1];
      return value;
    }

    if (port == 8) {
      decoded.model = transformers(bytes.slice(0,2));
      decoded.confidence = transformers(bytes.slice(2,4));
    }

    // TODO: Transform bytes to decoded payload below
    var decodedPayload = {
      "Number of humans detected": decoded.model,
      "Last image": decoded.confidence
    };
    // END TODO

    return Serialize(decodedPayload)
  }

// Generated: change according to your Google Form fields.
var field_mapping = {
  "Number of humans detected": "entry.405136457",
  "Last image": "entry.1518740792"
};
// End Generated

function Serialize(payload) {
var str = [];
for (var key in payload) {
    if (payload.hasOwnProperty(key)) {
    var name = encodeURIComponent(field_mapping[key]);
    var value = encodeURIComponent(payload[key]);
    console.log("NAME ## " + name);
    console.log("VALUE ## " + value)
    str.push(name + "=" + value);
    }
}
return str.join("&");
}
// DO NOT REMOVE: Google Form Function
The Helium Google Sheets integration sends the Vision AI kits data to a Sheet from which we have an excel function that checks if unauthorized human entry was detected and sends SMS accordingly.
You can use the SheetSMS extension of Google Sheets (https://sheetsms.com/) to text a message to the authorities whenever unauthorized human entry was detected.
here is a Medium article to help setup sheetsms.
that's a wrap.
Future work:
- Capturing and saving face's of intruders
- finding free alternative to sheetSMS
I hope this project helps you achieve peace.


Comments